How-to-Grow
World Class
Giant Vegetables
by Ross Keightley
with Don Langevin
Joe Atherton
Clive Bevan
Chris Casacci
Alf Cobb
Alicia Dill
Kevin and Gareth Fortey
Peter Glazebrook
Phil and Jane Hunt
Joe Jutras
Charlie Kemp
John and Chris Lyons
Marv Meisner
Brian Moore
Ian Neale
Marty Schnicker
Dave Thomas
Brad Wursten
XtremeGardening Series
Annedawn Publishing
Naples, FL 34104
www.GiantPumpkin.com
www.WorldClassGardening.com
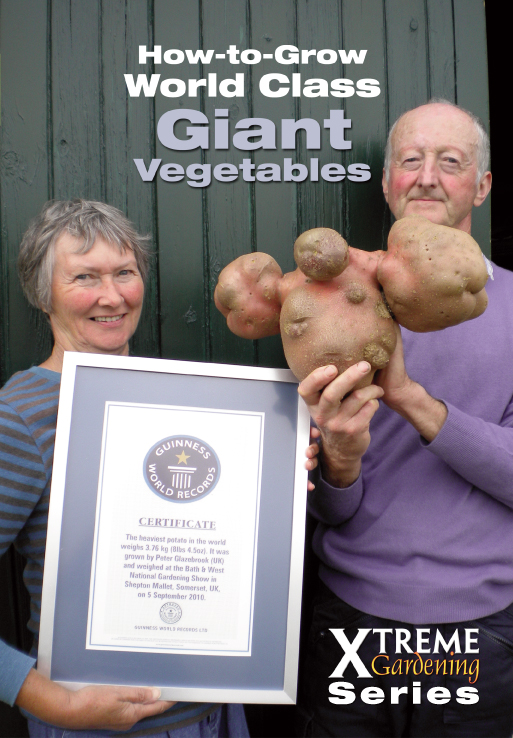
Cover photo shows Peter and Mary Glazebrook
with the 2010, world record, 8 lb 4.5 oz (3.76 kg) potato.
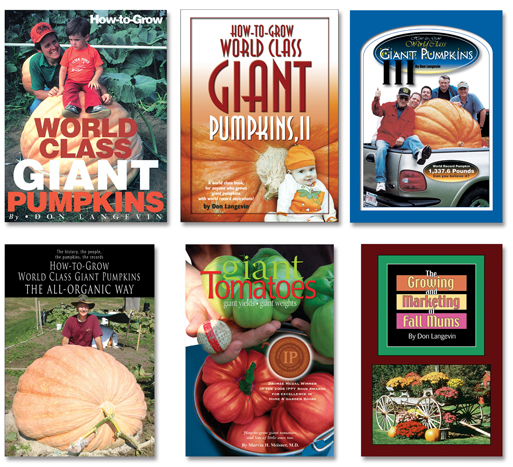
Other Books from Annedawn Publishing
How-to-Grow World Class Giant Pumpkins
How-to-Grow World Class Giant Pumpkins, II
How-to-Grow World Class Giant Pumpkins, III
How-to-Grow World Class Giant Pumpkins – The All-Organic Way
Giant Tomatoes
The Growing and Marketing of Fall Mums
All rights reserved. No part of this book may be reproduced or transmitted in any form by any means, electronic or mechanical, including photocopying, recording or by any information storage and retrieval system without the written consent of the author, except for inclusion of brief quotations in a review.
Annedawn Publishing
Naples, FL 34104
www.GiantPumpkin.com
www.WorldClassGardening.com
Copyright © 2013 Annedawn Publishing
First release 2013
Printed in the United States of America
Library of Congress Cataloging in Publication Data
Keightley, Ross.
How-to-Grow World Class Giant Vegetables
Ross Keightley
with Don Langevin,
Peter Glazebrook, Brad Wursten, Ian Neal, Dave Thomas, Joe Atherton, Ron Wallis, Kevin and Gareth Fortey, Alf Cobb, Clive Bevan, Medwyn Williams, Marv Meisner
Designed and edited by Don Langevin
First edition
Library of Congress Control Number
ISBN 0-9755153-3-0
Dedication
This Book is Dedicated to
Xtreme Gardeners Everywhere
Who Extend the Limits of Variety Potential
For Everyone
Preface
"Growing giant vegetables seemed completely out of the question and a hobby reserved for experts. How wrong I was. While expressing an interest at a National Giant Vegetable Show, some growers gave me some giant pumpkin seeds and the know-how to grow them. For this act of kindness, I had to promise to exhibit my pumpkin no matter what the size. I did grow the pumpkin and it grew beyond my wildest dreams, and won me a prize at the next show. I was hooked on this fascinating hobby.
"So, the reason for this book is purely to pass on the information that Don Langevin and I have collected from some of the best growers in the world, so any interested gardener can join the quest. It's more than just gardening, it's a way of life."
– Ross Keightley (below)
Below: Ian Neale
Acknowledgements
Many people contributed to this book with images, articles, and ideas including:
allisonallison
Joe Atherton
Susan Barber
Dave Bhaskaran
BigPumpkins.com
Danny Boyce
John Butler
Chris Casacci
Alf Cobb
Steve Connolly
Steve DeRycke
Alicia Dill
dnfisher
EGVGA
Tina Finders
Kevin and Gareth Fortey
Peter Glazebrook
GPC
GVGO
Karl Haist
Christy Harp
Joannis Höllein
Phil and Jane Hunt
Vic James
Art Johnston
Joe Jutras
Charlie Kemp
Chris Kent
Bob and Jo Leggett
John and Chris Lyons
Mario's Planet
David Martin
Brian McGill
Marv Meisner
Michael Davie
Brian Moore
Ian Neale
Peter Paulaski
Erik Presto
Marty Schnicker
Len Stelpflug
Chris Stevens
Dave Thomas
timmyjimi
John Vincent
walknboston
Ron Wallace
Ray Waterman
Pat Watson
George Webster
Brad Wursten
Susie Zuerner
Table of Contents
Introduction
A Passion
Categories
Aubergines (Eggplants)
Beets
Brussels Sprouts
Cabbages
Cantaloupes
Carrots
Parsnips
Long Stuff
Cauliflowers
Celery
Corn
Cucumbers
Leeks
Long & Other Gourds
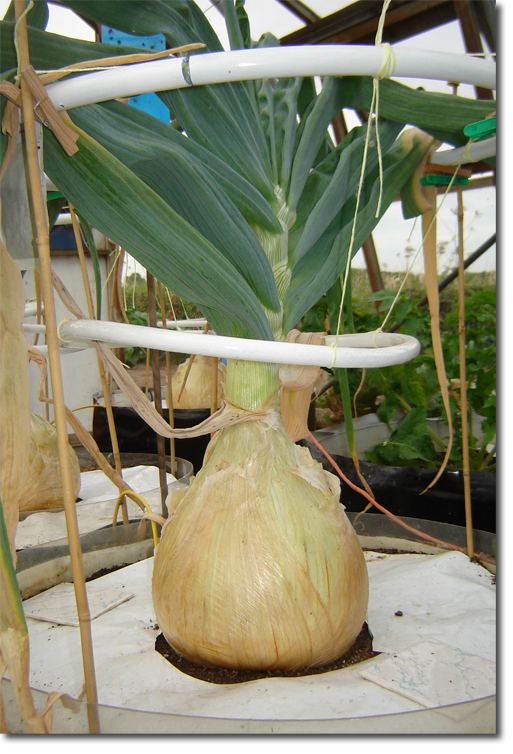
Onions
Peppers
Potatoes
Runner Beans
Swedes/Rutabagas
Pumpkins
Squash
Marrows
Zucchinis
Tomatoes
Sunflowers
Watermelons
Records
Rules
The Right Varieties
Introduction
Whole books have or could be written on each extreme category of growing covered in this book, but the summary format presented here still contains all the requirements for success in growing and competing. Applying the instructions will have you well on your way to neighborhood bragging rights – and city, state, country, and world records.
Millions of gardeners have discovered that the joy of growing World Class Giant Vegetables lies in the fact that anyone with just rudimentary gardening experience can compete – and do they ever! As my good friend, and world record holder, Ron Wallace once said, "Don's books reveal the secret methods used by competitive growers, thereby leveling the playing field for everyone."
 A Passion
I discovered that I was a passionate gardener in 1992 when I was first introduced to the sport of giant pumpkin growing. Since then, I have written four books on giant pumpkins, and one on chrysanthemums, along with editing, designing, and publishing a two books on giant tomatoes.
I have had a lot of time to consider the appeal of gardening, and the often seen passion exhibited in its pursuit. People who enjoy gardening generally take that enjoyment to a higher level. This level usually takes the form of a challenge. At first, it may just be a challenge of one's self, and later if interest prevails, to challenging others either locally, regionally, or ultimately, worldwide.
There is a little bit of the Xtreme Gardener in all gardeners, and at last count, there are some 100 million gardeners in the United States alone, and countless millions in Australia, Canada, New Zealand, Europe, Asia, and elsewhere. Their passions can be as varied as growing giant pumpkins, watermelons, and onions, tall corn, sunflowers, and cabbages, to other ventures that are just as passionate like: collecting plants (hostas, roses, dahlias, daylilies, etc.), and manicuring that trophy front lawn of turf grass. Scotts Turfood products and MiracleGro Plantfood have made a lot of money catering to these passionate gardeners. Pride in one's work plays a dominant role in almost every gardening pursuit on earth. Beyond the need to garden for food, gardening is a hobby, and for many of these gardeners, it is a sport as well. It is a challenge to excel.
I always wondered why the big publishing companies were not interested in serving this enormous number of people. The major publishing companies have always considered giant "anythings" as too narrow a subject to commit time and resources to. A lot of small self publishers like myself have managed to survive in the wake of this non-commitment. I found that my books on giant pumpkins did not just appeal to giant pumpkin growers, but to that vast number I call Xtreme Gardeners. There is a little bit of the extreme in all gardeners, and anything written in the "extreme" has enormous interest to them.
This book is dedicated to gardeners everywhere that start with a love of the effort, and finish far beyond their wildest dreams.
Here's to you, Xtreme Gardeners.
 Categories
This book will be a work in progress for some time, as new categories of vegetables, fruit and flowers make their way into the book by way of popularity of growing or new records. What you see today will change, because input from those reading the text will have a significant impact on its future content. New images will be added from time to time to improve the book, making the teaching aspect of it clearer. I have a page on my website to upload images that you think would do a better job at explaining the textual instruction. The link is: http://www.GiantPumpkin.com/giant_vegetable_form.php.
Here you will be able to choose a category of vegetable, and write a caption for your image; or send articles in Microsoft Word (.doc) or text (.txt) files for my review.
I will review all submissions and use them if they further improve the book, so keep a sharp eye for a good image that can, by itself, tell a better story about a growing procedure.
And, if you break a record, by all means send a picture to me, so I might add it to the book.
The categories covered thus far in this evolving book are:
Aubergines (eggplants)
Beets
Brussels Sprouts
Cabbages
Cantaloupes
Carrots
Parsnips
Long Stuff
Cauliflower
Celery
Corn
Cucumbers
Leeks
Long & Other Gourds
Onions
Parsnips
Peppers
Potatoes
Pumpkins
Runner Beans
Squash and Marrows
Sunflowers
Swedes/Rutabagas
Tomatoes
Watermelons
Zucchinis
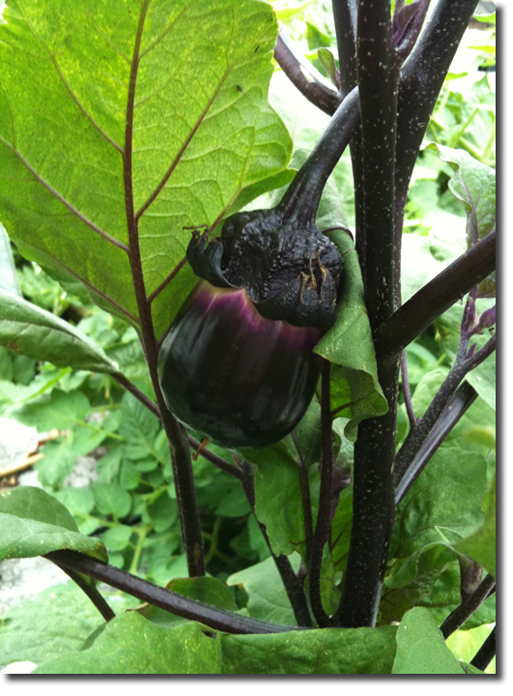 Aubergines (Eggplants)
Eggplants love warmth and grow best in very sunny, well-drained locations. Raised beds that have been generously enriched with composted manure are ideal, but any fertile soil with a pH from 6.3 to 6.8 will satisfy the plants. Although eggplant's coarse, leathery leaves withstand hot weather in champion style, provide a generous mulch of hay, shredded leaves, or other biodegradable material beneath your plants to keep the soil relatively cool and to hold moisture and keep down weeds.
Because eggplant really needs warm soil to grow well, gardeners in cool climates often do best growing eggplant in large, dark-colored containers. On a sunny day, soil temperatures inside black pots may be 10 degrees or more higher than in-ground soil temperatures. Row covers are also a good option in cool climates, or even to protect from cool spells in warm climates. Open the ends of the row covers on warm days to let the bees reach the flowers for help with pollination.
Eggplants grow into tall, angular plants, so they should be spaced 24 to 36 inches apart. Fertilize planting holes by mixing in a balanced time-release or organic fertilizer following the rates given on the label. At the same time, mix in 2" of compost to help hold moisture and fertilizer in the soil. Set transplants at the same depth that they are growing in their containers, and water well before spreading mulch.
In the case of a late, Spring, cold spell, you may need to delay planting eggplant seedlings until cool weather passes. Should this happen, keep the plants in a sheltered, sunny spot outdoors during the day, and bring them indoors at night.
Be sure to keep plants watered or they will be small and bitter. They need a nice, steady supply of moisture but not so much that the soil is soggy. Drip systems or a soaker hose are ideal.
Eggplants are prone to falling over when loaded with fruit, so you may want to tie plants to stakes to keep them upright. If you drive a stake into the ground just an inch or two from the plant at the time of planting, you won't disturb the plant by trying to do it later. You can also use small tomato cages to support the plants.
Troubleshooting
The tiny, black flea beetle is by far the worst pest of eggplant, but big, healthy plants usually produce well despite tiny leaf holes made by lots of flea beetles. In some areas, a common soil-borne fungus, verticillium wilt, causes plants to wilt and die. Where verticillium is a common problem with non-resistant tomatoes (they are close eggplant cousins), grow eggplants in containers filled with premium potting mix.
Harvest and Storage
Eggplant fruit can taste bitter if picked underripe or overripe, so harvesting is part of the eggplant grower's art. A perfect fruit will stop growing larger, have a glossy skin, and show a sprinkling of soft, well-formed yet immature seeds when you slice it open. Fruit with no visible seeds are immature, and hard, dark seeds are found in overripe eggplant.
Use pruning shears to harvest eggplant with a short stub of stem attached, because the fruits will not easily pull free by hand. Rinse clean, pat dry, and store in the refrigerator for several days. Eggplant discolors rapidly when cut open, so work quickly when preparing slices or skewers for grilling. Marinades that include salt, vinegar, or lemon juice will keep cut pieces of eggplant from darkening.
Aubergines belong to the tomato and potato family and can be grown in a similar manner – although there is one major difference. Because they originate from extremely hot climates, they naturally like it hot and to be successful they need to be grown iwhere summers are quite warm or in glasshouses. The aubergine is great favourite of the Greeks and is used often in a dish called Moussaka. On there own they are bitter to the taste, but well salted, rinsed off, and baked, they become a tasty side dish such as ratatouille.
To grow a giant aubergines you will, as always, need the correct variety of seed. Some favourite varieties are Black Beauty, Serina F1, Parks Whpper, and Black Enorma, all of which are generally available from seed suppliers such as Thompson and Morgan.
Start the seeds off early, for they need a long growing time. Place them on the surface of small pots full of compost and just cover. Try to use a compost with a small amont of nutrients to give the plant a good start. Place on a tray and water from below. Keep at a temperature of 65º-80º F. Do not water again until the seedlings emerge, usually a week or so after sowing.
After a month, re-pot into 3.5" pots with nutrient rich compost. Keep the plants warm until they reach the 4 true leaf stage (two first, round leaves excluded). At this stage, the plants will be ready to go into there final place or they could be potted up into 9" pots and transplanted later. If you choose to re-pot, then use a nutrient rich compost to keep the plant fed for about 4 months.
The ideal soil for growing on the plants is based on John Innes No3 recipe or you can use the old favourite of 1/3rd soil, 1/3rd compost and 1/3rd well rotted manure, plus a dusting of lime and bone meal. The important thing is that the growing media is open, light, and full of nutrients. Cucumber and tomato beds are similar.
As the plant grows, stake it up to give much needed support. As the flowers develop, use an artists brush to aid in the pollination process. When one aubergine has set on each stem, pinch all flowers to limit it to one fruit. Do not pinch out the main stem, this will make the plant branch out.
Start feeding at this point with a balanced NPK feed. Use at a quarter of the manufacturer's recommended strength at every watering. As the fruit develops, increase the potash (K) content similar to feeding tomatoes.
As time goes by, select the most promising fruit and pinch out the rest. If the fruit needs support, then use nylon stocking similar to supporting cucumbers. It is a good idea to put a series of canes around the plant to give it support. The stems can sometimes be very brittle and fail easily under the weight of the fruit or a strong wind. There is little else to do except regularly watering and feeding.
Generally speaking, aubergines are fairly disease and pest resistant; but keep an eye out for whitefly and other aphids, then spray with a multi purpose insecticide.
Sometimes leaves die on the plant – these should be removed because they usually carry botrytis and may infect the rest of the plant. Do not pinch out the main stem, otherwise the plant will branch out.
To summarize growing world class giant aubergines (eggplants): insure that plants are not chilled, plant in warm weather, stake plants, and cull to one eggplant per plant. Mulch soil after plants are well established, feed with a ballanced NPK (20-20-20) fertilizer, and keep a consistent level of moisture in the soil. Eggplants are particularly drought resistant, so over watering seems to have more adverse effects than good.
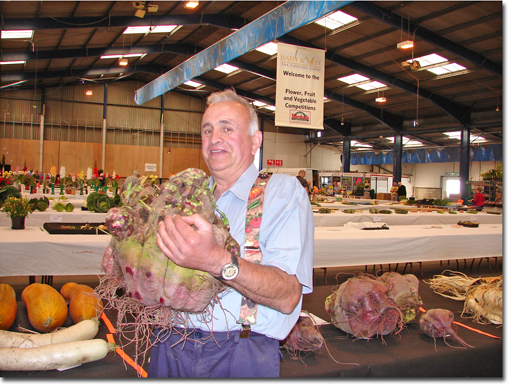
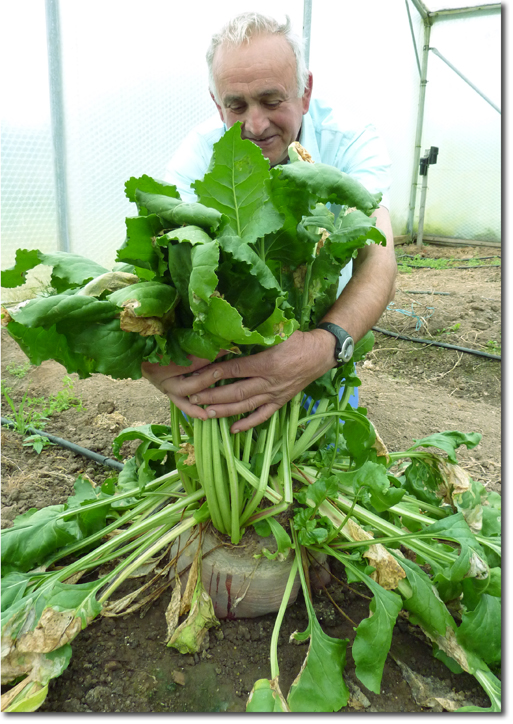 Beets
Beets
with Ian Neale
As with most giant vegetables, the variety of seed you grow is of the utmost importance. Ian uses a seed that he has selectively planted over the years, and is not generally available. But, other very successful seeds are freely available from seed companies or even from racks in your nearby garden center. The type of beet required is globe in shape – not the long root type. Globe Detroit 6 Rubious from Thompson and Morgan and Winter Keeper Lutz Green Leaf are examples of varieties to start with.
Growing beets is very similar to growing swedes or rutabagas, except the soil pH should be neutral.
Germination
Beet seeds are made up of clusters of individual seeds – usually about three. Choose the largest clusters you have for your competition seeds. Soak paper towels in boiling water, then drain off any excess. Place the seeds between folds in the towel, then place the towel in a plastic bag. Store at 65º-70º F (18º-21º C) with full light. The seeds should emerge within 10 days.
Remove the germinated seeds, and pot them up in warm seed compost. Continue to grow them at 60º - 65º F (18º-21º C) in full sunlight. This method works best for beet seeds because they are very woody, and need a lot of moisture to soften their tough, outer coating. After germination, grow your beets exactly as you grow swedes.
A row of beetroots with soaker hoses
About Beets
Preferred pH range is 7-7.2
Best germination temperature is
65º-70º F (18º-21º C)
Ideal growing temperature is 65º-70º F
Maturity time is about 26 weeks
Temperatures above 25º C (77º F) adversely affect their growth, color, and development
Over watering will cause too much
leaf growth
Use no fresh manure as a soil additive.
Plant in soil that is a deep, sandy loam with plenty of organic matter
Protect young plants from birds
Fertilizers And Effects
Nitrogen (N)
Nitrogen is needed in abundance over the entire season, but a sudden increase will cause splitting. So, little and often is best – using well-diluted concentrations weekly.
If N is deficient, the leaves will become light green in appearance, then yellow as a result of lack of chlorophyll. This deficiency reduces photosynthesis, and hence the size of the plant and root.
Phosphorus (P)
Phosphorus is needed for root development during the early stages, and flower development later on. A little extra bone meal at transplanting could be an advantage as well as some Superphosphate (0-20-0).
Potassium (K)
For optimum growth, potassium is needed. If a deficiency occurs, then the leaves will take on an olive/yellow appearance, commonly known as 'scorch.' K also strengthens the immune system, making for growth that can better protect itself from fungal threats. Wood ash is a good source of K, and can be added to the surrounding soil.
Calcium (Ca)
Calcium is one of the building blocks of growth. Use calcium carbonate (lime) to raise the soil pH to 7.
Magnesium (Mg)
Deficient magnesium levels will reduce root and fruit yields. Dolomite lime (another type of limestone) is a useful addition, because it contains calcium as well as magnesium.
Saving Seeds
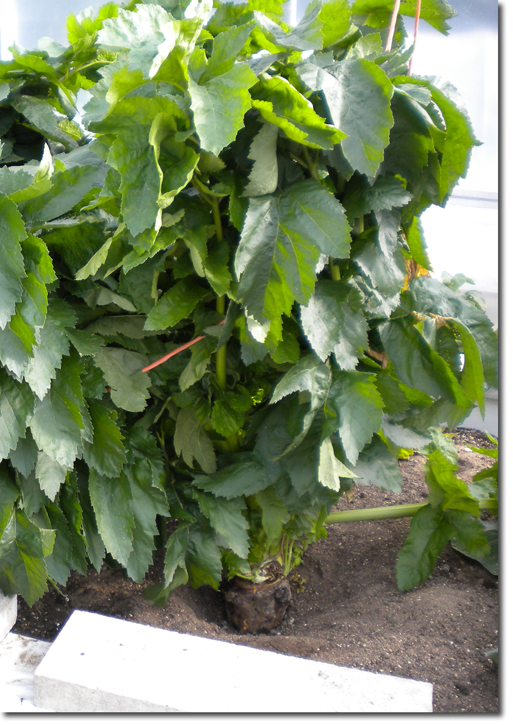
Beet seeds are very easy to grow, but they do need a lot of room. After the shows, plant your best beet in a greenhouse, and watch it grow. The following year, a mass of seed clusters will appear. When they start to turn brown, harvest and place them in a brown, paper bag in a frost-free, dry place.
Below: one giant beetroot grown for seed
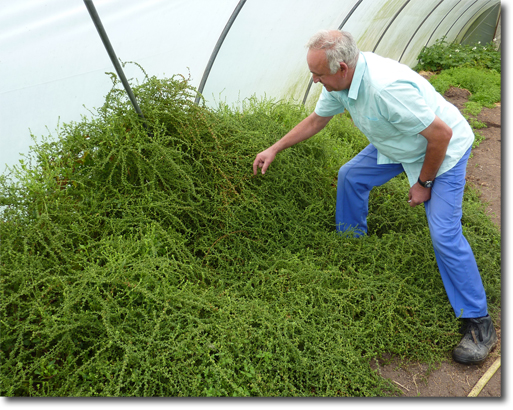
A closeup of plant, seed stem with seeds, and seeds.
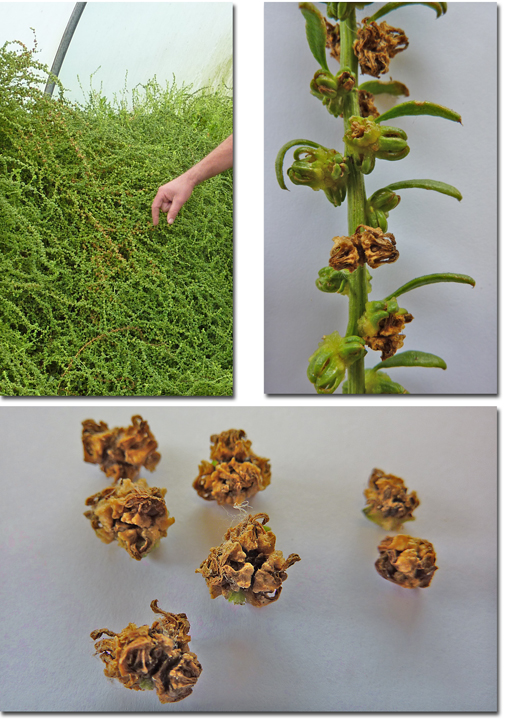
The world record for beets was set in 2010 by Ontario, Canada grower, Norm Craven, with a 51 lb 10 oz (23.4 kg) specimen.
 Brussels Sprouts
by Chris Casacci
Climate Requirements Zones: 3 - 9
World Record Size 18 lb 3 oz
Giant Variety Bedford Fillbasket
Growing Season 90-130 Days
Seed Viability 5 Years
Average Size 4'-5' Tall
Transplant 8-12 Weeks or 1'-2'
Ideal pH 6.5-7.0
Seed Production Every Other Year
Watering Needs Medium-Heavy
Fertilizer Balanced
Spacing 3'
Harvest Time October-November
Germination
Start seeds in coconut fiber or a loose sterilized soil media. Make sure the media is moist, but not soaked. You can use a heating mat at 70º-80°F (21º-27º C), and a humidity dome to ensure best results. Germination takes 6-9 days. Once seeds sprout a set of true leaves, transplant into a one gallon pot.
Guinness Requirements
Record candidates must be in good condition and weighed free of debris. The record is based on the weight of one Brussels sprout, not the whole plant. Keep in mind that Brussels sprouts are normally harvested at around 1", so 18 lb seems quite extreme – but are not xtreme vegetables what this book is all about?
Note, giant Brussels sprouts are not very flavorful when grown for size.
General Growing
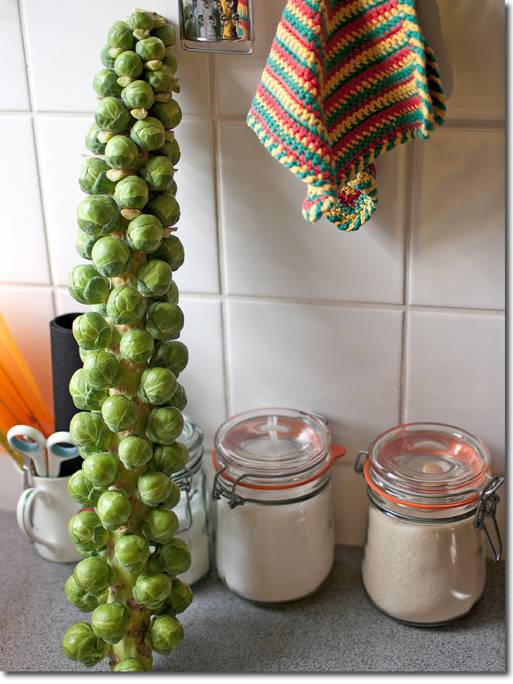
Brussels sprouts are in the same family as cabbage, and normally are harvested at a very small size. You want to grow your Brussels sprout on the plant as long as possible. I have found that the largest Brussels sprouts comes from the Bedford Fillbasket variety. This variety is very difficult to get access to in the USA, but is readily available in the UK.
This plant is a heavy nitrogen consumer, so make sure to use a balanced 20-20-20 mix or a frontloaded 20-10-10 fertilizer for best results. Look out for nitrogen deficiencies especially if you are only using organic nutrients. Many growers practice the removal of lower leaves in order to increase production, but this should not be necessary when growing purely for size. If any sprouts start to turn yellow or have signs of disease remove them immediately. After your sprouts are ½" in size, remove all but one or two sprouts per plant to encourage them to reach their maximum size potential. Choose sprouts on the lower portion of the plant to prevent them from breaking off when they reach a larger and heavier size. If necessary, support your one or two large sprouts with a hammock tied around the plant. If all goes well, you should have a brussels sprout at least as big as a normal cabbage.
Pests & Disease
There are several pests you should watch out for on your brussels sprout. Mainly look for aphids, cabbage loopers, imported cabbage worm, flea beetles, and the diamond back moth.
If you have any of the insects above, a good pesticide to use is Sevin, which controls over 100 garden insects. It is readily available from any garden center or home store, and is safe on both vegetables and ornamentals.
Disease with Brussels sprouts usually comes in the form of club root, black rot, black leg, wirestem, leafspot, and downy mildew. Unfortunately there is no cure for most of the diseases above. A good fungicide will help with the mildew and leafspot, but the only way to prevent the others is to avoid planting where crucifers have been grown during the past five years.
If you compared a Brussels sprout to a normal size hamburger, a giant Brussels sprout comparison would look like below.
Harvesting
When harvesting Brussels sprouts, you want to cut the sprout off as close to the stem of the plant as possible. Take care not to injure any of the sprout wrapper leaves, as every one counts for your overall weight.
Saving Seeds
Brussels sprouts will not produce seeds true to form if they are from a hybrid source; however Bedford Fillbasket is not a hybrid. Brussels sprouts produce seeds by growing a large seed pod which will turn brown and dry during its second year of growth. Once the pod is dry, collect the seeds by placing the pod in a plastic bag and shaking it. The seeds will fall to the bottom and can then be placed in a labeled envelope.
Cabbages
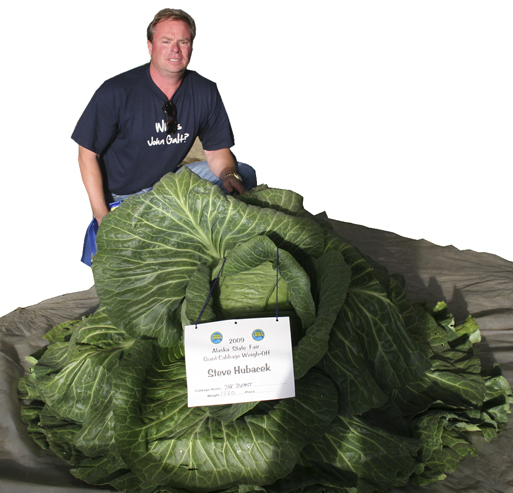
with Dave Thomas
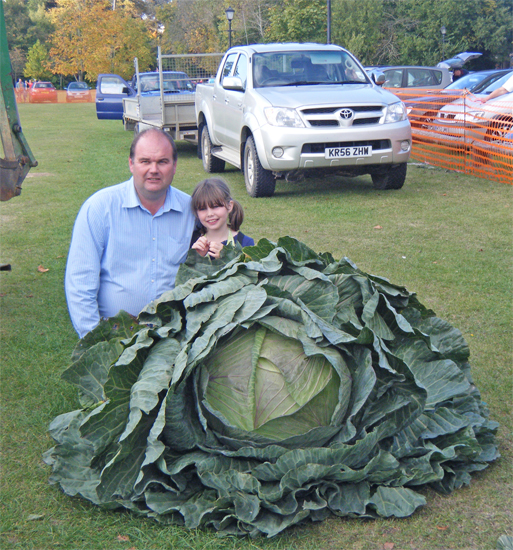
The reigning champion of the British National Giant Cabbage Competition is Dave Thomas – affectionately known as the Cornish Giant. This is a reputation gained for his size as well as the size of the cabbages he grows. He has won the competition for the last seven years, and he has grown many cabbages in excess of 100 lb. Here, he generously shares his method of growing. Dave is a farmer's son who is by profession an agronomist. He grows cabbages purely for fun; along with pumpkins, squash, potatoes, and marrows.
The cabbage variety Dave uses comes from a commercial variety, called "cow cabbage," originally grown for cattle feed, and of course, its enormous size. Although it is no longer practical to feed cabbage to livestock, and the seed is of no commercial interest, giant vegetable grower, George Rogers, has continued to plant and produce seed of this variety.
A few years back, disaster nearly struck when a herd of cows wandered into the seed patch and devoured all but one of George's cabbages. The strain could have been lost forever, but George managed to produce some good seed from this lone plant that he calls the Flat Poll. This particular strain seems to favor Cornwall south west England, where the climate is temperate, wet, and surrounded by sea. Snow and frosts are seldom experienced, but they do get a lot of rain during the summer months. The soil is a dark, red, rich color which suggests that a fair amount of iron is present.
Alaskan growers also seem to do well, but they tend to use different varieties of seed like: Alaskan Giant, Robinsons Giant, and Clives Giant.
Germination
The seeds can be started in either late summer or early spring. Fall tends to be preferred over spring, but if space in a greenhouse is not available, spring sowing can still produce world class giant cabbages. They are not difficult to start, but it is important that seedlings receive full sunlight as soon as they break the surface of the soil.
Fall Starting
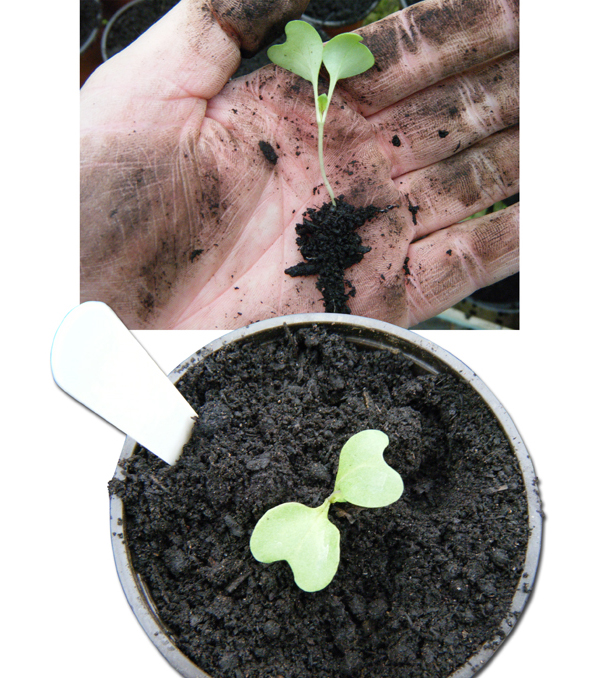
Seeds can be started in early November in a small tray or pot full of seed compost. Cover the seeds with about 1/4" of compost, water well, and place in a cool place such as a cold green house, not too hot, about 10º - 15º C (50º-60º F). It is not advisable to sow the seeds earlier, because they may grow too quickly, and go to seed prematurely. Check for germination on a daily basis, and as soon as you see leaves, make sure the seedlings go into full sunlight, or they will grow long and spindly. They need to grow strong and short at this stage. If they begin long and leggy, then start over. Also, sprinkle a few slug pellets around the seedlings to protect them from slugs and snails.
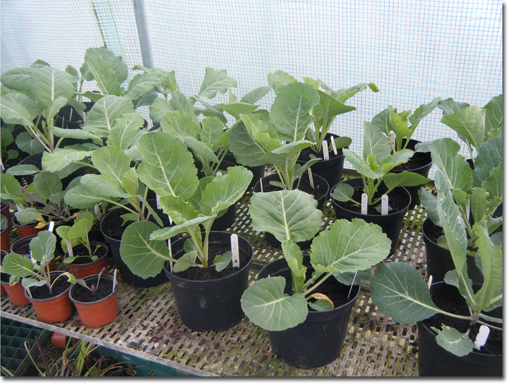
As soon as the seedlings have one true leaf (the third leaf), transplant them into 3 1/2" pots with sterilized soil media. Leave them in the greenhouse with just frost protection throughout the winter (heat is required in colder climates). When the roots start to show at the bottom of the pots – in roughly two months time – repot into 5" pots with the same media. There is no special feeding program at this stage. You want plants to be only growing roots, not leaves.
Spring Starting
Spring sowing is the same as fall, except that the start time is early March.
About Cabbages
Preferred pH: 7.5
Likes alkaline soil
Likes Nitrogen
Prefers free draining, clay, loam soil
Position: full sun
Likes to be transplanted
Ideal germination temperature: 10º-15º C (50º-60º F) must be above 4º C (39º F)
Average germination time: 7 days
Growing time: 10-11 months (when started in fall)
Prone to pests: pigeons, other birds, Cabbage Maggots, and Loopers
Needs to be supported
Does not like it hot (shade midday)
Loves rainy warm days
Prefers light winds for ventilation
Leaves are very brittle, and high winds can tear them off
Spacing 8' apart
Allocated area per plant: at least 7-8 square yards (63-72 sq. ft.)
Needs support: 18"x18" x 18" high (made from rebar)
 Fall Preparation
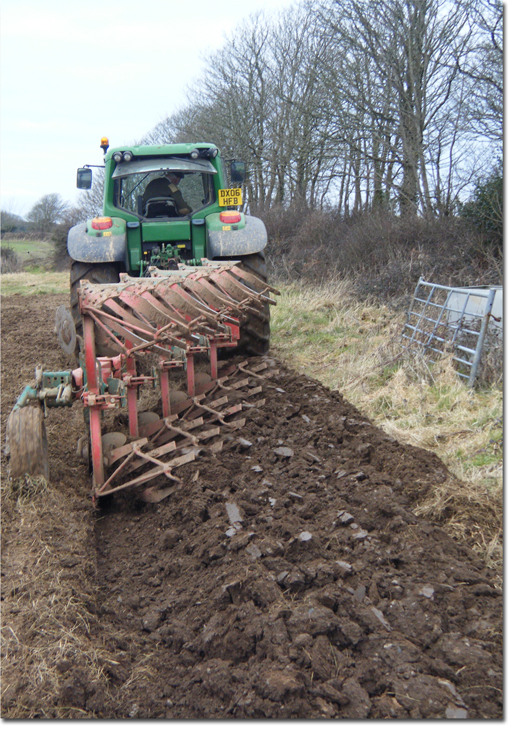
The plot must to be cultivated and fertilized as early as possible to allow the soil to breakdown and remove any salts. Add about 4 tons of farmyard manure to each 500 square yards (4500 square feet) of garden, and rototill to incorporate. Try to rototill to a depth of 18" when the ground is dry. If you try to do it when the soil is wet, then not only will you compact the soil, but it will not break down into nice friable loam particles. It is better to wait for the right conditions than to rush. Leave the ground over winter to let the rain wash out any salts from the manure, and let the frosts breakdown the soil. Although Dave uses a tractor, it is quite normal to dig by hand to get the same results.
 Transplanting
Although cabbages are fairly hardy, they do not like really cold temperatures, so do not transplant until you are sure that there is no risk of a hard frost – -10º to -7º C (15º-20º F).
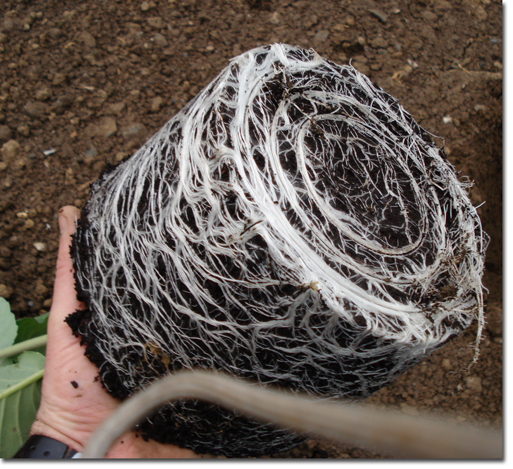
Dig a hole big enough to bury the plant to the first leaf. Remove the plant from the 5 liter pot, and brush the roots vigorously to expose them.
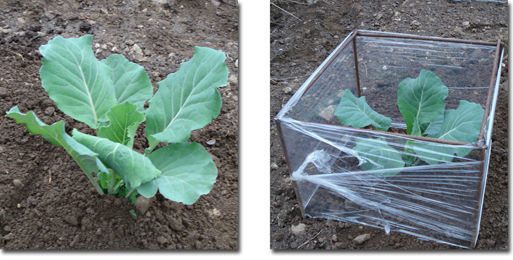
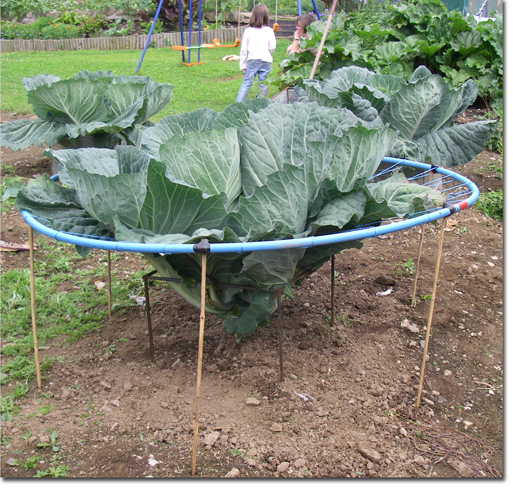
Sprinkle a handful of high nitrogen fertilizer (I use a 21% N product), and sprinkle around the roots. Water thoroughly. Make the support frame 18" x 18" x 18" and place it into ground. This frame is made from rebar but wood is also ok. Wrap the frame with strong packaging/pallet film – not kitchen wrap, it's too weak.
This combination of frame and plastic film prevents pigeons and other critters from eating the plants. The frame supports the lower leaves, and prevents them from breaking off. Also, the angle of the leaves helps to drain off any water – very important to prevent rotting. When puddles of water collect on the leaves, it's advisable to puncture the leaf with a thin cane to let the water drain. Failure to do this will lead to rotting and loss of leaves. The frame also helps to support the cabbage and keep it upright as it grows – especially when the wind blows.
When the plant is big enough, remove the plastic film to allow access for watering and fertilizer applications. It is better to water the ground underneath than over the leaves, because the water will get to the roots instead of either evaporating or causing rot.
Cover the cabbage with netting to protect from Cabbage Loopers (adult white butterflies).
November
5 Sowed seeds in a tray with seed compost and place in greenhouse – spread some slug pellets in the seeded area
16 Transplanted seedlings into 3" pots, and apply more slug pellets
December
10 Spread 4-5 tons of farm manure and rototill in (500 square yards (4500 square feet)
February
26 Repotted into 5 litre (1 gallon) pots with general purpose compost, and applied more slug pellets
March
22 Transplanted outside 8' apart with a handful of 21% nitrogen fertilizer, and more slug pellets
27 Checked for pests and diseases
April
3, 10, 17 Checked for pests and diseases
22 Applied a handful of 21% N fertilizer to each plant
27 Checked for pests and diseases
May
3, 10 Checked for pests and diseases
17 Applied a handful of 21% N fertilizer to each plant
22 Pollinated flowers on seed cabbages
27 Checked for pests and diseases
June
3, 10, 17 Checked for pests and diseases
18 Cabbage leaves are now extending outside of frame
22 Applied a handful of 21% N fertilizer to each plant
27/ Checked for pests and diseases
28 Cabbage is 1 meter (40") across
July
3, 10, 17 Checked for pests and diseases
22 Applied a handful of 21% N fertilizer to each plant
27 Check for pests and diseases
August
3, 10, 17 Checked for pests and diseases
22 Applied a handful of 21% N fertilizer to each plant
27 Checked for pests and diseases
September
2/ Cut biggest for National Giant Vegetable Show
5/ Won first prize for 100 lb cabbage
October
10 Picked biggest cabbage for pumpkin festival at Southampton
12 Cabbage weighed 105 lb (47.6 kg) – my best ever.
Watering
In the early stages, it is advisable to water sparingly to encourage the roots to go deep in search of water. If you water too much at the beginning, the roots will stay near the surface and not develop fully. Bernard Lavery, who once held the world record, was a great advocate of this technique even though cabbages love moisture. About 2 weeks after transplanting, keep the roots moist by watering "little and often." You can water morning and evening, but not during the day when the sun is strong. Even if the leaves go limp, refrain from watering the leaves until the sun goes down.
It's OK to water the ground, but again, do not soak. If water collects on the leaves, drain it off by puncturing the leaf with a thin cane.
Some grower use vacuum suction to remove the water, but the Cornwall sea breezes do the job for us. Make sure no standing water remains on the leaves.
If at any time a hose pipe (long handled watering wand) is used, be careful of the pressure because you may knock a leaf off. It is best to use a fine spray. It is not necessary to use warm water for cabbages, for they are not heat sensitive.
Pest and Diseases
Slugs and Snails
These can be a serious problem at the seedling stage and when the plants are young. They eat the young tender shoots. Once the plants are big enough, they will have only cosmetic effects. They can create holes in the mature leaves, which is unsightly and a loss in weight. To prevent, use slug pellet repellent around the plant, and spray with an approved insecticide.
Pigeons and Other Birds
These are a menace at the early stages outside. Cabbage is a particular delicacy for Cornish pigeons, who will literally strip the plant bare and invariably kill it. The only solution is to protect the plant with a shield or a net. If you use my system with the frame, you will have no problem draping the net over the plant. Other birds can also be a problem, such as sparrows, so guard against them. Birds usually only eat the young shoots and leaves, but if you experience a problem, then build a big cage around the plant and cover it with a net.
Animals
Many animals such as deer, sheep, and rabbits absolutely love young cabbage. If any of these wander into your patch, they may devour them completely. If this is a possibility, then build a net cage at least 4' x 4' x 3' high to protect them.
Aphids
These are tiny insects that congregate around new growth and suck all the goodness from the plant. Spray with an insecticide immediately.
Caterpillars
There are two main types of butterflies that lay their eggs on cabbage leaves – the cabbage white and the great white. The butterflies do no damage, but the caterpillars that hatch from their eggs are voracious eaters, and do a lot of damage. If left uncontrolled, they would eat a whole cabbage right down to the stalk, even the giants.
Prevention is easier on the plants than a cure with insecticides, so cover the plants with a net with mesh size 1/4" to 3/8" [6 to 10 mm]. If eggs are found, then wipe them off and spray with a good insecticide.
Cabbage Root Fly
There name describes them perfectly, but what it does not say is how destructive they are. They can cause the roots to become virtually nonexistent. Protection should start at the potting and transplanting stage. Dust the roots with insecticidal powder before potting into larger pots. When transplanting, dust the roots and surrounding area. Place a collar around the stalk to prevent airborne flies from landing on the root.
Diseases
Downy Mildew and Alternaria are two common diseases. Downy Mildew can be controlled by a good fungicide and alternaria is prevented by clearing away dead foliage, and maintaining good air circulation through the plants.
Fertilizer Program
Cabbages are not complicated to feed, just make sure the fall preparation is done properly with plenty of well rotted manure. The seedlings and potted plants do not need any special feed or compost until transplanting into the ground. At this point, a handful of high nitrogen feed with 21% N is raked into the soil and there after every 4 weeks to maturity. If the heads are slow in developing, then a single high potash feed will help to kick start the plant.
Saving Seed
Select the most promising cabbage, and do not harvest them as normal. Leave them to keep growing until they eventually produce yellow flower heads the following year. (In colder climates, the plant will have to be dug and brought inside, and then replanted in the spring.) When the flowers die back and the pods start to turn brown and crispy, cut off the whole head and place in a net bag and hang it up to dry indoors. After a couple of weeks, the seeds will all be dry. Remove them from the pods and store in a paper bag in a frost-free, dry environment. They will last up to 5 years if stored properly.
It is possible to leave the stalk of your best cabbage in the ground, and it too will eventually go to seed. Please note that cabbages will easily cross pollinate with others up to 100 yards away. Insects transfer the pollen. So you must make sure that you do not have different varieties nearby going to seed. Remember also that F1 hybrids will revert back to their parents and may not turn out exactly the same as your original.
It pays to check the viability of the seeds at this point for germination. Use a wet paper towel to test.
Taking Cuttings
In order to produce an exact copy of your prize winning cabbage, let the stalk produce mini cabbages. Cut these off and transplant them into 5 liter (1 gallon) pots with rooting powder dusted on them.
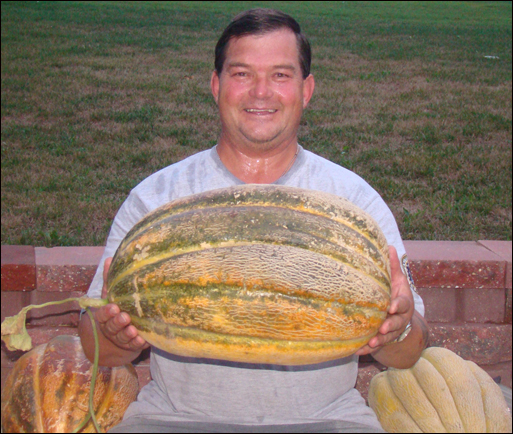
Cantaloupes
with Marty Schnicker
To grow large cantaloupes, you need well drained soil. In the fall or early spring, prepare an area a minimum of 15' x 15' for each plant you plan on growing (larger if you have the room). The best time to do this is in the fall, so that the soil can break down any amendments over the winter, though early spring is fine. The plants will eventually be trained to occupy a space of 225 - 350 square feet for best results.
I add 2"-3" of 2-year-old, aged, horse manure; worked in with several bags of shredded leaves. I also add 50 pounds of garden gypsum, which adds calcium needed for the large appetite that cantaloupes have for it. I add gypsum to everything I grow in my garden to keep my calcium levels up. My pH was 6.5 for my 50.2 pound cantaloupe, and 7.2 for my 49-pounder. My average range of pH preference for most of my vegetables is 6.5 - 6.8. pH is important, and ample calcium will maximize your cantaloupe's potential. Gypsum adds valuable calcium while not effecting pH. So, if your pH is in the 6.5 - 6.8, good range; don't use lime as a calcium supplement, because it will raise your soil's pH.
Seed selection is very important in having the best possible chance to grow an award winning cantaloupe. There are not as many places to obtain good seeds, because there are not as many people growing competitive cantaloupes as giant pumpkins and squash. It is best to start with a variety like North Carolina Cantaloupe or Colossal Cantaloupe.
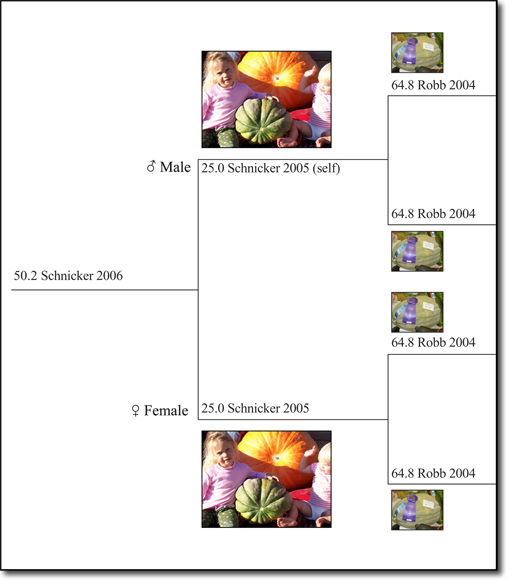
These varieties are readily available, but seeds with better genetics can be purchased online from P and P Seed Company, and WorldClassGardening.com, or from competitive growers you meet on your way. I purchased a 64.8 Robb World Record Cantaloupe seed in 2005. If you can find a grower that has grown giant cantaloupes, most likely he will give you a few seeds to get started. Some gardening clubs and grower associations have them available as well.

I start my seeds in quart/liter sized pots with sterile potting soil. I use a mix without added fertilizer in it. Make sure your potting mixture is not too wet – it should be damp but light in your hand. I pot the seed then place a plastic bag over the top of the pot so that the top of the pot does not dry out too much. I then place the pot on a heat mat that maintains the temperature between 72-82 degrees. In 4-6 days, the seeds should germinate, and I plan to have them outside 7 days after germination. Cantaloupes like it warm, so be sure your soil outside is warm before you start your seeds inside. You can use soil heating cables if you want to try to stretch the season.
I dig an area 5' x 5' and 18" deep and prepare the planting hole for the transplant with a 40 pound bag of potting soil with fertilizer, 2 pounds of gypsum, and a 40 pound bag of aged manure compost. The planting hole will give the roots lots of room to grow.
The vines do not root at each leaf node as pumpkins do, so most of the nutrition comes from the crown or stump area of the plant. Once the plant is transplanted, I cover it with a small plastic greenhouse to protect it from the wind. I will leave it covered until it outgrows the protection. By then, it is strong enough to be on its own.
When the plant covers about a 3' x 3' area, and has several vines coming directly from the stump or crown, I begin to train the vines, so I can more readily observe their growth. I do not want the vines to be touching each other, which could cause powdery mildew. I want my fruit sets on one of the main vines or a strong secondary just off of the mains. Be sure the plant is covering at least a 100 square foot area (10' x 10'), before selecting any fruit to grow on to competition. Be sure to keep the plant protected with fungicides and insecticides. Any sign of wilting could be a sign of plant disease and or rot. You can trim a few vines off as they grow to keep the plant under control and improve the movement of air through the vines.
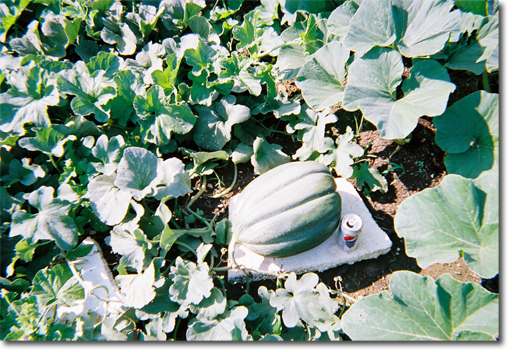
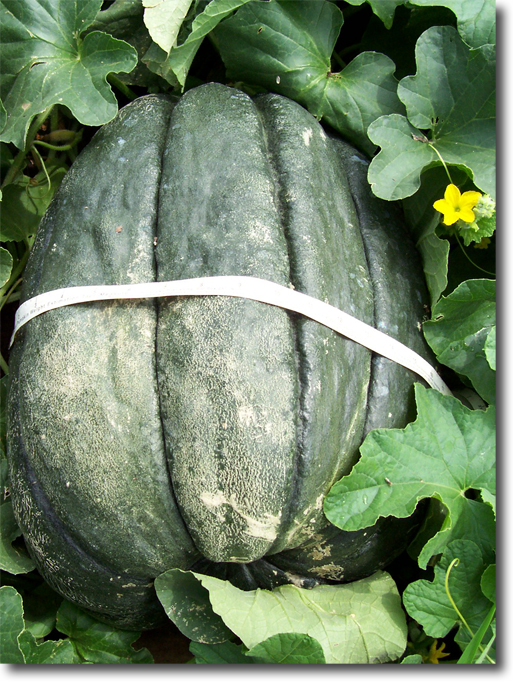
Fruit selection is very important, and you should select perfectly shaped fruit to start. No lopsided, banana-shaped fruit that will probably split on the blossom end. You want a nice, fuzzy dark-green, bottle-shaped melon; and to keep that shape, you need to keep the soil moisture level up. I water a little everyday depending on weather. Mother nature plays a huge role in growing giant cantaloupes, and the warmer the weather, the better. (80 degrees during the day, and nighttime temperatures 65-75 degrees are best.) They can gain 2 pounds a day under these conditions. Once I choose the melon to compete with, I place a board under it to keep it off the soil. The board keeps the bottom of the melon dry, prevents the fruit from rotting, and keeps slugs or snails from damaging it. Drill a few drain holes in the board to help with drainage. I lay mill fabric over the board to further protect the fruit. Have someone carefully lift the melon while you check to see if it is dry. If there is moisture underneath, I dry it off with a rag. I lost a melon one year, which may have been over 60 pounds, that rotted on the ground.
You can leave one on if you want the largest possible fruit, or leave 3-4 on the plant and have some nice 25-35 pound fruit to later harvest. My 49 pound fruit was one of 5 fruit on the plant, but it was the first melon set. The others were set 2-3 weeks later after the 49 was well on its way. Shading the melon can help keep it from getting burned from the sun. This variety normally grows only 40-50 days, but good protection may extend this time. As the melon grows, you will need to move it every few days to keep the stem from "kinking" and restricting its growth. Once the plant has filled the area allotted to it, and the melons are growing well, I give the plant some organic fish and seaweed fertilizer to feed the plant and push the fruit. I drench every 7-10 days.
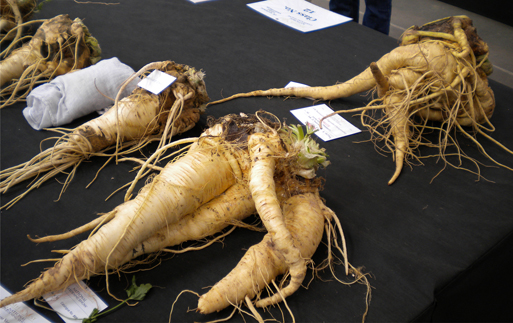
Carrots
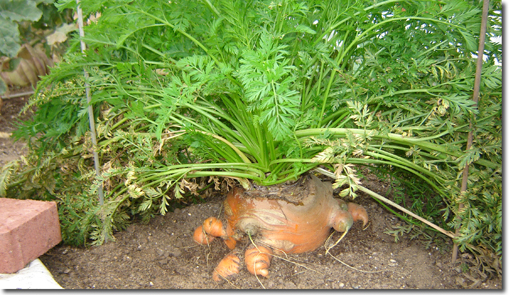
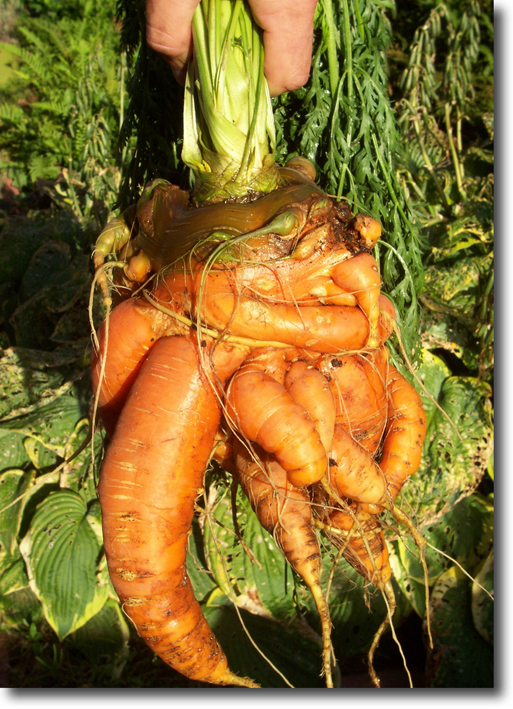
with Joe Atherton
Growing giant carrots is more about skilful gardening than the genetics of the seed. That is why Joe regularly wins prizes at all the major shows. Very few people understand how carrots can get so big. It is often erroneously said that several carrots are growing together. This could not be further from the truth. In essence, the carrot's root is stunted when still a seedling, and then plenty of care is given to the plants that are grown under cover and in raised beds. The seed variety most used is Flakee and it is available from many seed suppliers.
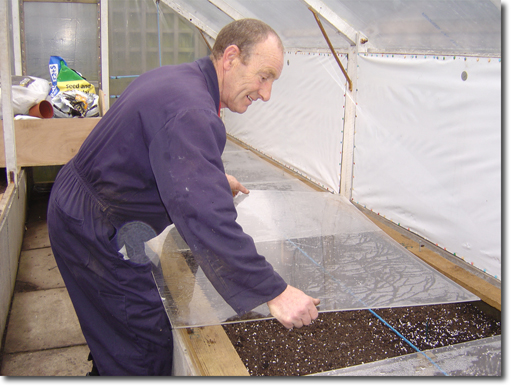
Method of Growing
The year starts in October with the digging of soil into raised beds to a depth of one spade, and then left to over winter to let the rain wash out any salts that may have accumulated. In December, I prepare the pots for the seeds. I use a 7" pot and remove the base with a knife, because the pot will used upside down. I then cover a heated bench in a greenhouse, or warm cloche, with 1" of seed starter mix. Place the pots upside down onto the bench, and fill them with sieved pot mix. Water and leave for a fortnight to warm up, then sow 6 seeds per pot and cover with 5 mm (about a 1/4") of media. Within 10 days, the seeds will start to germinate and break through the media. As soon as they show the first true leaf, thin them out to just 2 seedlings per pot. One week later, choose the best in each pot and thin the rest. Leave the single seedling per pot to grow on until March.
About the end of February, cultivate the final beds and cover the soil with clear polythene to warm it for planting.
During the first week in March, dig holes in the bed to twice the width of the pots. Take a piece of plywood and slide each pot off the bench onto it to facilitate moving without disturbing the roots. Similarly, slide the pots off the plywood into the newly dug holes. Give a sprinkling of super phosphate (0-20-0) around the pot and fill the surrounding hole with just a little soil. Then, raise the pot and fill in some more soil. Continue until the carrot plant is completely surrounded by soil. Water well and cover the area with a polythene sheet suspended above the plants, to keep them warm.
In April, or when the weather starts to warm up, remove the polythene cover and water when needed. At the end of April it will be time for the first feeding. Use a half-strength Chempak No3 liquid feed (20-20-20). Do not use full strength; too much feed will split the growing carrots. Feed the plants once a week at half-strength until harvest.
Inspect plants for bugs and diseases and treat accordingly. A common pest is red spider mite.
About Carrots
They take 8 months to grow
Likes free-draining light, sandy loam
Soil pH should be in a range of 6 - 7.2
Provide 4 sq. ft. of area per carrot (2' x 2')
Ideal germination temperature is 55º F
Germination time is about 10 days
The ideal growing temperature is 50º - 75º F (10º - 24) C)
Carrots do not like it hot
Potting Mix 1
I use 5-parts Levingtons M3 (see appendix), + 5-parts soil from my old carrot patch, + 1-part sand, then sieve to a fine consistency.
Seed Varieties
The popular variety used to grow giant carrots is Flakee. It originated in Holland and produces very large carrots. If this variety is difficult to obtain, then select the largest type available with a broad shoulder. The technique of growing is more important than the variety.
Diary
October
12/ Prepared bed by digging one spade deep
December
3/ Prepared 7" pots with no base with initial pot mix, and placed them on greenhouse bench with 1" of potting soil beneath to warm up
27/ Sowed 6 seeds per pot
January
5/ Starting to germinate
12/ First true leaf appears
13/ Thinned pots to 2 seedlings
19/ Thinned to best seedling in each pot
February
22/ Covered bed with a polytunnel to warm the soil up for planting
March
6/ Soil temperature reaches 50º F (10º C)
7/ Planted pots in bed, then covered with clear pastic directly on soil with holes cut in for carrot seedlings to come through
April
1/ Removed plastic and watered thoroughly
29/ Fed Chempak No. 3 at ½ strength
May
6, 13, 21, 28/ Fed Chempak No. 3 at ½ strength
June
3, 10, 17, 24/ Fed Chempak No. 3 at ½ strength
July
1, 9, 16/ Fed Chempak No. 3 at ½ strength
18/ Sprayed Dynamec ½ ml/litre (2 ml/gal.) for red spider mites
22, 29/ Fed Chempak No. 3 at ½ st.
August
2/ Sprayed Dursban to protect from red spider mites
5, 12, 19, 26/ Fed Chempak No. 3 at ½ strength
27/ Tested carrots for selection – push to and fro – loose ones are not good in length
September
1/ Lifted carrots for show
5/ Won 2nd prize
Spider Mites
Best prevention is to spray with insecticide, and increase ventilation to keep plants cooler. Or, treat with SB Plant Invigorator (see appendix).
Aphids
Aphids are a very common small crawling insect. Kill them off using a insecticide like Seven.
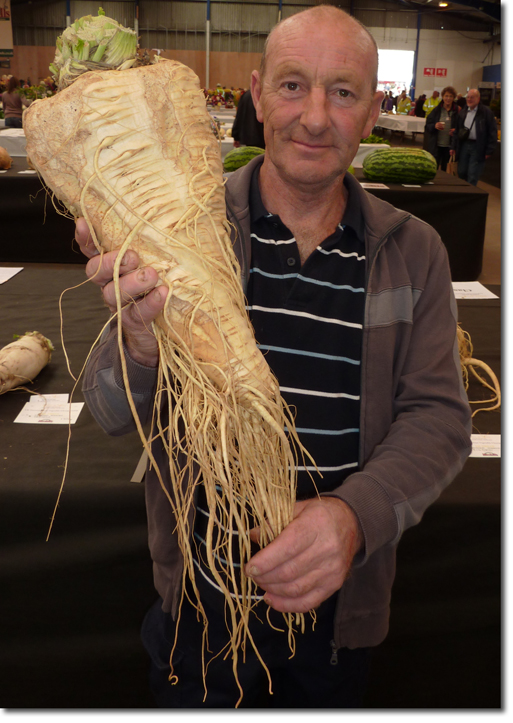
Parsnips
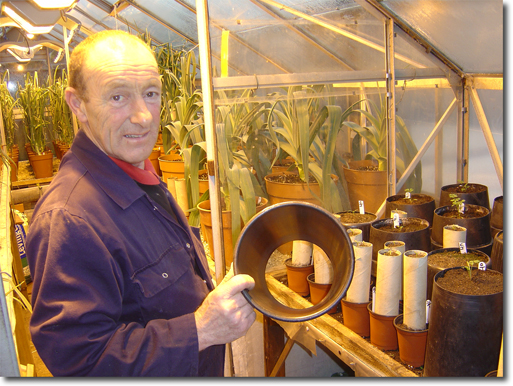
with Joe Atherton
Joe Atherton has attained many world records and the parsnip is one of them. He grew a massive 11 3/4 pound one in 2008 from seed that you could buy at any garden center. The method he uses is quite straight forward but has an unusual procedure – he breaks the tap root at the right time so that the parsnip grows many tap roots, each of which will feed the main root. Good soil preparation, gentle feeding, and growing under cover are the basis for his methods.
It is important to protect the plants in the early part of the year in order to extend the growing season. Joe's greenhouse has removable sides, so maximum ventilation is created for summer cooling. Parsnips prefer cool temperatures, and growth can slow during summer heat.
His greenhouse has raised beds (2' high x 3' wide) filled with soil to the John Innes recipe No. 3 (see appendix). If Joe uses soil from a previous crop, then he flushes it with water to remove salts. Alternatively, he opens up his greenhouse to winter's wrath.
The year starts in January by digging out raised beds. Before the soil is replaced, 8" diameter by 18" long tubes are placed in the beds to give 4 sq. ft. (2' x 2') of area per plant. The soil is then earthed up to the top of the tubes and left to settle.
Later he fills the tubes with the following finely sieved mix: 4 parts Levingtons F2S (see appendix) + 4 parts Humax John Innes No. 2 (see appendix) + 1 part perlite. Then, he slides out the tubes and fills the holes with his sieved mix to the same level as the bed.

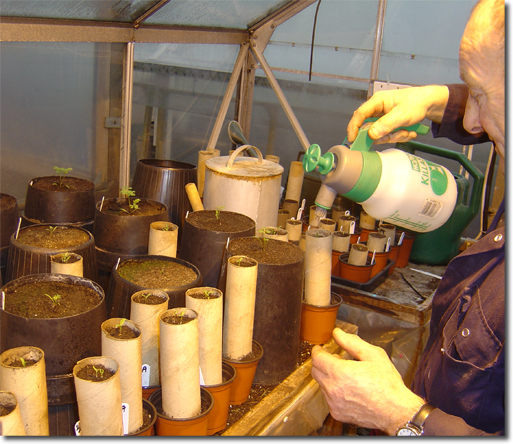
At the end of January, it's time to sow the seeds. He uses the cardboard inner tubes of rolls of toilet paper. The tubes are placed in 3" pots and filled with the above mix. He supports the filled tubes by partly filling the pot to about a third of its height. He places 4 seeds in each tube and covers with 1/4" of soil, then waters gently with warm water. He starts more tubes than he needs to allow for losses. Place the pots on a heated bench, and keep at a minimum of 55º F (13º C). Within 2 to 3 weeks, the seedlings will appear. He places a few slug pellets on each tube to deter slugs when the seedlings are at there most vulnerable.
When the first true leaf appears, he thins out the seedlings to one per tube. Keep the soil moist and grow on until the tap root can be seen extending from the tube.
About the first week in March, when the soil should be a minimum of 50º F (10º C), he takes the tubes out of the 3" pots and inspects the roots. If they are showing, he buries the tubes in the prepared holes in his raised beds, then covers with polythene. He cuts holes in the polythene to allow the plants to grow above the bed cover. He then waters the transplants gently and keeps them just moist through the remainder of the season – never allowing the soil to dry out.

By the end of March, it should be warm enough to remove the polythene covering from the beds.
About six weeks after transplanting, towards the end of April, he starts feeding. He uses ½-strength Chempack No. 3 (see appendix) just to wet the soil. It is important to only feed when the soil needs moisture – never feed when the soil is wet. Feed once a week through harvest.
Check for bugs like spider mites or green flies, and spray at their first sign with a suitable systemic insecticide.
As summer progresses, keep the green house as cool as possible, between 55º - 70º F (12º - 20º C).
Parsnip Growth
Do not over water or over feed because the parsnips will split. Moderate, continuous water and feed are the best way to grow parsnips – fluctuations in either will produce negative results.
The parsnips should be ready to harvest at the end of August, but it is not advisable to lift them until a day before showing. Unearth them by hand to minimize damage to the roots – every part of the root counts in the total weight of the parsnip. Wash off the dirt very slowly with a low pressure spray to start with, then higher pressure to fully clean and dislodge soil. If too much water is allowed over the roots, they may absorb it – causing the parsnip to split and end all your work – so take it slow and easy.
Cut the greenery down to 2" initially, then at the show trim to 1". Wrap the parsnip in a damp cloth and pack in a box to protect against damage.
Seed Collecting
It is not generally advisable to collect your own seed, because the important part of growing parsnips is the growing technique and care – not the variety. Also, the best seeds are usually F1 hybrids, and the seed saved from them will not necessary have the same characteristics.
Parsnip are biennial, so if you want to harvest your own seeds, take your best parsnip, dress any wounds with sulphur, place it on a bed of sand, and lightly cover it with peat. Leave it in a frost free area and keep it just moist, not wet. When the parsnip starts to produce shoots, transplant it into the garden and let it grow. Allow plenty of room because it will grow into a very large bush. Collect the seed heads, and dry them off by hanging them up in a paper bag or pillow case in a warm place. Strip the seeds off when dry and store in a paper bag. Parsnip seeds have a very short germination life, so keep them for no more than 2 years.
Diary
January
6/ Made 11 bore holes in raised beds; buried tubes and filled with grow mix.
29/ Made 16 sowings of Albion seeds into toilet rolls filled with grow mix—4 seeds per tube. Stood tubes in 3" pots partly filled with compost to support. Placed on green house staging at 50º F (10º C) with no extra light
February
16/ Seeds start to germinate
22/ Covered the raised bed with clear polythene to warm up the soil.
26/ First true leaf showing –thinned out to one seedling per tube
March
8/ Tap root showing at the bottom of the tube – broke off tap root and planted into bore hole with tube
29/ Removed polythene from bed
April
22/ Started feeding program with Chempack No. 3 at ½ strength (see appendix)
30/ Fed Chempack No. 3 at ½ strength
May
6, 14, 20, 27/ Fed No. 3 at ½ strength
June
3, 10, 17, 24/ Fed No. 3 at ½ strength
July
1, 9, 16/ Fed No. 3 at ½ strength
18/ Sprayed with Dynamec insecticide ½ ml/lt as a precaution
22, 29/ Fed No. 3 at ½ strength
August
2/ Sprayed with Dursban insecticide 4ml/lt for red spider mite
5, 12, 19, 26/ Fed No. 3 at ½ strength
27/ Checked for best parsnips by rocking too and fro
September
1/ Day before the show –lifted by digging by hand and cut off leaves to 2" long
2/ Trimmed stalk to 1", weighed 5.34 kg. (11.7 lbs.) won 2nd prize. Peter Glazebrook won with world record of 5.9 kg. (13 lbs.)
 Long Stuff
Long Carrots, Parsnips & Beets
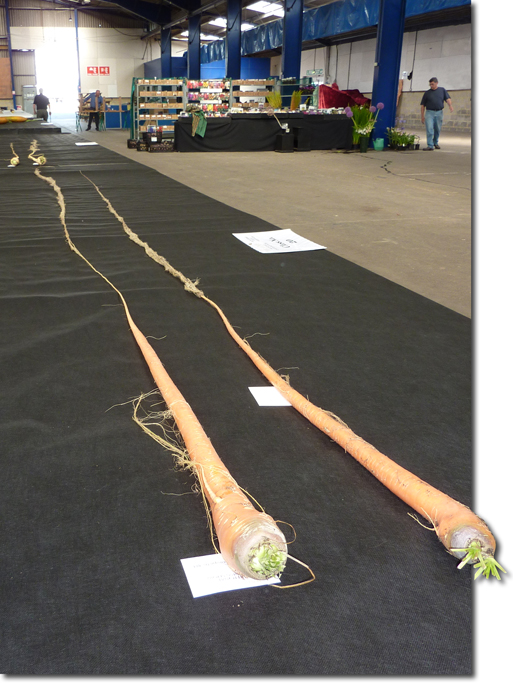
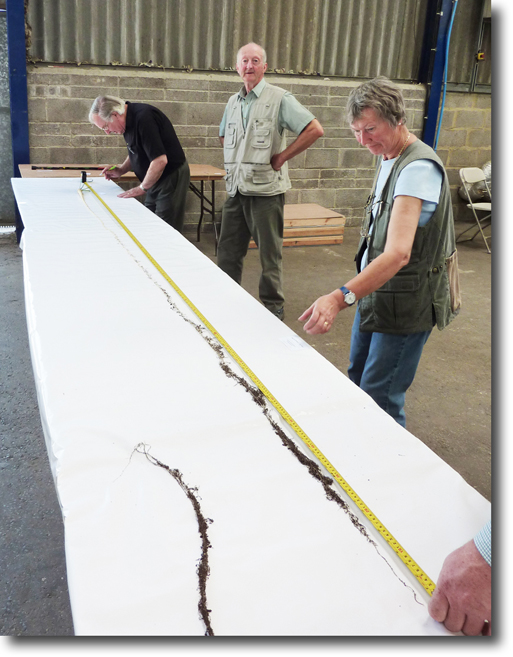
with Peter Glazebrook
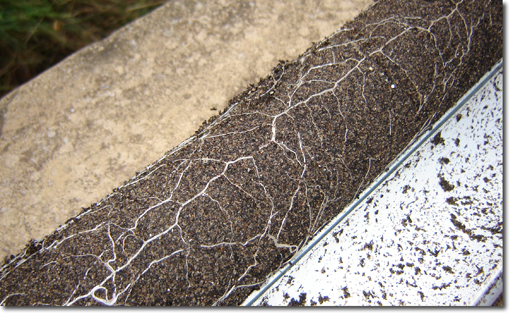
Peter has mastered the art of growing long carrots and has obtained a world record to prove it. His longest ever carrot reached 17' 3" and set a world record, since surpassed. The body of the carrot is relatively normal in size (about 18" long) but the attached root can be several feet long.
To most people, the long carrot is a disappointment, because they expect it to be big as well as long. But, to make a carrot extra long, you need to encourage the root to grow and not its body. This is the clever part of growing long carrots, and Peter goes to great lengths to achieve it. Just look at his setup to the left. It's a work of art on its own.
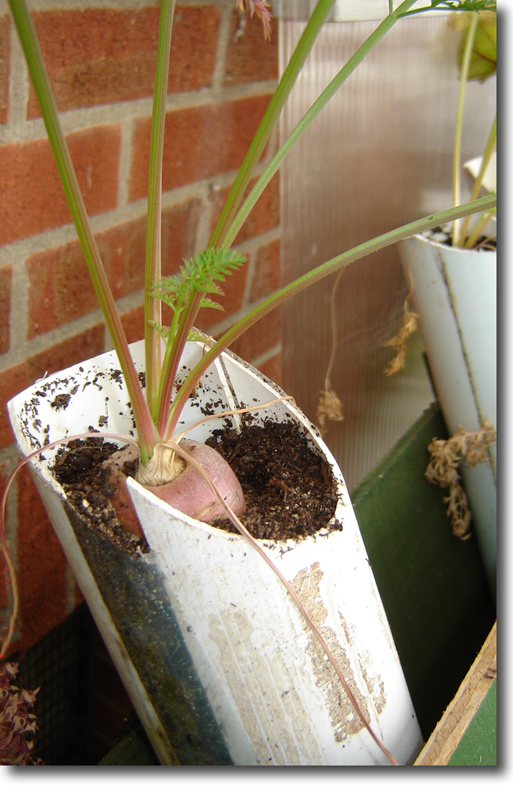
Essentially, the carrot is grown in an elevated drainpipe and watering is controlled in such a way as to encourage the root to follow the water.
The seed variety is not terribly important because it's the skill of the grower that counts – not the genetics of the seed – like many other giant vegetables. But, Peter does prefer the following varieties: St. Valery and G. Watson's Select Long carrot. He is always experimenting with different varieties, but it is a very long process to prove which seed will do the best. Also, how many pipes can you have up the side of your house?
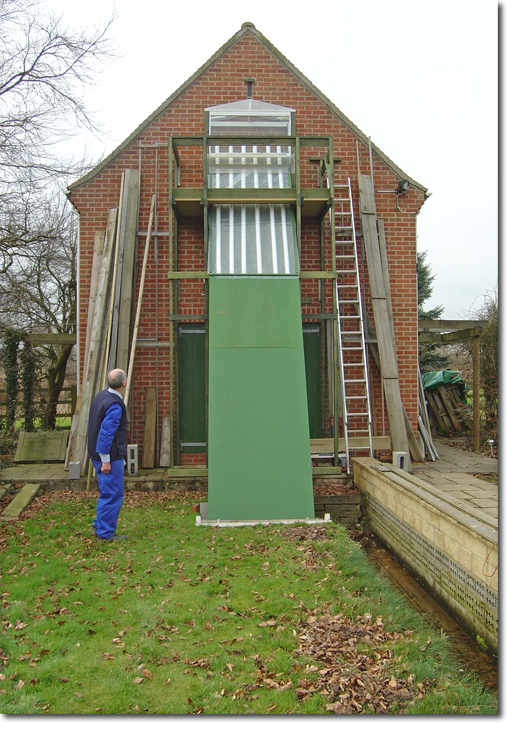
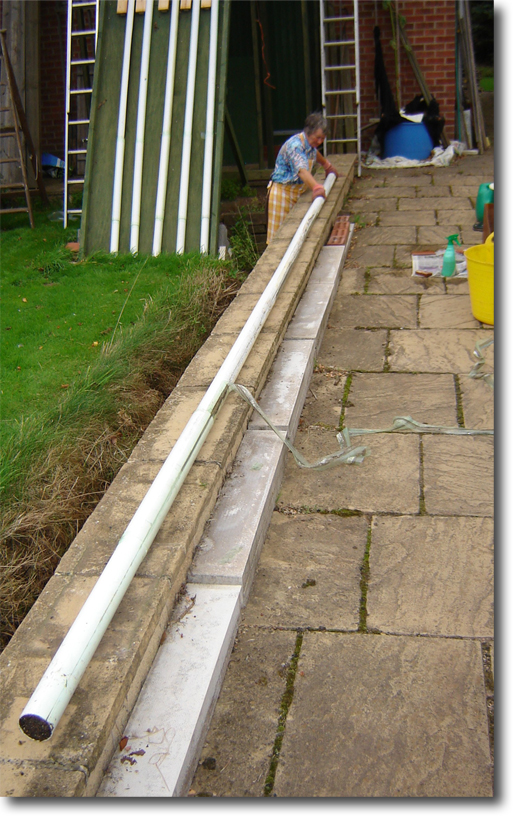
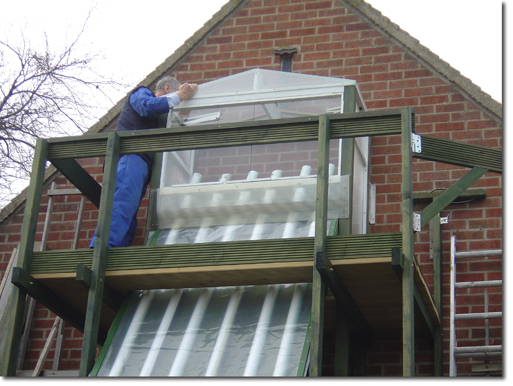
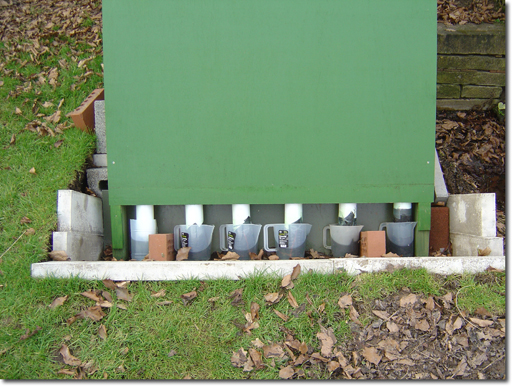
Before embarking on his method of growing long carrots, you will need a SE to SW facing wall in full sun that can support pipes up to 21' long. In the early days, Peter would simply clip the pipes to the wall and scale the height with his ladder. But now he has built a structure that makes growing easier and safer. Also, the small greenhouse built at the top makes for better control of the growing environment.
Structure and Pipe Needs
Pipe: 2 1/2" PVC by 21' long, cut in half lengthways and then taped back together
A ladder up to 18' long
A wood platform to stand on
Weather protection around the top of pipes
Pipe Soil Mixture
1/3rd clean garden soil, 1/4" fine-sieved, 1/3rd peat, 1/4" fine-sieved
1/6th grit sand, 1/8" fine-sieved, and
1/6th medium Perlite
Add superphosphate (0-20-0) and sulphate of potash (0-0-50)
Seaweed or kelp meal can also be added
The year starts in February when the pipes are filled with the soil mix. This must be done when the pipes are in their upright position, watered, then left to settle, and then topped up as required to within a 1" of the top with more of the mixture.
Start 3 seeds in the center of each pipe, cover lightly, water, and seal with a plastic bag to prevent soil from drying out.
Carrots are slow to germinate, and will take between 14 to 21 days to appear. As soon as they show, remove the plastic bags to let in air. A week later, thin to the best, two seedlings. After another week, thin to leave just one seedling per tube.
The remainder of the season is all about watering, ventilating, feeding, and nurturing.
Watering little and often is the secret. Check daily, but only water enough to keep the soil moist. This can be done with the aid of a small watering can.
With regard to pests and diseases, Peter does very little except manage the ventilation and paint his top surround with creosote to discourage aphids.
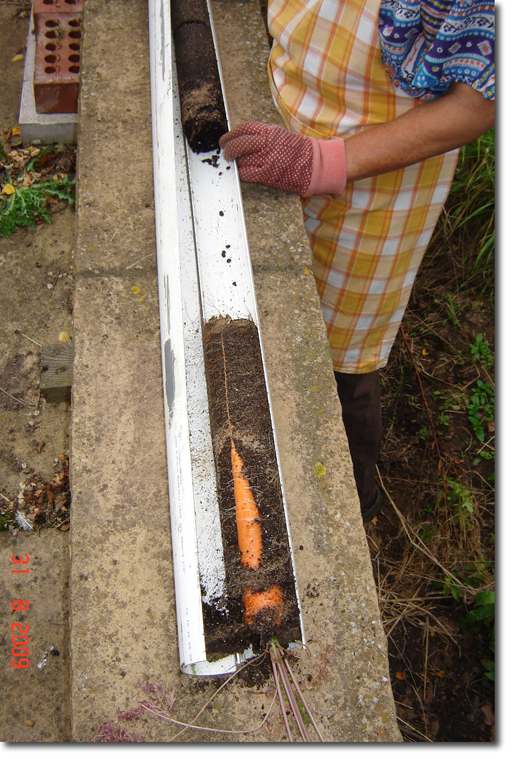
The final stage involves inspecting the pipes. It's best not to water a few days before opening so as to dry out the compost in the pipes. Bring the pipes down carefully and place on a level surface. Remove the tape and open, then carefully remove the carrot from the compost.
The main root is normally visible in the compost. Allow the compost to dry out slightly and then carefully tease away the carrot and gingerly remove the long root – working your way down the pipe.
Coil the long root in a large box with newspaper laid between the successive coils, then head for the show.
Diary
February
9/ Filled all six pipes with compost, watered from the top, and left to settle
11/ Fit clear polythene over front of pipes to warm them up
22/ Most pipes sunk as much as 6", topped off with compost
24/ Sowed 2 pipes with G.Watsons Select Long and 2 pipes with St. Valery Long, then covered pipe tops with polythene bags
March
2/ Watered and replaced poly bags
13/ Two Watsons showing
15/ Two St. Valerys showing now – removed bags
20/ Thinned seedlings to 2 per pipe
25/ Thinned out to one and lightly watered
29/ All are growing well—first true leaf showing
April
1/ Lightly watered
3/ Applied creosote to surrounding woodwork to deter aphids
4/ Provided more ventilation during full sun
7/ Attached plywood sheet to cover up part of pipes to keep them cool
19/ All doing well
21/ Watered lightly – one has slipped down 12" – refilled with compost and reseeded with G. Watsons Long carrot
24/ Covered remaining top section with plywood to keep cool
May
1/ Watered all pipes lightly
2/ Reseeded G. Watsons Long showing
3/ Hot sunny day –removed side doors to ventilate
5/ Watered lightly
7/ One carrot looking slightly red and weak, indicating problem with root
From this point on, they need little water
10/ Fed with Chempak No 4 (15-15-30)
24/ Hottest day of the year –removed side vents
June
18/ Fed Chempak No 4 (15-15-30)
July
6/ Carrot ½" across
August
5/ Leaving vents open all night now
15/ Two carrots with exposed tops are forcing pipe apart
18/ Watered, but very little getting down the pipe due to large carrot blocking flow
26/ Last day watering before lifting for show
29/ Lifted, but the compost had settled in some, so disappointing results
At the Show
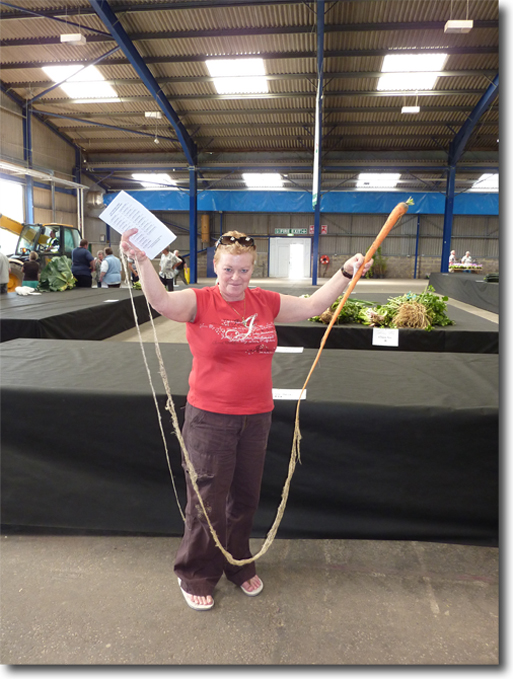
Transporting long carrots to the show is a precarious business. Their delicate nature means that one false move and all is over. It takes a brave person to risk 6 months of work. They must be kept moist to stop any brittleness. Joe Atherton wisely leaves this task to his wife. A wise move. I may try it next year.
The carrot is measured from the shoulder to the tip. The world record stands at 19' 2".
Final Comments
Peter's rig is very elaborate, but if you do not have a house wall that suits the needs, then long rooted vegetables can be grown in tubes attached to the side of a fence at an angle of about 30 degrees. They are grown in the same way, but if you cannot provide top protection, delay sowing until April.
Long Parsnips and Beets
For parsnips and beetroots, the growing method is the same as for carrots. The only difference is the seed.
Parsnips
A standard, off the shelf, seed variety is quite adequate, like Picador F1 described as having a long tapering root, smooth skin, and excellent resistance to canker. Medwyn Williams is a good supplier of this variety.
Beets
Again, like the parsnip and carrot, it has more to do with the grower than the genetics of the seed; but of course the seed does have some influence. Peter uses Robinsons Mammoth Long which is described as long and slender with dark flesh.
In 2008, Peter grew a world record long beet which measured 640.5 cm (21').
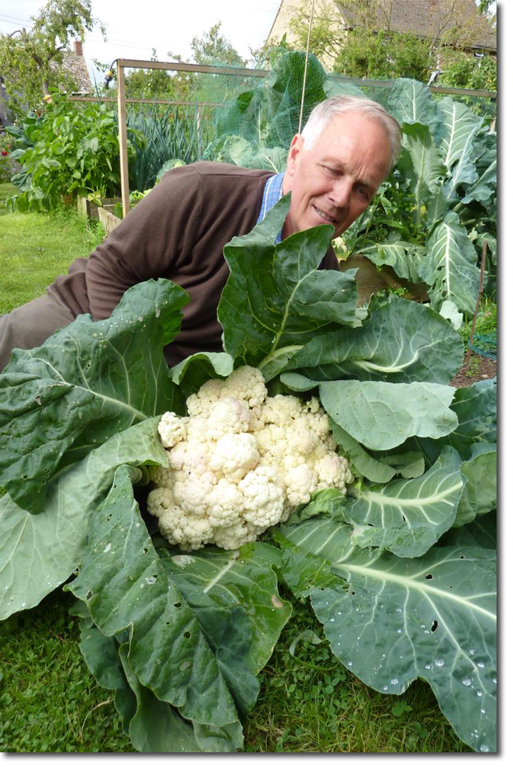
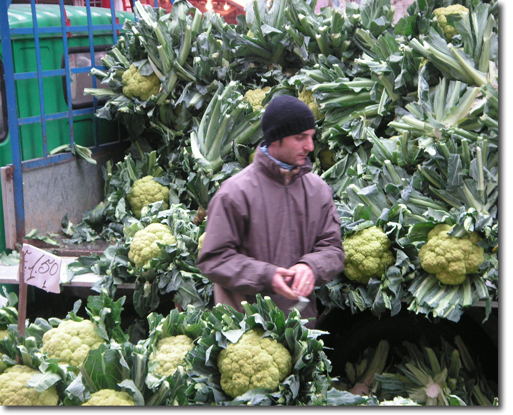
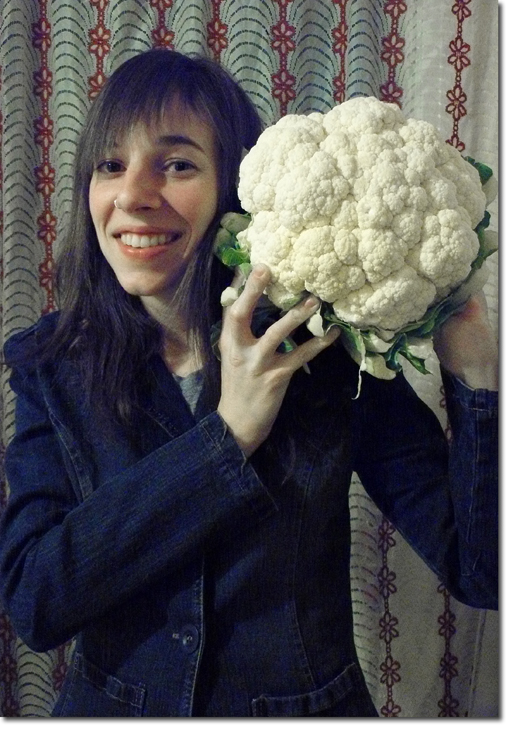
Cauliflower
There is no great mystery to growing cauliflower. Pick a reasonably sunny site for the place where the plants will grow to maturity. Then, prepare the soil correctly in advance of transplanting seedlings. Cauliflowers need soil that has been left to settle and digest any amendments added, so leave several months between digging and planting.
Dig over your soil removing any stones you find and work in plenty of well-rotted manure or compost. Tread on the soil to remove any air pockets and make the surface very firm. Do not fork over the surface before planting the seedlings – tread down gently, rake lightly, and remove any surface rubbish.
Cauliflowers will fail if the soil is too acidic, so aim for a pH of 6 to 7.5.
Starting
Cauliflower seeds can be planted in a seedbed or in pots indoors, then transplanted into their garden location. Germination requires 7 to 12 days at 21°C (70°F). When seedlings have their first true leaf, transplant to pots.
Transplanting
Once the plants have 5-6 leaves, transplant them to their final growing positions, spaced at least 75 cm (30") apart. If you start seeds in seed beds outside, water the seed bed the day before transplanting, and carefully lift the seedlings with as much soil as possible around their roots – placing them in prepared holes. Set the seedlings at the same level as in the seedbed, then pack soil firmly around their roots. Protect seedlings from birds with netting.
Cultivation
The secret of success is steady uninterrupted growth. From transplanting time onwards, they need continuous watering. If checked at any time, they will begin to form heads. Mulch the soil around the plants three weeks after planting, then drench. Replace mulch as it deteriorates, and pull all weeds.
Cauliflower grow slowly over a long period of time, so avoid rapid growth. If manure has been added, no additional fertilizer is needed prior to planting.
Cauliflower is a cool season vegetable that may be considered a challenge to those who haven't learned its secrets. It is a crop that needs both correct soil and climatic requirements. It is best grown so that it will mature in the fall.
Any delay in growth will encourage the plants to prematurely form a small head. In order to avoid this, the soil should be high in organic matter so that it will hold moisture. It must also be very fertile. So, using a great deal of well composted manure is a must.
If started early inside, cauliflower plants should be about 6 weeks old when set in the field. Cauliflower plants are grown in much the same way as cabbage plants.
Set the plants 4' apart. The plants should be set in the spring about 10 days after it is safe to set the earliest cabbage. The plants should be watered when transplanted to prevent wilting. Severe shock to plants at transplanting time often causes poor head development. Work a quart of chicken manure into the soil around each plant 3 weeks after setting out the plants and again a month later.
Curds may "yellow" if they receive too much sun, so protect the heads by using the plant's leaves to shade the curds. When the curd reaches about 3" in size, secure leaves with soft string, a rubber band, or a clothes pin. (A few varieties are self-blanching, meaning the leaves curl over the curd naturally.)
Harvesting
When harvesting, cut in the early morning when the plant is freshest, ideally with dew on it. During frosty weather however, it is better to wait till the warmest part of the day. Cut through the stalk close to ground level with a sharp knife, leaving enough leaves around the curd to protect it.
Unlike some brassicas, the cauliflower will not produce worthwhile shoots after its head has been cut, so clear the remains of the crop after cutting.
Some of the best cauliflower varieties are: Autumn Giant, All Year Round, Self Blanching, Snowball, Giant of Naples, Purple of Sicily, and Violetta Italia.
The world record was set in 1999 by Allan Hattersley of the UK at 54 lb 3 oz.
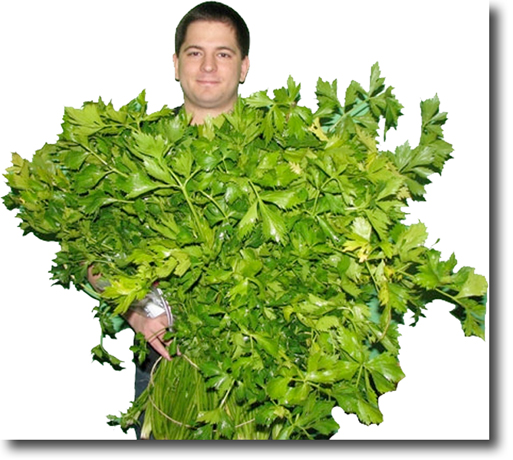
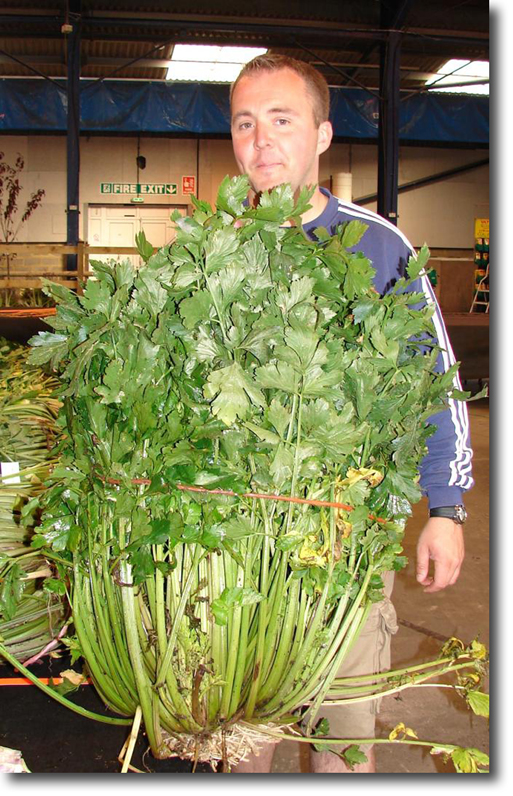 Celery
with Kevin & Gareth Fortey
Kevin and Gareth are major players in the giant vegetable arena in the UK and exhibit a wide range of vegetables. Their names are frequently seen on tables as prize-winners.
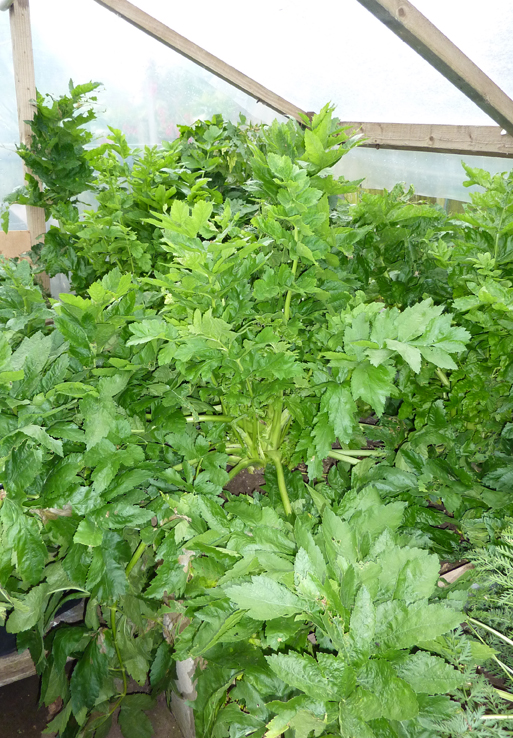
Kevin and Gareth are the sons of Mike Fortey, one of the legendary growers and pioneers of the giant vegetable growing movement. They helped their father from a young age and were taught how to grow and maintain a wide variety of flowers and vegetables. They gained considerably knowledge from their father until his death in 1996. Then, they realized how much more there is to learn, so in their father's memory, soldiered on to reach exceptional horticulture standards. They have won many top prizes and made several TV appearances. Though, they have never grown a world record. The brothers are very competitive in there growing, and they share with us their way to grow giant celery. They manage to grow celery to the ridiculous size of 16 kilos (over 35 lb). The celery is grown in a polythene tunnel in order to control the growing environment.
Seed
The seed used by Kevin and Gareth is one that their father nurtured over the years and is not generally available. But, the Ideal and Giant Red celery varieties are very good for growing giants.
Getting Started
Prepare the ground in October by adding plenty of well rotted manure – about one wheelbarrow load per square yard, then dig it in. Leave this to over winter. Three weeks before the celery is ready for planting, add to the bed a dressing of Vitax Q4 (5.3-7.5-10) and poultry pellets, then rototill in.
About the middle of January, start the seeds off in a seed tray full of good seed compost. Moisten the media, then sprinkle with seed and lightly press down. Cover with a coating of fine vermiculite and place in a propagator at 65º F (18º C). Full light is required to germinate. Remove from the propagator as soon as they have germinated and place in good light at room temperature.
After 2 weeks, thin out the weak seedlings. When they reach 3" in height, pot them up into 3" pots with 3 parts Levingtons F2 (see appendix) mixed with 1 part fine vermiculite and keep warm. Levingtons F2 compost is peat based with a small amount of fertilizer. Leave them to grow, keeping them moist at all times.
Transplanting
When the roots are showing at the bottom of the pots, and the temperature outside is 55º F (13º C) or above, it's time to transplant the seedlings into the tunnel. Set out plants 3'-4' apart and thoroughly water. As the plants start to grow, start feeding them with Vitax 301 (36-0-12) once a week to start with, and then twice a week as they gain in size. Also, give them a top dressing with peat and Vitax Q4 (5.3-7.5-10.0 + trace elements). To keep the nitrogen level high enough, spray with Foliar Vitax 301 twice a week. Keep watering and feeding twice a week until one month before the shows, then change the feed to Vitax 101 (26-0-26). Remove any decaying leaves to minimize heart rot and other diseases.
 About Celery
Ideal PH 6.0-6.5
It's the smallest vegetable seed at 70.000 seeds per oz.
Ideal germination temperature is 70º F (21º C)
Preferred growing temperature 55º-70ºF (13º - 21º C)
Celery does not like excessive heat
Soil needs good moisture retaining properties – ideally loam with high organic matter
Likes lots of nitrogen (N)
Likes lots of water but prone to heart rot
Seed – Ideal is very popular, as are Pink Giant varieties
Celery is related to the turnip and has a shallow root system that requires frequent watering. The roots are very large and need a lot of room to grow, so a light well drained soil is a basic requirement. Like cabbages, it requires calcium and lots of manure. Mulching is essential to keep the large roots moist
Celery can burn sensitive skin – so handle with care
Diary
January
15/ Sowed seeds into seed tray with good seed compost and put in propagator at 70º F (21º C)
February
7/ Seeds germinate
23/ Weak seedlings removed
March
1/ Potted seedlings into 3" pots
 May
May
1/ Pots full of roots – planted out in tunnel
June
1/ Started feeding Vitax 301 (36-0-12) twice a week
August
1/ Changed feed to Vitax 101 (26-0-26)
10/ Removed decaying leaves
September
3/ Cut best one for show
4/ Won 3rd prize with 16.0 kg. (35.2 lb)
October
10/ Selected best celery for seed production. Cut growth down to 6", potted up and placed in semi-heated greenhouse.
January Year 2
1/ Seed head coming up
June Year 2
1/ Cut off seed head—put in plain paper bag and hung up in airing cupboard
15/ Removed seed heads from cupboard, removed seeds, then stored in airtight container.
Saving Seed
To save the seed of your best celery, cut the stems off at 6" above the main root ball. Dig and pot up into a large pot with a mix of soil and peat. Keep in a semi heated greenhouse over winter to allow the plant to gain a deep root base. The seed head will come up around January or February and this will need help to pollinate. This can be done by gently shaking the stems daily. Around May or June the seed heads can be harvested. Place them in a bag and hang up in an airing cupboard or somewhere warm. Leave for about two weeks, then collect the seed and store in an airtight container. Keep the seeds in a cool place.
Double Digging
Start by digging a trench about 60 cm (2 foot) wide, and one spit (spade depth) deep of topsoil half way across the bed, place this soil onto the ground outside of the bed - placing it on a sheet of plastic or a board will protect the ground.
Use a fork to fork over the subsoil to the depth of the fork prongs. If turf was removed from the bed, put some into the subsoil (grass side down) and break it up with the spade. If no turf was removed, add some other organic material - well rotted manure, garden compost, or similar.
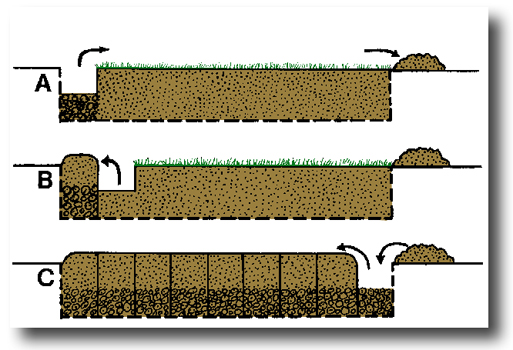
Stepping backwards, dig another 60cm (2 foot) trench of topsoil and put this onto the top of the subsoil and turf mix in the first trench, break up the topsoil and remove any large stones, roots, weeds, etc.
Repeat breaking up the subsoil in the new trench, putting in the turf or other organic material, covering with topsoil from the next trench, removing large stones, weeds etc until you reach the end of the bed.
Now moving to the other side of the bed, dig out a similar 60cm (2 foot) trench of topsoil and put it in the last trench on the first side.
Repeat digging the second side of the bed as described - forking the subsoil, putting in the turf/organic material, and covering with topsoil from the next trench - removing any large stones, roots, weeds, etc as you go.
When you reach the large trench, fill it in using the topsoil retained from the very first trench.
Level off the whole bed using a rake.
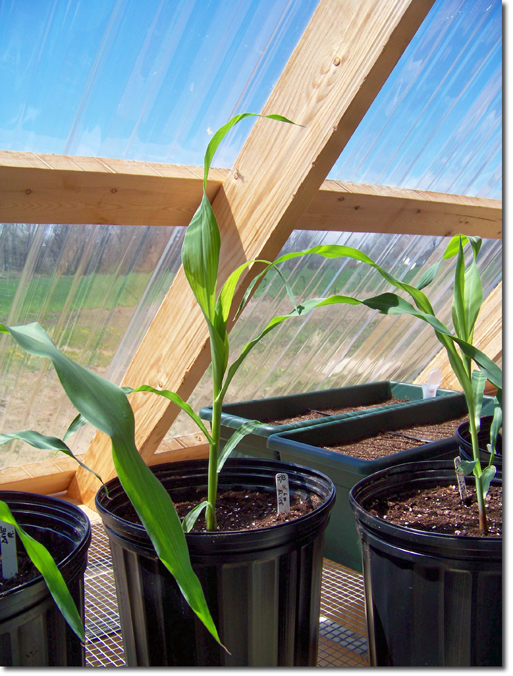
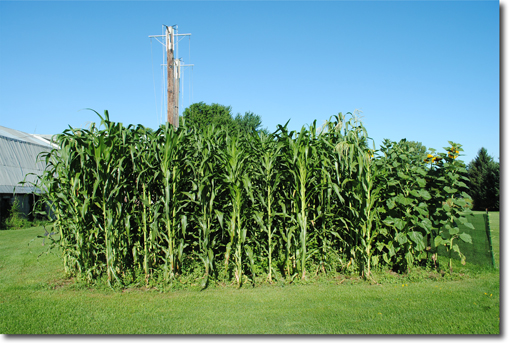
 Corn
Corn
with Brian Moore and Alicia Dill
Growing corn for height is a popular competition staged at agricultural shows. The rules are simple - the height of the corn stalk is laid out on the ground and measured for accuracy from roots to tassels.
There are many varieties (thousands of different types) of corn. Some kinds of corn are short, even 2'-3' at maturity. Most corn used as grain is in the 6'-8' range with some getting to 10'-12' with the correct amounts of fertilizer, sunlight, water, and temperature during the growing season.
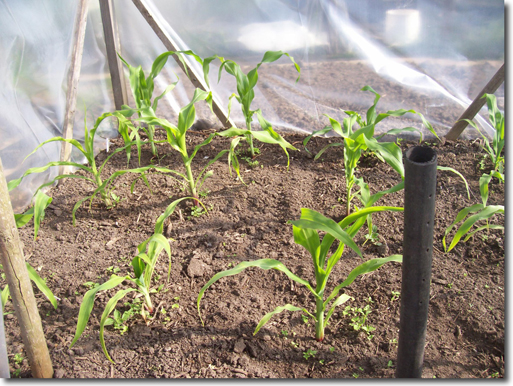
Many kinds of corn grown for ensilage or silage (where the whole stalk is used, not just the grain ear) are routinely 14'-16', or even 18' tall; because the intent is to have more mass to use as feed (since corn is a grass, think of it like really tall hay.)
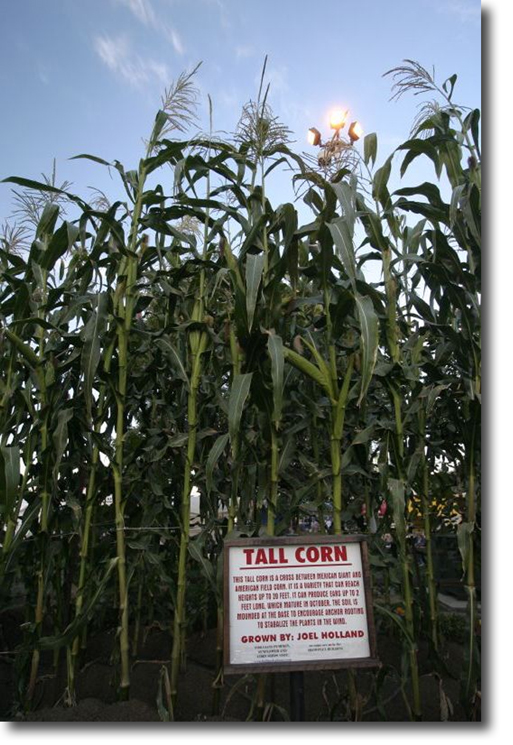
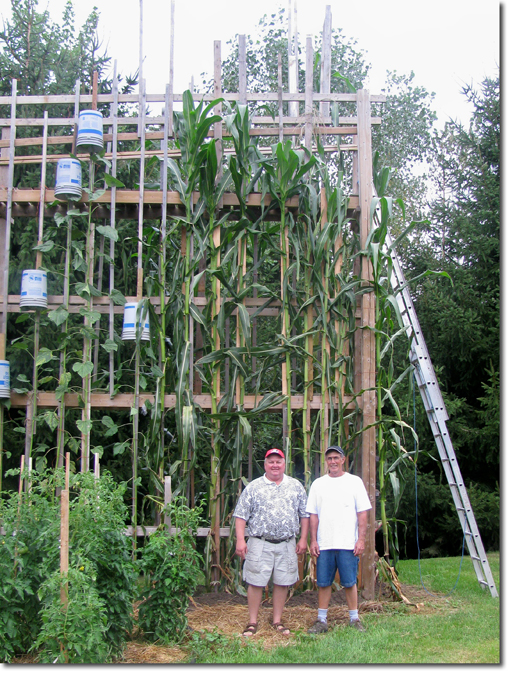
Some tropical varieties from Mexico and Peru, like Jala Maize, will easily grow to 20' by themselves, or taller if they are given special care for competitive "tall corn" contests.
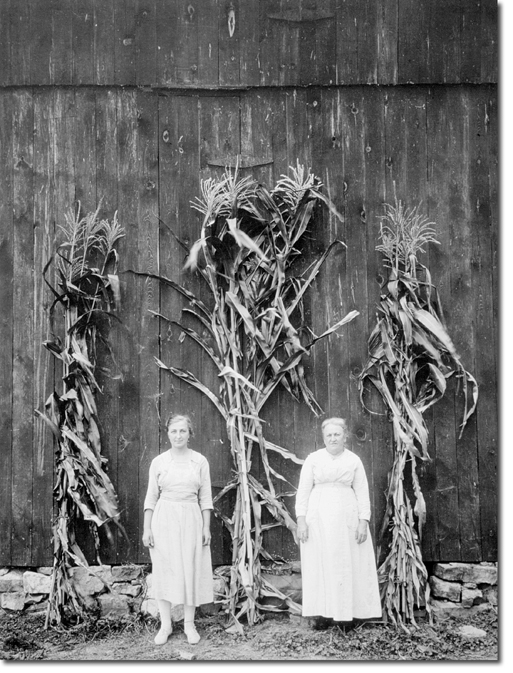
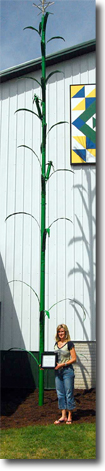
Don Radda from Washington, Iowa won the State Fair, tall corn contest every year from the 1930's to the 1960's. His tallest is a world record at 31' 7/8".
I mainly grow a variety from Mexico called, Jala Valley Landrace Maize. It's one of the tallest varieties of maize in the world, and it also produces the longest ears at around 2', with cobbs about 18" long.
Jala does not always produce ears, especially with taller plants. There is quite a bit of variation with this variety. I'm able to get these heights because Jala is photosensitive, and will keep on growing until we get short daylight days. I believe this is the variety that was used to produce the current world record.
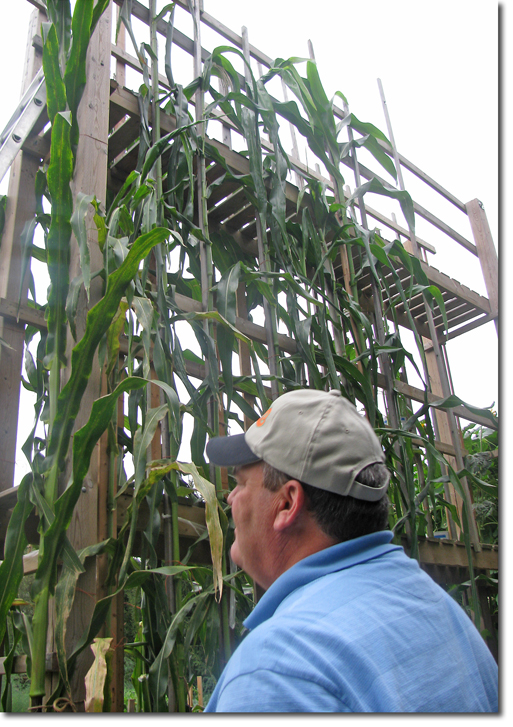
There are other giant varieties of corn out there, such as Mexican June White, which generally gets about 15-16 ft tall. There is a temperate corn named Goliath Silage that also produces some tall plants with large ears. Goliath produced an Iowa State Fair record at 18' 4".
I didn't seriously grow giant plants until 2002. There are people out there with a lot more experience than I have. Every year, I learn a little bit more. Someday I may even get a world record or two.
At one point, the late Don Radda was known as Iowa's Corn King. His record of growing a 31' 7/8" stalk in 1946 still reigns.
Julie Zieser, Radda's daughter and her husband, Wayne, agree no one will ever beat his record. The Ziesers live and farm Radda's land, where he grew his tall corn.
"The time he spent on this must have just been outrageous. You wouldn't find too many people who would put that much time and effort into something like this," Wayne says.
Washington, IA has since been known as the Tall Corn Capital of the World, for Radda's outstanding tall corn, during the 1930s -1950s.
"I knew my dad was pretty important, and we had a trophy room where people would come in and dad would show off his trophies," Julie says.
"He was always in the paper, and we were always so proud of him. He did die too young we feel.
Radda died in 1967 at age 65. For the past 30 years, there was talk around the town of what to do to honor him. The talk became reality when a metal sculpture, created by Tom Evans with Evans Welding, was erected at the Washington County Fairgrounds.
The plans became reality with the help of the city's Chamber of Commerce, the county fair board and the county tourism committee.
To this day, I can't come to Washington without someone mentioning something about my dad," Julie explains.
The county tall corn contest eventually was canceled in the 1950s because Radda would win every year. Later on, history was repeated when the Ziesers won the contest repeatedly.
"The tall corn contest was resurrected in 1983 and of course we had to enter it," Julie says. "Of course, we had to enter the tall corn contest here, and we won it for three years so they discontinued it again.
"It is a lot of work, and takes a lot of time. Life today is a lot more complicated, farming is just so busy."
It wasn't just the height of the corn that Radda was competitive with.
"Another thing that amazed me was not only his ability to grow it tall, he could also grow tremendous yields. He was the first to win the Iowa Masters Corn Growers competition," Wayne explains.
"In 1948 he had a yield of over 221 tons per acre. I think the following year, he had a 209 ton entry.
"What was amazing to me, was he was able to do that back then, without the technology we have today. He didn't have Bt corn, the built-in traits, or the crop-protection advantages that we have today."
Julie describes her father as intelligent, determined and an "Awesome musician." He played the piccolo.
"I guess my dad had a good sense of competitiveness. He wanted to be the best, and he knew he could be," she says. "He was intelligent enough, too, and he wanted to make a name for himself – and he did."
The longest ear of corn ever recorded is Bernard Lavery's 1994, world record 36" (92.08 cm) ear.
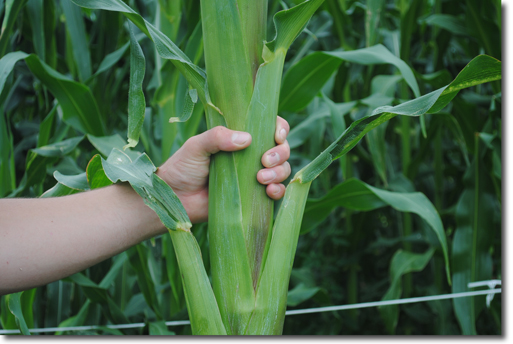

Cucumbers
with Alf Cobb
The world record holder for giant cucumbers is Alf Cobb. Unbelievably, at the time of writing this book, he is 93 and getting ready for his fourth consecutive world record attempt. Alf is almost deaf, but he knows how to grow cucumbers. His heaviest to date is 27 lb (12.3 kg), and his longest is 36" (91.4 cm).
His method of growing is straight forward and not complicated. The key is doing the right things at the right time. Alf rises at 5 am and waters his crops from water pumped from a well. His garden is only 100' away from a river. His soil, which is fairly sandy, has been influenced by the flood deposits of this river.
Alf grows his cucumbers inside poly tunnels on 6" raised beds filled with sandy, loam, garden soil, peat moss, leaf mold, and manure.
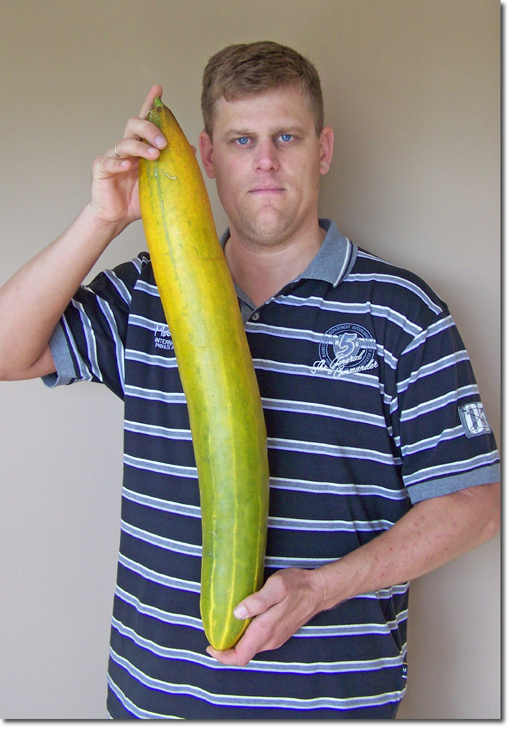
About Cucumbers
Preferred Ph 6.2—6.75
Nitrogen 100 ppm
Phosphorus 70 ppm
Potassium 400 ppm
Magnesium 100 ppm
Germination temperature: 25º C (77º F)
Days to germination: 7-10
Ideal growing temperature 20º C (70º F)
Temperature no less than 17º C (60º F)
Cucumbers are not frost resistant
Originated in Western Asia 1000 BC
Competition variety must be of the genus and species: Cucumis sativus
Seed
The origin of Alf's seed for heavy cucumbers is the variety, Zeppelin, which was originally given to him by Benard Lavery. There are a few seed suppliers who still carry Zeppelin.
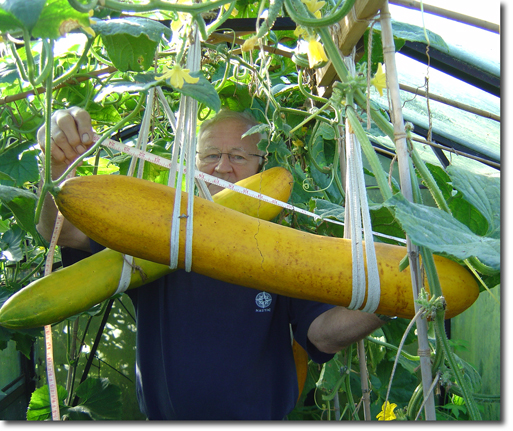
Germination
Select only the best looking seeds, and pot them up into 5" plastic pots using a good multi-purpose compost such as Arthur Bowers (see appendix). This compost is made with peat moss and 30% recycled green waste, with enough fertilizer to carry the plants for 4 to 6 weeks.
Alf's year starts in October when he removes the soil from his tunnels and replaces it with fresh soil from his garden. To this he adds 1"-2" of leaf mold made from cherry and apple tree leaves plus 2" of farmyard manure. It is all dug in, watered, and left to nature to get the soil working over winter. It is important to keep the soil moist so as to encourage bacteria and micro-organism creation that break down the ingredients into plant useable nutrients.
In early spring, generous amounts of leaf mold and well rotted manure are added to the soil again, and lightly forked into the top few inches. He keep the tunnels watered to produce a more productive, "living soil."
During the first week in April, start seeds in 5" pots filled with a multi-purpose compost. Place them in a propagator or heated green house. Alf prefers to use the 5" pots because he says, "It saves disturbing the roots and makes sure they are not checked when transplanting." It is important not to have any check in growth, particularly during the seedling's early stages.
Alf made his own mini propagator within his greenhouse. The propagator is a thermostatically controlled fan heater which blows over a bucket of water. This keeps the humidity high, which is ideal for cucumbers. The seedlings stay in the propagator for a month before being transplanted.
Around the first week in May, the plants are set out in the poly tunnel at 3' apart. At this point, he prepares a 5' high frame with 6' canes for support.
Water the transplants lightly but regularly. As soon as the plants start to grow above the 2' mark, feed them with a half-strength, diluted, high nitrogen solution with an NPK ratio like 25-15-15. Tie the vines as they grow at regular intervals, and remove all secondary vines. One vine is required so that all the energy goes into the production of one fruit. Weed and feed every 7 days, and as the year progresses, feed every 4 days. Give the plants a once-a-month treatment of Epsom salts (Magnesium sulphate).
Do not let any cucumbers set until July, or they will be over ripe for the shows in September. Also, do not let any fruit develop unless it is at least a meter high, otherwise it will touch the ground and spoil. Delaying fruit set will encourage a strong root system.
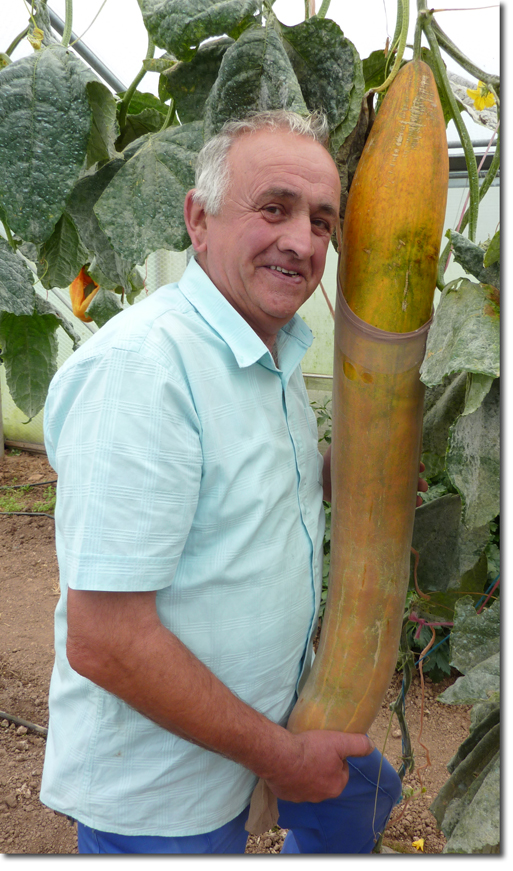
It is important to keep the bugs at bay by regular spraying with a good insecticide. Do not forget to spray under the leaves as well as on top.
As the cucumbers start to put on weight, select the best and thin out all the others leaving only one per vine. Support the cucumber at its end with a hammock and securely tie the stem to the supports. Failure to do this can cause the cucumber to break off.
Unlike most cucumber growing it will not be necessary to assist in pollination nor do you need to remove any flowers. Just let the bees do what they do best.
Hammock-style supports with stem tied up with heavy duty string/rope
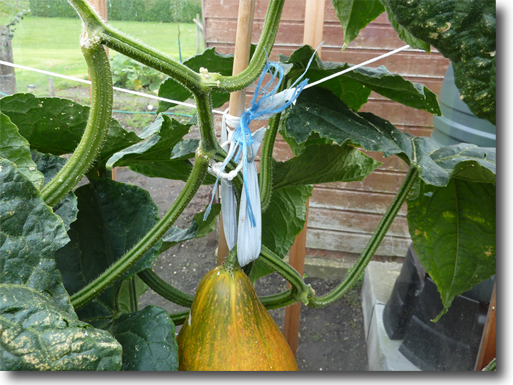
Watering
Alf waters his plants every other day at 5 am. The water he uses is pumped up from a well in his garden. This may have some positive effects on growth since it contains minerals and maintains a constant temperature. Cucumbers love humidity, so spraying the ground surrounding the plants in the morning helps to keep it high. Do not water the leaves during the heat of the day as they will burn.
Well head with pump
Diary
February
21/ Sprayed soil with vine weevil insecticide
23/ Covered soil with 1" of leaf mold and 2" of manure, and dug in
March
10/ Dug in peat and fertilizer
12/ Set up watering system in tunnels
13/ Watered tunnels
April
1/ Watered tunnels
6/ Started cucumber seeds
9/ Seedlings showing
28/ Sprayed tunnels for thrips and whitefly
May
3/ Planted cucumbers in tunnels
June
1, 3/ Fed with liquid seaweed solution drench
5/ Tied up cucumbers
8/ Pruned some leaves that showed signs of powdery mildew
9/ Tied up cucumbers, and applied Epsom salts
18/ Sprayed for black fly, greenfly, and thrips
28/ Cut off side shoots
29/ Hoed top soil
July
4/ Sprayed for greenfly and whitefly
7/ Tied up cucumbers with an old shirt to support fruit
9/ Applied Epsom salts
14/ Fed cucumbers with 25-15-15
August
9/ Applied Epsom salts
14/ Fed cucumbers with 25-15-15
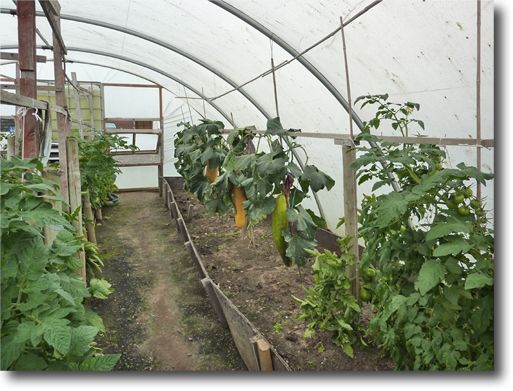
September
3/ Picked best cucumbers for the National Giant Vegetables Show
5/ Won first prize with another world record
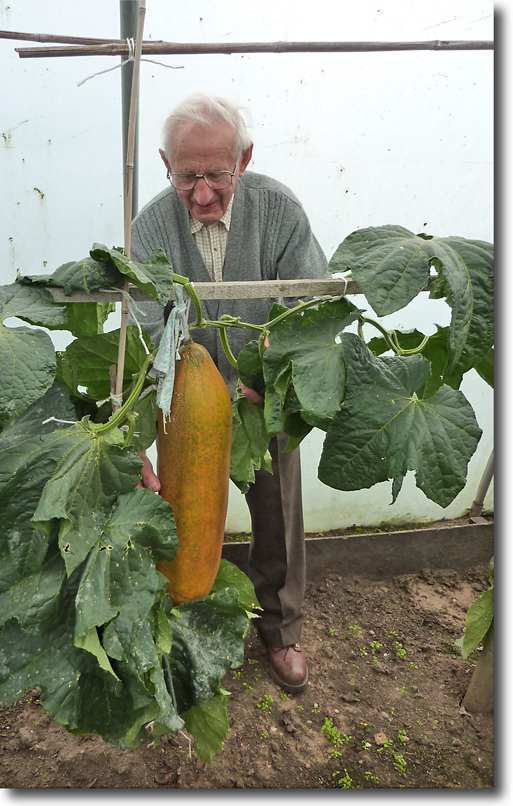
October
10/ Changed soil in tunnels with fresh soil from garden
13/ Sprayed tunnels with Armillatox (a soap based cleaner)
21/ Removed seeds from best cucumbers
30/ Worked in 1"-2" of leaf mold into the top 4" with a rake
November
4/ Sprayed Armillatox again, and set off smoke bomb in tunnel
The Show
Pick your best fruit, choosing either the heaviest or the longest according to the show. Cut the stem to 1" long and wrap the fruit in a clean damp cloth. They are fairly hardy, but take no risks by transporting in a box.
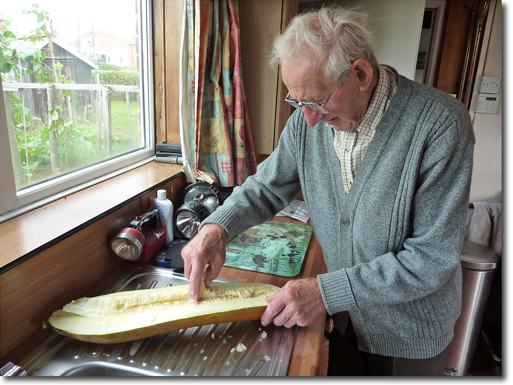
Seed
Allow the cucumber to fully ripen – it will become soft but not rotten. Split open lengthways and scoop out the seeds. Place them on paper towels and leave to dry naturally. Store in paper envelopes.
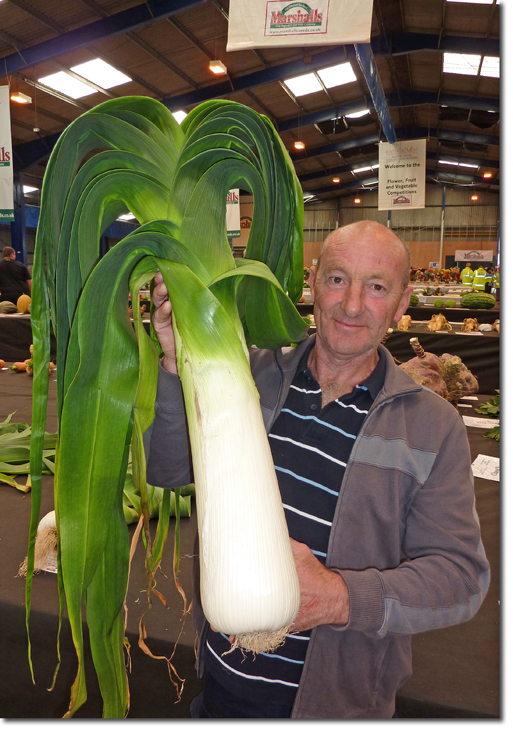 Leeks
Leeks
Pot Leeks
with Joe Atherton
The growing of massive leeks is a hobby developed by the mining community in Alisa Craig, an island off the coast of the UK. It is also the national emblem of Wales. The tradition, secrets, and techniques have been passed down through many generations. But, Joe is happy to pass on his world record growing method and says, "If you beat me, then you're a better grower than I."
To understand good growing techniques, it pays to look at the grower and ask why he or she is so successful. Joe is only 5' tall and has the face of a mischievous teenager. But, what Joe has in abundance is the will to succeed, skill, and dedication. He leaves nothing to chance. He analyses his soil, measures light intensity, temperature, and humidity, and is meticulous about all his procedures and feeding programs.
Behind every good gardener is a good woman, and Joe's wife is no exception. He actually trusts his wife more than himself in unearthing delicate long carrots.
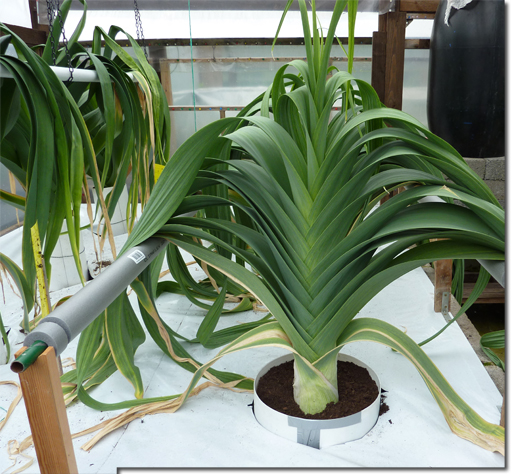
All About Leeks
Leeks originate from ancient Egypt and have been grown successfully for hundreds of years in cooler climates. The northern parts of Britain are a few degrees cooler than the south, and hence, a preferred location to grow them.
Leeks are biennial plants that can reproduce in three different ways – seeds, pips, and grasses. The best chance of success is to allow the leek to go to seed, and then harvest one of the three.
Seeds will not necessarily reproduce copies. Some people sow these seeds and select potential leeks, but this is very time consuming and risky. Pips come from the seed head and look like small pearls. These are genetically the same as the plant. Grasses are like miniature leeks growing out of the flower head. These are also genetically the same as the plant, and this is what Joe uses.
All three can also be obtained from reputable suppliers. Joe uses a variety called Wilton, but a number of other seeds, pips, or grasses can be obtained from competitive growers.
Autumn Preparation
The leeks are grown in polythene covered raised beds, which are reworked every 3 years. The growing media in the beds is made up of soil, peat, and sand of equal proportions, plus 5% pearlite. In the autumn, I cultivate the top 18" of the soil and send a sample to be analysed. After adding what has been recommended by the soil analyst, I hoe it in, water, and leave it to breakdown over the winter. Around mid-March, I decide where the leeks are going to grow. They need at least a clear space of 12" all the way around to let the roots grow properly. Dig a hole in each chosen place for a 10" pot, or the same size pot as the leeks are in. I bury a similar empty pot, and cover the whole bed with clear polythene to heat it up. As soon as the soil temperature reaches 52º F (12ºC), the leek seedlings are transplanted into the holes created in the bed.
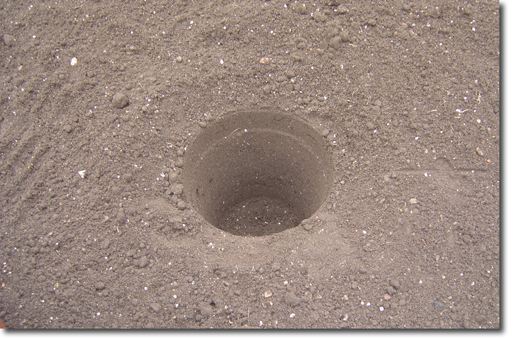
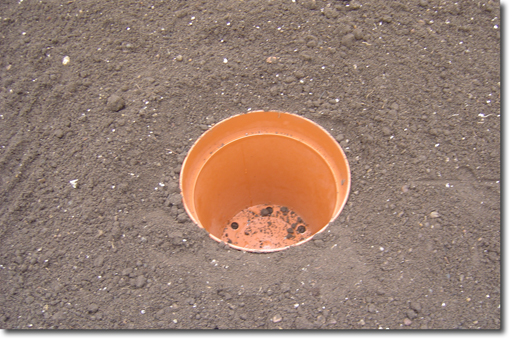
Seeds
I sprinkle the seeds onto a tray full of good quality seed compost. It needs to be at least 3" deep. Sieve it with a 1/4" mesh to make sure there are no lumps. Water the compost so that it is moist but not wet. Check that the seeds are at least ½" apart, use tweezers to plant if necessary. Cover with ¼" of compost, then tap the tray to settle the compost – do not compress. Place the tray in a propagator and keep at 65º F (18º C). Control the moisture level and ventilate to prevent damping off.
After about 10 days, the seedlings will appear. Place the tray in full daylight at 65º F (18º C) without any covering to allow good ventilation.
When seedlings have there first true leaf, which is the third visible leaf, then they are ready to transplant into pots.
Pips
To sow, place them on damp compost at a temperature of 55º F (13º C), and allow the shoot to emerge.
Transplant them into 3" pots with 50/50 Levingtons M3+M2 (see appendix). Water, and leave on a heated bench for about a week.
Grasses
Do not pick the grasses off the seed head until they are ready. Give them a gentle pull to check. When they are ready, place the whole head in a bucket of fungicide for 24 hours. The following day, the grasses should fall out by themselves.
Select the best grasses and pot them into 3" pots with an equal mix of Levingtons M3 and M2. I place them on the bench in the greenhouse, and maintain a temperature of at least 50º F (10º C)
Potting Up
When seedlings are 1 week old, turn on growlights to supplement day light. Lights should be on for 8 hours in late October starting at 8 am. As time goes by, increase the growlight hours by 15 minutes per week to match natural sunlight.
As a general rule, the leeks will need repotting every 4 weeks into 5", 7", 9", and then 10" pots using the same compost mix except for the final potting in which case, I use 7 parts Levingtones M3 + 1 part perlite. I repot whenever roots appear at the bottom of the pot.
Spray regularly with insecticide to control pests such as red spider mites, aphids, and thrips – usually once every 2 weeks starting in May.
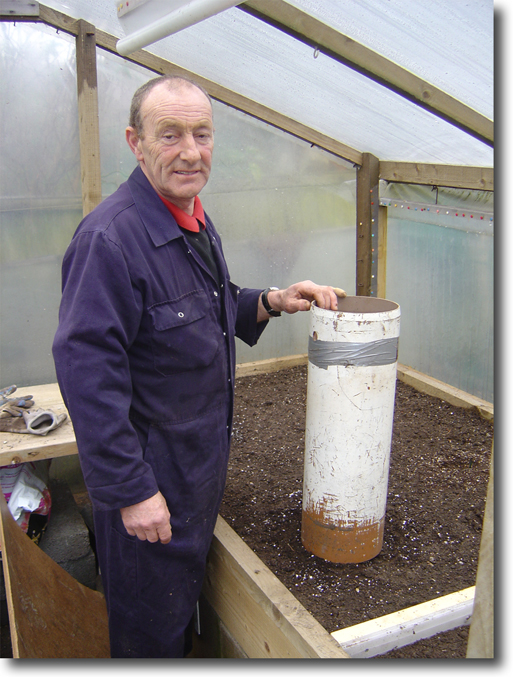
Transplanting To Greenhouse
When the 10" pots are full of roots, and the greenhouse soil is 52º F (12ºC), transplant them into their final growing areas. Cut a hole in the polythene sheet above the buried pots. Remove the buried pot and tap out the leek from its pot. Place carefully into its new home and water thoroughly, keeping the soil moist but not soaking wet. If needed, start supporting the leaves to prevent them from touching the soil; which will help prevent diseases such as mold and botrytis from starting. On cold nights, cover the plants to protect.
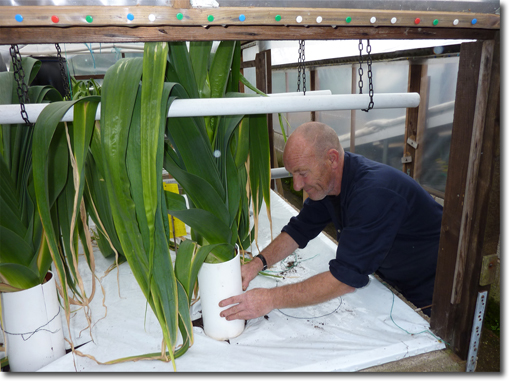
Growing On
Add fertilizer as suggested by the soil analyst. It is important not to add all the fertilizer in one go for this may cause the roots to burn. Water little and often to keep the soil moist.
Look for pests and diseases and spray accordingly, but remember to do it when it is cool and overcast. Look for any signs of disease such as fusarium rot, and remove the plant and any surrounding soil to prevent it from spreading. Destroy the plant and dispose of the soil. Do not put it on the compost heap, or you will further propagate the disease.
If you intend to eat any of the leeks, do not spray within 3 weeks to allow the pesticides to dissipate.
If the weather is hot, consider shading the plants to keep them cool. As the leeks grow, cover the stem with tubing to promote stem growth.
One week before the show, measure the leeks and select the best. The best way to do this is to use a non metallic tape measure. Measure around the stem's circumference. Circumference is a good indicator of weight – the bigger the circumference, the heavier the leek.
Show Preparation
Dig your best leeks with a fork and remove any dirt with a water spray. Weigh them, and place the heaviest in a bucket containing 3" of water. Keep them in the bucket for transportation. At the show, weigh them as soon as possible to prevent weight loss.
Diary
October
1/ Threw out all plants and foliage.
3/ Cleaned green house from top to bottom with Jeyes Fluid (see appendix)
9/ Burned sulphur candles in the greenhouse
18/ Started up greenhouse, oil-fired boiler
19/ Soaked leek heads in Benlate solution for 24 hours
20/ Took 77 grasses off of heads and potted up 24 of the best into 3" pots with 50/50 Levingtons M3 and M2. Stood on staging and watered
27/ Now that they have rooted, I supplemented light with a 400 watt high pressure sodium bulb. Light is on for entire daylight period.
November
10/ Inspected pots for complete root growth, then transplanted into 5" pots with 7 parts Levingtons M3 + 1 part perlite
December
8/ Pots full of roots – repotted to 7" pots with 7 parts Levingtons M3 + 1 part perlite
January
7/ Pots full of roots –potted up into 9" pots with 7 parts Levingtons M3 + 1 part perlite
8/ Sent sample of soil to be analysed.
14/ Results back from analysis – pH 6.77 – added 1½ ounces of dolomite lime/square yard, and worked into the top 8" of soil.
February
11/ Potted up into 10" pots with Levingtons M3 + 1 part perlite – my last repot.
15/ Added superphosphate (0-20-0) at 1 ounce/square yard + potash (0-0-60) at 1½ ounces/square yard.
30/ Covered soil with clear polythene to warm it up
March
14/ Raked in 1½ oz of nitrogen, Sulphate of ammonia/square yard
15/ Dug holes 24" apart to take 10" empty pots. Covered with polythene
22/ The soil temperature has reached 52º F (11º C) for a week. Planted leeks.
April
3/ Removed polythene, and watered soil to dampen.
4/ Added supports to prevent leaves from contacting the soil
18/ Raked in 2nd dose – 1½ oz of Sulphate of ammonia/square yard
May
9/ Raked in 3rd dose – 1½ ounces of Sulphate of ammonia/square yard
25/ Found red spiders mites, so sprayed plants with Dynamec pesticide
June
8/ Sprayed with Dursban to kill any young red spider mites
22/ Sprayed with Dynamec to kill off red spider mites
July
3/ One leek is listing to one side – fusarium found around root – dug up and discarded. 22/ Sprayed with Dursban – still have a small problem with red spider mites.
August
6/ Sprayed with Dynamec to kill off any red spider mites
27/ Measured each leek to pre-select for the show.
September
1/ Dug up leeks for show –washed the roots and weighed them. Placed them in a bucket containing 3" water.
2/ Shaved hairs off seed head
Pests and Diseases
Fusarium
This is a soil borne disease that manifests itself as brown patches. Usually caused by over watering and over applying nitrogen. A common problem when trying to push your plants. There is no cure and fusarium will stay in the soil if it is not sterilized.
Thrips
They are tiny, 1-2 mm insects with thin, feathery wings. Most thrips feed on plants, but some species are predatory on other small arthropods. Feeding injury often appears as sunken, silvery patches on leaf surfaces. Prevention is easier than cure, so spray regularly with a good systemic insecticide.
Plant-feeding thrips develop from eggs through several immature stages to a papal stage, then emerge as adults. Eggs are laid on leaf tissue, larvae feed on leaves, and the pupae stage often occurs off the plant in the soil. There are multiple generations of thrips each year, so populations can build rapidly to damaging levels. The generation time from egg to egg can be as little as two weeks
Spider Mites
A minute red spider mite will turn the leaves white. Prevent with insecticide, increase ventilation to keep cooler, or treat with SB Plant Invigorator (see appendix). You may need to spray repeatedly to kill the eggs.
Slugs
Slugs will attack leeks, so it is advisable to put a few slug pellets around seedlings.
Aphids
Aphids are a most destructive plant eating insect that thrives on young growth. They can amass quickly into the thousands, so they need to be controlled as soon as possible. Spray with a systemic insecticide.
Ants are often present when aphids are about. They feed on the Aphids' honeydew bodies. So, be on the lookout for ants and destroy them as well.
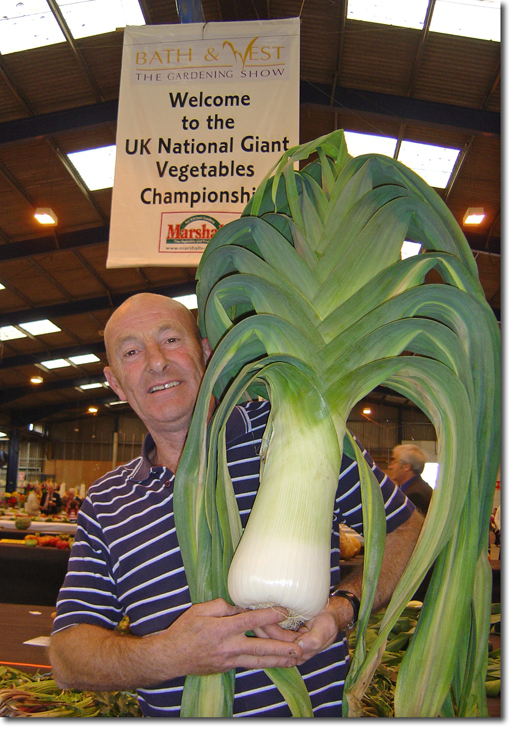
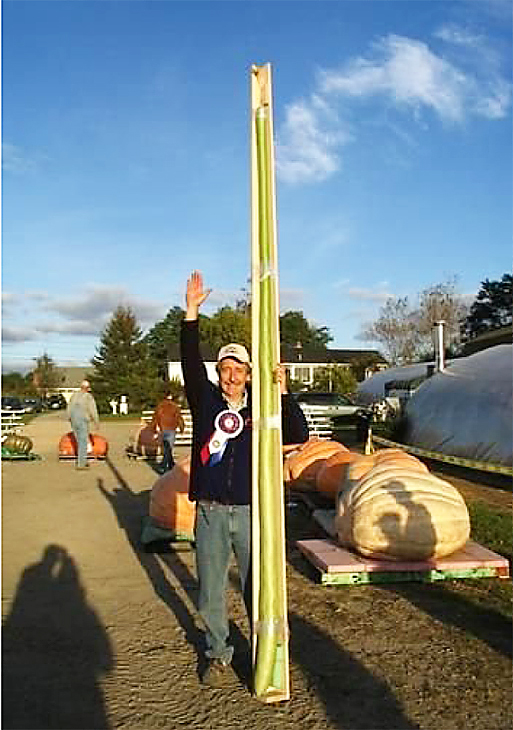
Long Gourds
by Joe Jutras
At the annual winter giant pumpkin seminar in Ontario, Canada, I asked Al Eaton for some help. Al had been growing long gourds and I knew he could get me started. He was happy to give me seeds and tips on how to grow them. He explained that they need very little room to grow, and require far less work in growing than giant pumpkins. Al mentioned that germinating long gourd seeds was often difficult, so he gave me some "practice" seeds to try first.
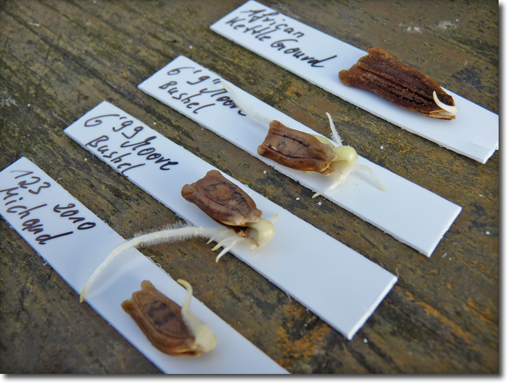 I cut the very tip off the seed, filed the edges, and soaked them overnight in warm water. I placed them in a damp paper towel, and placed it in a plastic bag in an 80 degree cabinet. After three days, you could see small roots starting to protrude from the seeds. I planted them in 8" pots and set them on a warming mat. In three days they broke through the soil.
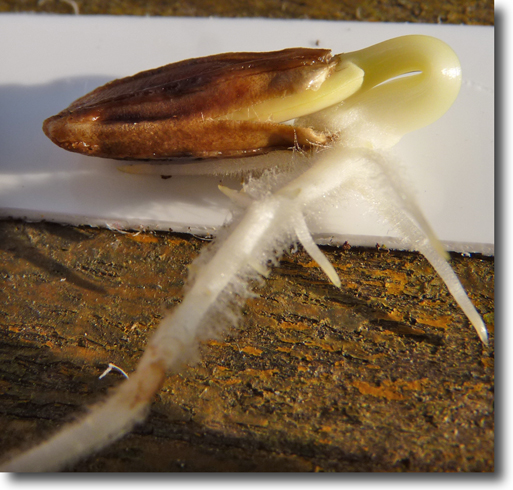
My soil prep was done in early April in a 20'x20' vegetable garden that I hadn't used in 4 years. I added 2 yards of cow manure, 2 yards of compost, one bag of gypsum, and 20 pounds of lime to a 12' long, and 4' wide, raised bed. I worked-in a half cup each of mycorrhizal fungi and dried blood to the 4' wide planting holes.
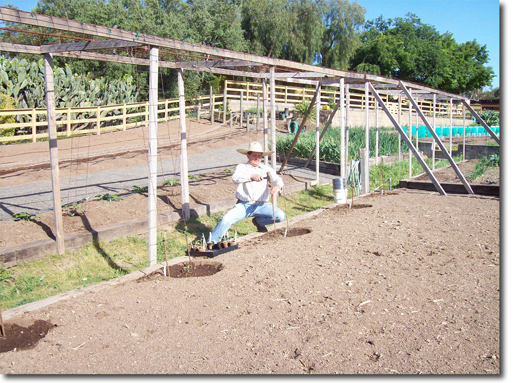
I applied a foliar-spray of seaweed, and a soil-drench of fish and seaweed weekly. My spray schedule is the same for my pumpkins.
I started my seeds on May 1, and transfered them to my greenhouse soon after they were up. I transplanted them into the garden in early June, and left them in a cloche throughout the month of June.
My son and I built the trellis on the 4th of July. We used 12' long, 2x4's for legs (46" on center), and 12' long, 2x6's for rafters. We stapled 4' wide, 6"x6", cattle fencing up one side and over the top of the trellis. Our finished trellis is 12' x 12' x12', and supports 3 long gourd plants.
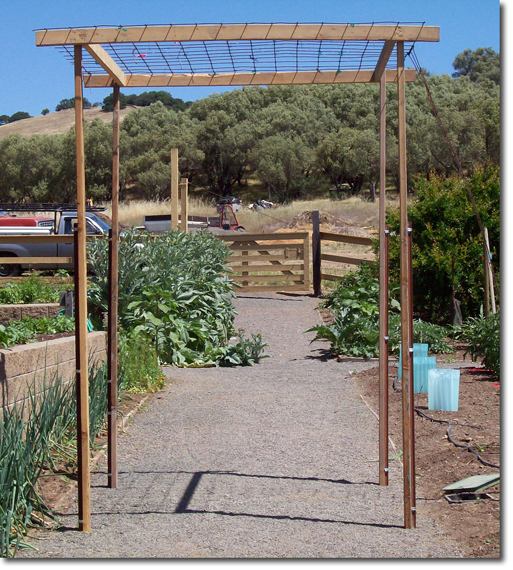
By now the plants were 6' to 7' long and growing very fast. By the end of July, they completely covered the trellis. They were 25' long, and each plant covered 100 square feet (a 10' x 10' area). I pruned them to 4' wide.
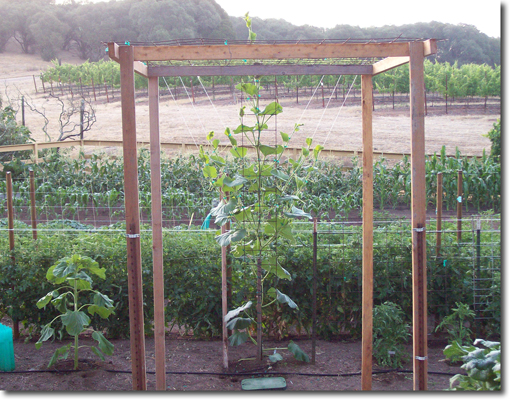
Long gourds bloom at night, covering the trellis with hundreds of white flowers. I hand pollinated at around 9 pm, from a 6' step ladder, using a miners' flashlight strapped to my forehead. It gave me both hands free to pollinate.

As the long gourds became heavier, I realized that I needed to support them. I learned this the hard way when I heard a thump while working in the pumpkin patch one evening. One of the gourds had broken from the vine. I tied the rest to the top of the trellis with nylon stockings. I placed split pieces of garden hose around the wires above the gourds to keep the wire from cutting them.
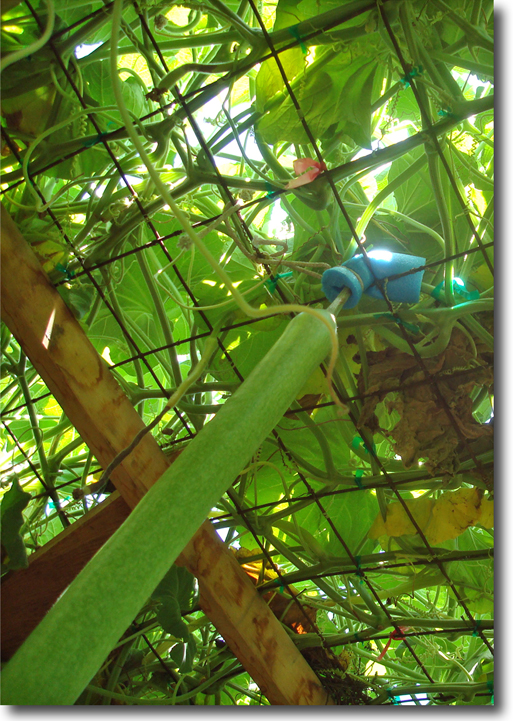
When the gourds were 8' long, I drove stakes into the ground on either side of each gourd, and tied the gourds to the stakes, using foam padding to cushion. This keeps them from swaying.
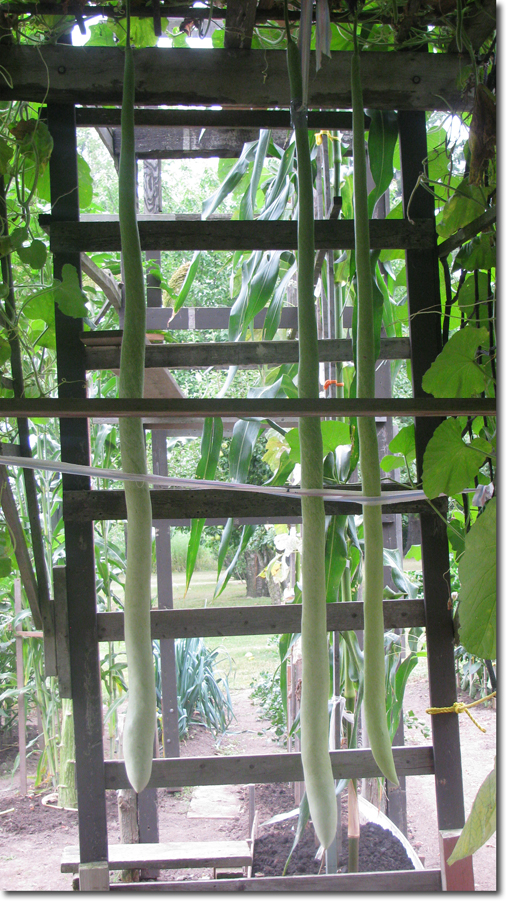
We measured daily from three weeks after transplanting until they stopped growing. We harvested when a weekly measurement did not increase. Before we cut the gourd off the vine, I made a board support from two pieces of wood 1"x4" by 11' long – screwed together at a 90º angle. We stood it up against the gourd and used stretch-wrap to hold it securely to the boards. Then, I cut the stem.
What a relief to get it down in one piece!
I would encourage anyone who enjoys gardening to give long gourds a try. I think you will be truly amazed with them.
— Joe Jutras has been responsible for growing some of the longest long gourds ever grown (a world record in 2006 at 126.5", and a world record pumpkin in 2007 at 1689 pounds).
There is a great article about growing long gourds by John and Chris Lyons that follows.
I thank John & Chris and the GVGO for allowing us to reprint it here.
by John & Chris Lyons
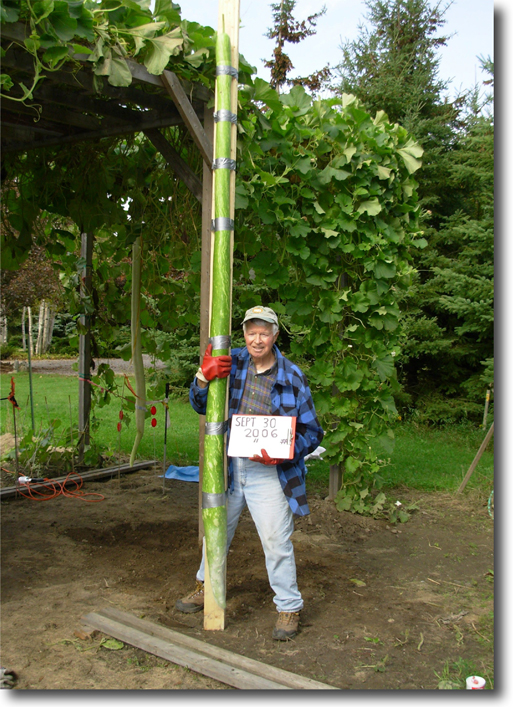
Growing long gourds has become popular with many giant vegetable growers because they provide a great opportunity to grow something quite different in a relatively small area with less time and resources than growwing giant pumpkins. Gourd vines can grow up just about anything, but an overhead trellis is the best way to go if you want to be competitive and have control over the plant and vines. We grow our long gourds on two trellises, which are 10' tall and are about 10' x 10' square on top. They are constructed with 4x4 main posts and 2x4 framing on the growing sides and top. There are 4'x8' sheets of lattice on two sides for the vines to grow up on and a 1'x3' cross frame on the top, which allows for easy access to the vines. It is advisable to build a strong structure that will support the weight of several large gourds. We have found that you will need at least 5' of side and top width to train a gourd vine or two plants on a 10' x 10' trellis. You should try to face the vining side of the trellis towards the west to southwest to get the best exposure to the sun and allow the gourds to be grown in the shade underneath the vine and trellis. This will prevent the sun and wind from prematurely hardening off the soft skin that is necessary to grow really long fruit.
Preparing the soil is always an important step. At the base of each trellis every spring, we mix 3 wheelbarrow loads of well composted manure into each planting site, which is about 5' x 5' and dug to a depth of at least 1'. A pH level of about 7.0 is ideal and we add some peat moss each year to help keep our pH at that level.
Germinating seeds can sometimes be a bit of a challenge, as some seeds can be more difficult to start than others. We soak the seeds for up to 8 hours in 3% hydrogen peroxide, which is diluted up to 10% in water. After soaking, the seeds are wrapped in damp paper towels and put into sealed plastic bags. They are then placed on a heat tray at about 85º F (30º C.) until germination begins after a few days. The germinating seeds are then planted into 6ʺ pots to prevent the plants from becoming root bound. I have found that most varieties of long gourds are best to be germinated from late Apri to early May. Gourd plants that are grown under artificial light will be leggy and weak and must be tied to a stake right from the beginning. Plants that are kept in natural sunlight will be stockier and easier to handle, but slower to start vining.
We like to transplant to the growing site around mid‐May or when conditions permit. I like to plant them at least a foot back from the trellis, and protect the plant in a mini greenhouse. A stick is used to guide the vine to the trellis, about 3' above the ground. If the plant is already staked in the pot, transplant the plant and stake together. Fertilize with a 10‐52‐10 water‐soluble fertilizer the first few weeks, and then switch to a balanced 10‐10‐10 or 20‐20‐20. Donʹt forget to spray for insects and disease as required. Once the plants get established and begin vining, you can start to prune off excessive side growth and train the main vine over the top of the trellis, allowing it to grow over the top while removing the excessive side vines.
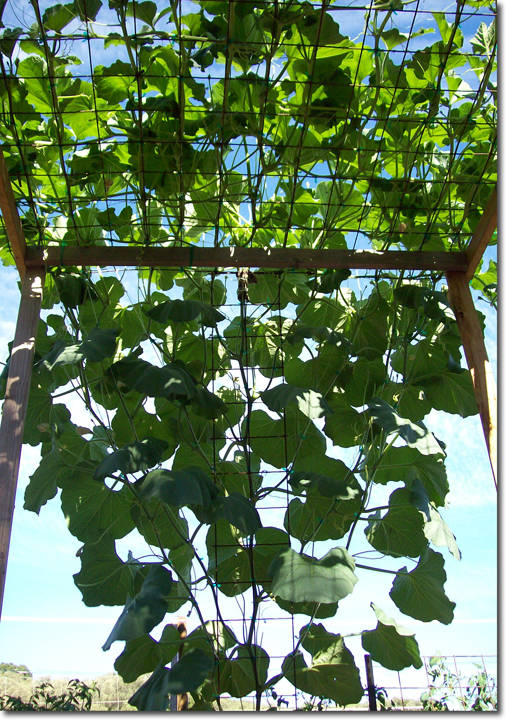
Long gourds generally open in the evening and are done by mid‐morning. Look for the white flowers and a 3"‐4ʺ fruit. Pollinate with a few male flowers, but be careful because the female bloom is very fragile and pollinating must be done with a light touch. I have found that few female blossoms are successfully open pollinated.
If you want a competitive long gourd, you should limit plants to 1 or 2 fruits per plant after they reach 18ʺ‐24ʺ in length. Try to select fruit that are slender and that are the fastest growing. Make sure the gourdʹs vine is secure and will not pull down from the trellis. You may have to provide extra support for the vine at this area of the plant.
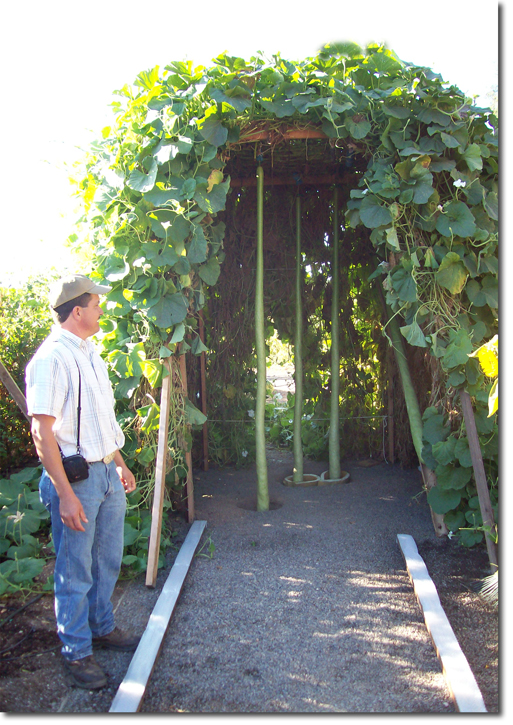
Good genetics pay off. A seed that is a fast grower will do well, as most growth will be done in 4 weeks. During the peak week of growth, they can gain 5ʺ‐6ʺ per day before they start to slow down. At this time you can start to pollinate another batch of gourds. Some long gourds become thick and heavy as they mature and may require extra support. For many years we have skewered heavy gourds with a stainless steel pin, near the top, and used cloth strips or soft rope to tie it off. Failure to support the gourd may eventually cause it to break off the vine.
After the gourd has stopped growing for several days, we carefully cut them down and store them in the basement. They will last for months like this and become harder and less likely to be broken. Sometimes we tape a long board to the gourd, even before we cut it down, to make sure it doesnʹt break while we are moving it. Especially, if itʹs a long one.
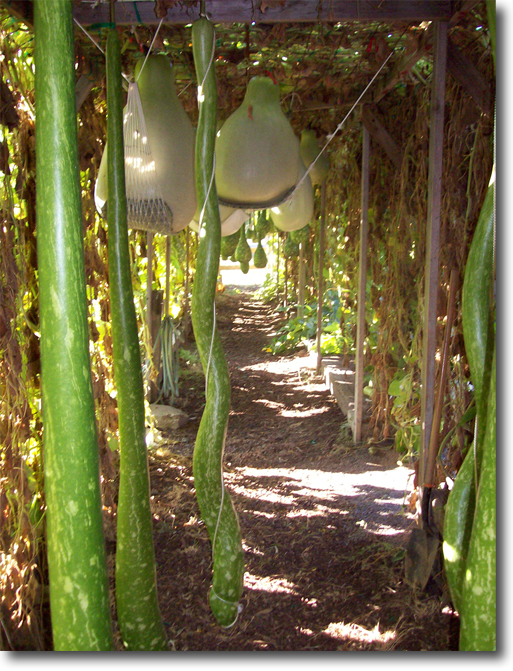
Watering is always a little subjective due to soil and weather conditions, but there is a guideline. In the early season we keep them damp, usually watering 2‐3 times a week about the way the pumpkins are watered and during the hot weather every other day and sometimes every day when the gourds are running. We frequently test the soilʹs moisture level with a soil probe as we do with the pumpkins. When the gourd's growth slows up, then the intervals between watering must be reduced, as well as less water per watering. Gourds like to be kept damp but not too wet. Usually they receive 4 galllons of water per plant a day during peak growth, but that need can vary in different soil and weather conditions.
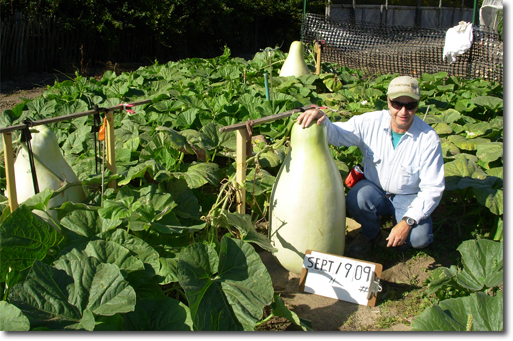
— John & Chris Lyons have been responsible for growing some of the longest long gourds ever grown.
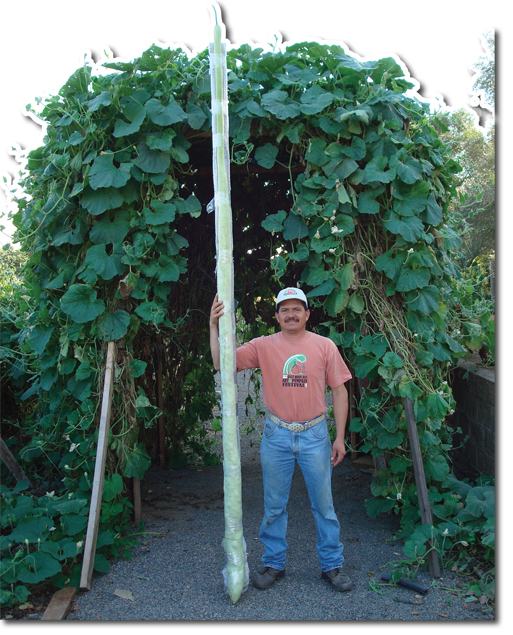
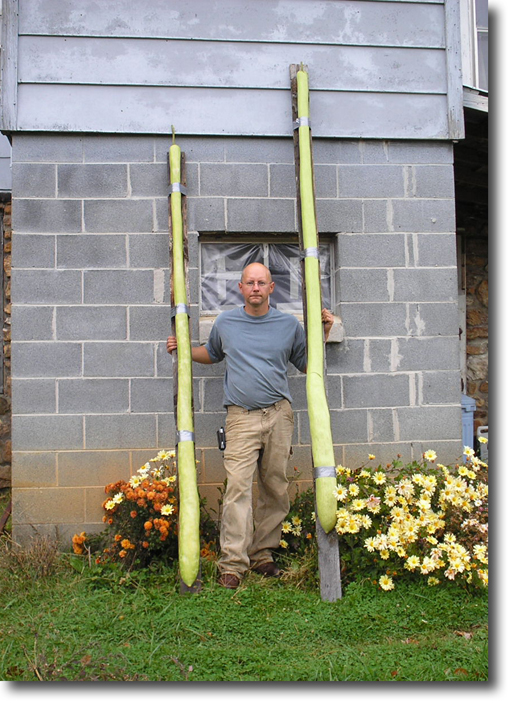
The world record for long gourds was set in 2010 by Wisconsin grower, Caleb Jacobus with his 11' 3" (3.43 m) gourd.
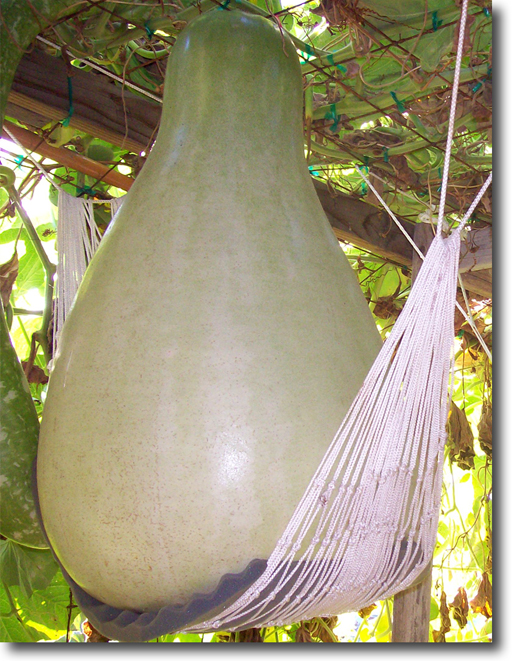
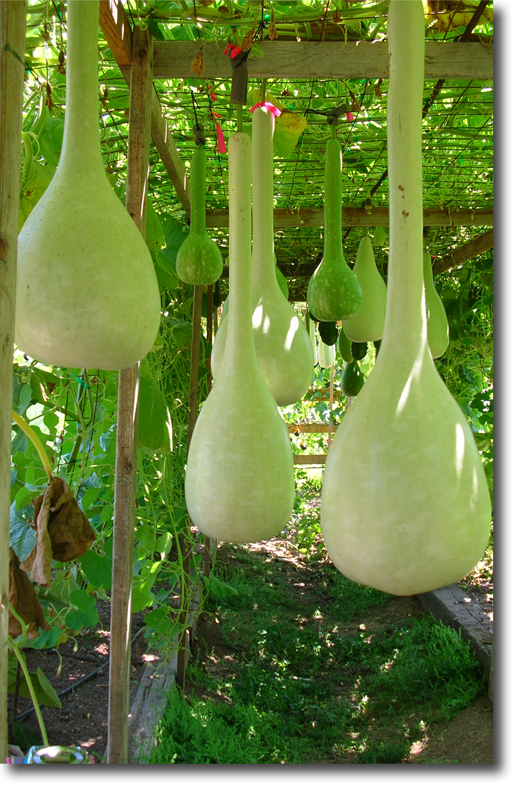
The heaviest kettle gourd was grown in 2001 by Paul Jeffers of Kentucky at 245 lb (111,1 kg).
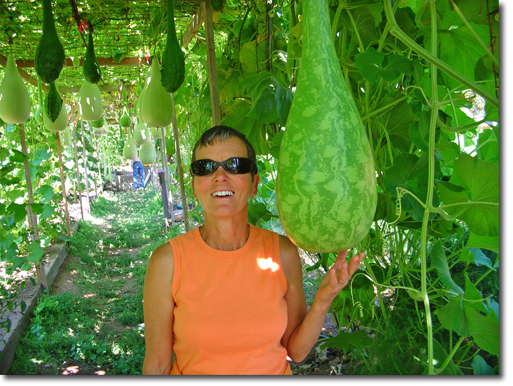
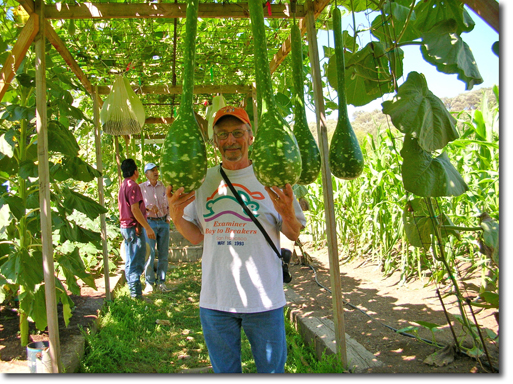
 Onions
By Peter Glazebrook
Peter Glazebrook consistently grows onions in excess of 14 lb, and is currently trying to break the world record of 16 lb, 81/2 oz. He is one of the world's most successful growers in many types of vegetables and has attained 12 world records and over 500 rosettes at a national level in Great Britain.
Peter is a very quiet, unassuming person who has only one thing on his mind – winning 1st prize. Second best is not an option in Peter's case, and he spends the whole year dedicated to the task of winning at the shows. He is retired from a successful career as a building surveyor, and is aided by his wife Mary who is also an excellent gardener. They happily share their time together and spend many, happy hours growing and exhibiting. They also share their knowledge freely to other growers and contribute to many vegetable societies.
Peter has agreed to share every detail of his method of growing giant onions with us, and if you follow his methods, you too will have a chance at a world record.
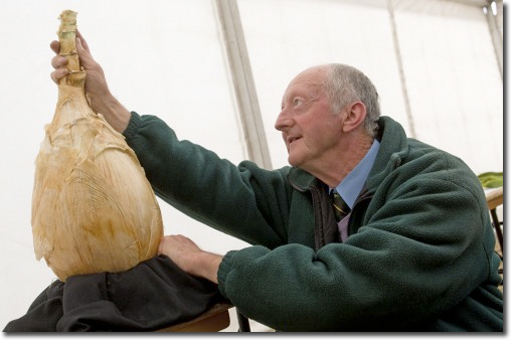
His methods are similar to what many top growers follow – with just subtle changes and a bit more dedication. The most important factors are: attention to detail, control of the growing environment, and extending the growing period by the use of artificial light. Control of pH, control of light hours, control of temperature, control of growing media, control of ventilation, and the control of pests and diseases are all essential. The other ingredients are determination and good seed.
So, here's how it's done.
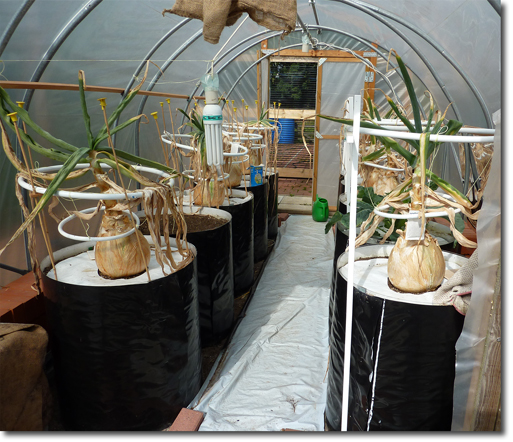
Seed
As with most giant vegetables, the seed is of paramount importance. The seed that Peter uses is a Billy-Lamb-Strain but Kelsae is readily available and also very successful. All giant onions originate from Ailsa Craig (named for the island of its origin in the outer Firth of Clyde, Scotland). These onion varieties are "long day" varieties.
It is possible to grow these from seeds, sets, and grasses, but to keep it simple for the moment, we will only discuss to the seed method. Later in the chapter, the other methods will be explained – the growing method applies to all.
Winter Preparation
Choose an area which receives full sunlight throughout early spring and summer. The onions are grown in cylinders, barrels, large pots, or permanent raised beds. They should be referred to as cylinders because they have no base.
Each year the cylinders are freshly filled with soil that has been prepared to the John Innes No.3 formula ("A rich mixture for final re-potting of gross feeding vegetable plants and for mature foliage plants and shrubs in interior planters or outdoor containers."). Peter incorporates sufficient basic food to last the whole season in this starter mix, so do not be tempted to increase plantfoods.
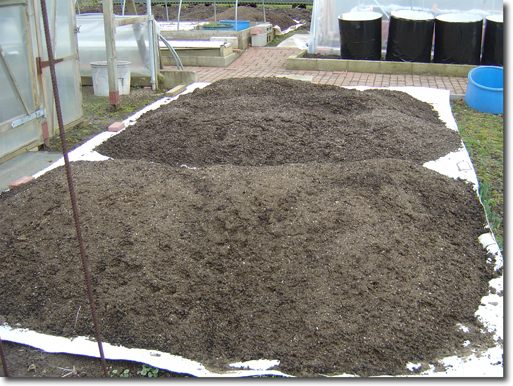
The soil is made up of the following:
7 parts loam, 2 parts sharp sand, and 3 parts peat moss. Each 36 liters (8 gallons dry) of this mixture receives 340 grams (3/4 lb) of John Innes base fertiliser (a ready mixed blend of hoof and horn, superphosphate, and potassium sulphate for mixing with loam, peat and grit to make John Innes loam-based potting composts) + 60 grams (1/8 lb) of ground limestone.
If the old soil removed from the containers is to be reused, it is laid out on a clean surface during winter to get the soil working and reduce salt concentrations. In February, a soil sample is sent for analysis and once the soil is dry enough, the recommended fertilizers are added to bring it back to the John Innes No.3 standards.
The pH is also adjusted to 6.5.
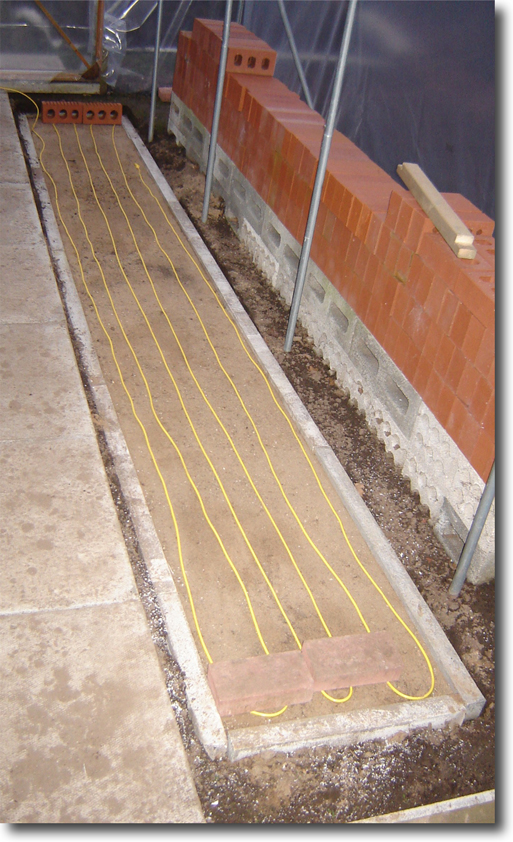 The cylinders are set on a heated sand bed within a tunnel or greenhouse. Sand is added to form a 10" sand-cone at the base of the cylinder to a height of 10". The sand-cone helps to transport water to the roots, gives good drainage, and keeps the soil close to the edge of the cylinder where it will be bettered warmed.
The cylinders are filled with soil during late February, and if necessary, sterilized with a 1:100 bleach solution.
A final soil test is carried out at the end of the season on a sample from where the best onion grew, This helps to determine the next year's preparation.
Germination
Sow the seeds in late October directly into trays of dampened good quality seed compost like Levingtons F2 (see appendix). Before planting, coat the seeds with a good fungicide. Place the seeds on the damp compost and cover lightly with compost. Label and place in a propagator that will give bottom heat of 70º F (21º C) and a top heat of 65º F (18º C).
Seedling Stage
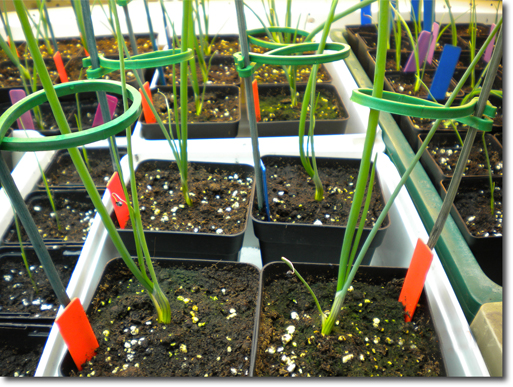
It is important to know that onions are light sensitive, and grow according to the number of hours of light. As soon as the seedlings appear, place the propagator in direct light. I use a light chamber that is a box 6' long by 3' wide by 3' high lined with a plastic mirror. Six, 70 watt fluorescent tubes, spaced 5" apart, provide the light. The chamber requires a ventilation fan that is temperature controlled to 68º F (20º C), and a small permanent fan to keep fresh air circulating at all times. The heat from the lamps is significant, so the fans are essential to cooing the chamber. If it becomes cold, a thermostatically controlled heater is required. The heater should be set to come on at 55º F (13º C). The lights stay on for 24 hours a day.
The seedlings stay in the propagator until they are past the "crooked stage," and standing up straight. Transplant the seedlings into 2½" pots of Levingtons F2 compost, and then into the propagator for a few more days. Remove seedlings from the propagator and leave them under the fluorescent lights.
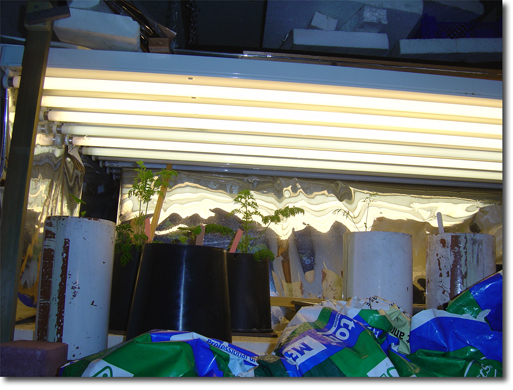
After four weeks from germination when the third true leaf appears, pot up into 4½" pots of Levingtons M3 compost (see appendix). Support the leaves so they are not touching the soil, and place the pots back under your lights.
Two weeks later, when the fifth true leaf is showing, select the best seedlings and transfer to a heated greenhouse. Place them on a heated bench, and provide additional artificial light. Continue to support leaves as they grow.
Onions on main heated bench under SONT Envirolite above side bench
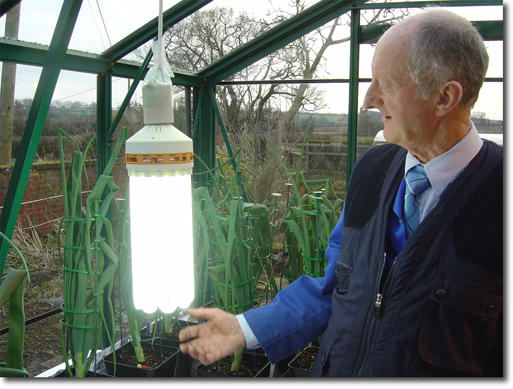
Growing On
The greenhouse is lit for 8.5 hours to supplement the short winter daylight. Every two weeks, the light is adjusted to stay on an extra 15 minutes during the day. Around week ten, spray plants with an insecticide as a preventative. During week eleven, when the onions have developed 6 leaves, pot them into 6½" pots using John Innes No.3 compost with added Humate and Levingtons M3. Fit larger, leaf supports at this time. Place back on the heated bench. Continue increasing the lighting period, water as and when needed, and inspect and spray for insects and diseases. It may be necessary to pot up into 9" pots using John Innes No.3, if not able to plant out in March.
PLANTING OUT INTO TUNNEL or Large greenhouse
Transplanting
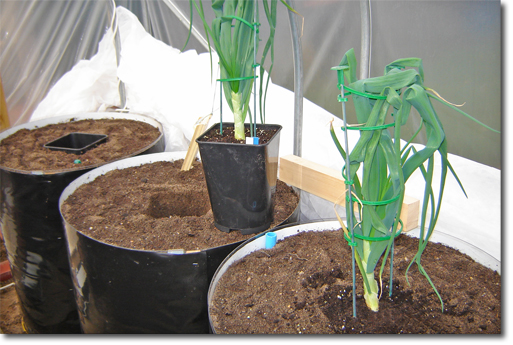
When the soil temperature reaches 11ºC (52º F) and the air can be maintained at 10º C (50º F), transplant the best onions from pots into barrels.
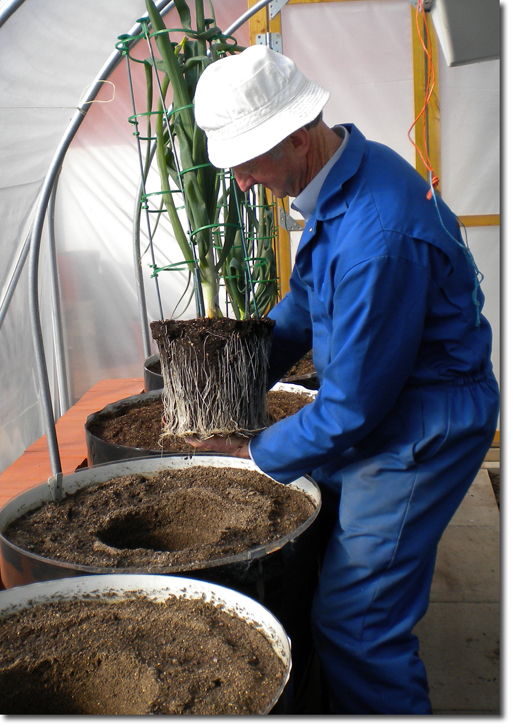
If planting early, it will still be necessary to take the supplementary lighting with them and run until natural daylight can take over – the aim is to prevent checking.
Water the plants mainly around the top few inches to keep the soil just moist.
Provide larger leaf supports and keep adjusting to ensure the leaves do not bend. Maintain heating during cold weather, and at night, cover plants if frost is expected.
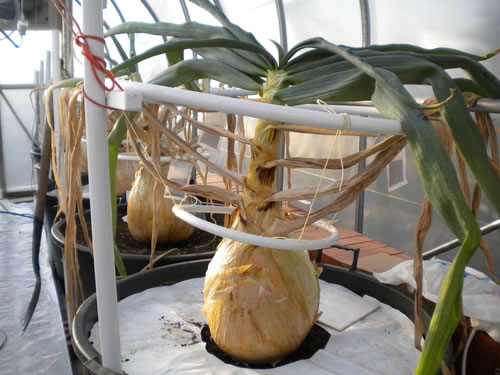
Summer Attention to Detail
Do not water overhead or directly on the onion bulb; water only around the edge of the containers to keep the plants dry.
As the season progresses, remove any dead skins and continue to water liberally as conditions dictate. On hot sunny days, do not forget to shade the plants from direct sunlight – it will scorch them otherwise. Continue to prevent or deal with pests and diseases.
During the last month of growth, introduce a high potash feed to encourage bulbing and ripening. A few days before the heavy-onion-show, measure and select what appears to be your best. Leave it planted as long as possible, and lift carefully with a fork with as many roots as possible. Read the show schedule carefully to ensure the onion is trimmed and presented as required. Transport carefully and keep cool.

Watering
Onions are more than 90% water, therefore the big ones will need to absorb and hold at least a gallon of water. Onions do not like wet soil so the trick is to water them little and often and only when required. Check the soil by squeezing a lump. If water comes out, it's too wet, if the lump fails to stick together, then it's too dry. The water used should be the same temperature as the ambient soil temperature. Keep a watering can in the growing area. When it's cold outside, water during the day; and when it's hot, water during the night.
Too much water around the roots starves them of the air they desperately need in order to grow. Do not automatically put fertilizer in the water. Use additional fertilizer only when they really need it. Too much feed will spell disaster.
Ventilation
Good ventilation is the key to success. Onions love plenty of air passing over their leaves to keep them cool and free from disease.
The type of onion we use is selected neither for its disease resistance nor tolerance to heat and water, rather for its size and vigor. Like all thoroughbreds, they need special attention – ventilation is one of them.
Heating
Although onions like it cool, they also like to be warm at the seedling stage; and at a constant temperature at all other stages. Also, they require heat under the roots to encourage them to send roots deep early on. Soil heating cables with a temperature control are best.
Thermostat, controlled fan heaters are a good source of surround heat, because they circulate air at the same time, and are quite economical.
Shading
To keep the onions cool in summer, it is imperative that shading be applied as and when needed.
Feeding Program
the onion needs goes into the soil at the beginning when the compost is prepared. The roots of the onion are very sensitive to concentrated feeds, so if you apply additional fertilizer, it must be applied in a diluted solution.
Make sure the initial soil is prepared as recommended, then apply plantfood only when needed.
Diseases
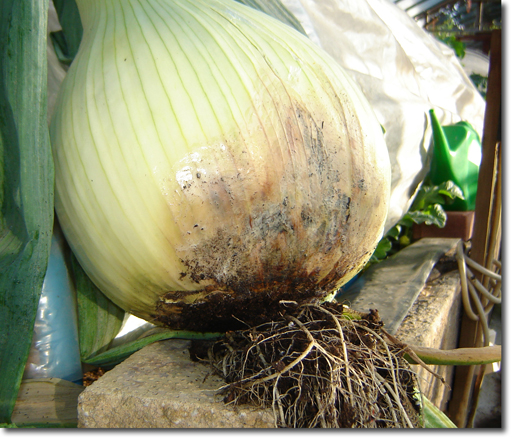
Botrytis
This is very common in onions and must be avoided before it starts. Everything should be sterilized before starting with a 1:100 bleach solution. This includes the soil, tunnel/greenhouse, pots, stakes, tools, and any other items that may come into contact with the onions. Consider the area as a quarantine area, and don't forget to wash your hands before and after working.
Prevention is always better than cure, so spray regularly in accordance with the manufacturer's recommendation. Use bio-fungicides like Serenade.
Botrytis appears as a dark patch under the skin. Removing the skin will reveal a slime, and several skins may have to be removed. These onions will not make it to the show.
Pink Rot
This disease starts when it gets hot and will make the plant collapse. The roots are greatly reduced and take on a pink hue. The onion is dieing, so the only thing to do is destroy it – for there is no cure. Prevention is to sterilize properly.
White Rot
This is very similar to Pink Rot. The leaves start to collapse and the roots are reduced. Lift the bulb. If there is no resistance, continue to lift. If white fluffy growth appears, then the bulb is infected. There is no cure for White Rot, so remove the onion. Prevent by sterilizing, and change the soil at least every third year.
Leaf Rot
This is a type of Botrytis and manifests itself as an oval white spot on the leaves during late spring , early summer. Fortunately, if noticed at the early stages, it can be contained. Spray with a good fungicide when it appears. Prevent by reducing the amount of feed and increasing ventilation in late spring and summer
Mildew
Mildew appears as a white, fine cobweb, and is caused by dampness. Prevent by reducing humidity, watering less, and increasing ventilation. If mildew is persistent, apply an ammonium-copper solution commonly known as Cheshunt Compound (see appendix).
Pests
Slugs
Slugs will not often attack onions, however it is advisable to put a few slug pellets around seedlings.
Thrips
They are tiny 1-2 mm insects with thin, feathery wings. Most thrips feed on plants, but some species are predatory on other small arthropods. Thrip feeding injury often appears as sunken, silvery patches on leaf surfaces. Prevention is better than cure, so spray regularly with a good systemic insecticide, or invest in predatory insects.
Plant-feeding thrips develop from eggs through several immature stages to a pupae stage, then emerge as adults. Eggs are laid on leaf tissue, then larvae feed on leaves. The pupae stage often occurs off the plant in the soil. There are multiple generations of thrips each year, so populations can build rapidly to damaging levels. The generation time from egg to egg can be as little as two weeks.
Onion Fly
These are flying insects that lay their eggs in the ground, and their larvae eventually find their way into the roots.
Prevention is best by covering the soil to prevent the fly from the soil around roots. Growing under cover will usually deter this pest.
Caterpillars
Although not very often seen, the Leek Moth also will attack onions. It's brown in color and arrives in July. Spray with an insecticide as soon as larvae are seen.
Lily Beetle
This beetle is bright orange-red, and has quite an appetite. It lays its eggs in a black sticky sack. Spray with insecticide when seen.
Wireworm
Wireworms can appear as a result of using unsterilized soil or leaf mold. The damage they do is not significant, but they are unwanted guests. Sterilising soil will remove them.
Whitefly
As their name implies, they are a small, white fly that is common in enclosed growing houses. A black sticky residue is found wherever they reside. Spray with a good insecticide.
Blackfly
This is common garden pest that can appear near young shoots, and can do a lot of damage. Spray with a good insecticide to prevent.
Spider Mites
This is a minute red spider that turns leaves white. To prevent, spray with an insecticide-miticide, and increase ventilation to cool the growing environment. Predatory insects can be of some assistance if insecticides are not used.
Propagation
Pips
Pips are small pearl like bulbs that appear on the flower head and can be used instead of seeds. They will produce a replica of their parent.
Sets
Sets are baby onions grown from seed that are heat-treated to stop them from going to seed during their first year.
Seeds
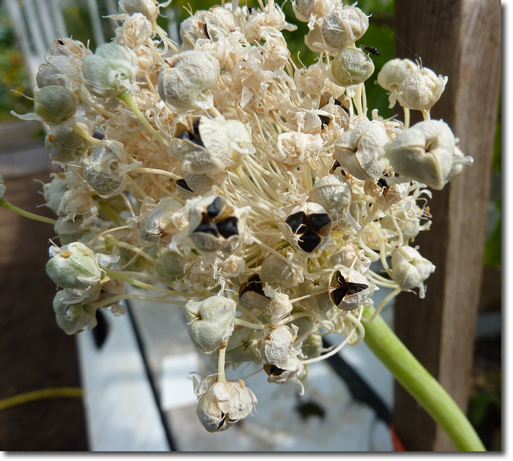
If you have grown a prize winning onion, then it makes sense to try and retain its gene potential. If the seed you grew it from is a hybrid, then the saved seed will not have the same characteristics as your prize winner. If the seed is from an open pollinated variety, then its seeds will reproduce similar onions.
Onions are biennial, so to produce seeds from a bulb, it must be grown for another year to create a seed head. Select your biggest and best disease free bulb, remove it from the soil, trim roots and treat with sulphur powder. Discard any decaying leaves. Check the condition of the bulb by gently pressing around the shoulder area. If it is soft, then the chances are that it will be no good for producing seed.
Store a sound bulb on a soft cloth in a protected area such as a workshop. To form a seed head, onions need at least a month of cold weather. As soon as the bulbs show signs of growth around early January, remove any decaying leaves and pot them up in 10" pots with a slow release feed compost such as Levingtons M3. Transfer the pot to a frost-free, lighted area and allow to grow. The flower heads will be at least 4' high, so make allowances for this and provide support.
Flowering onions will cross pollinate with other varieties very easily, so make sure that there are no other flowering onions within 100 yards. Look after the onion until the heads start to flower. It may be necessary to strip away the old bulb skins to prevent disease. Assist pollination by transferring pollen with a soft artist's brush. When the seeds have formed and are dry, remove and place them between sheets of newspaper. Store in a sunny location for two weeks.
Finally, remove any diseased seeds and store in a bag in a cool, dry place.
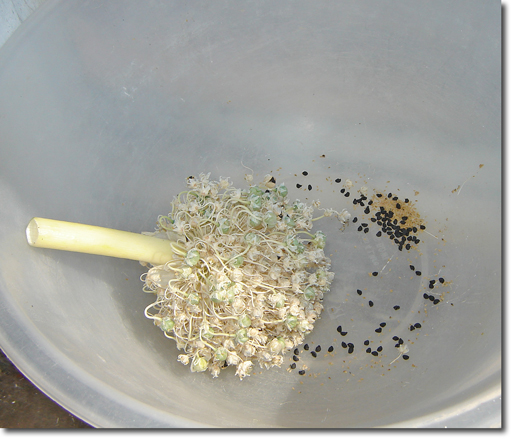
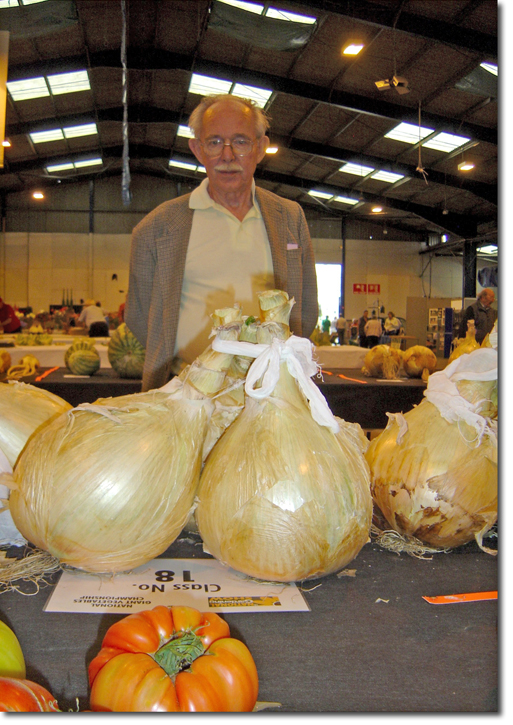
Peppers
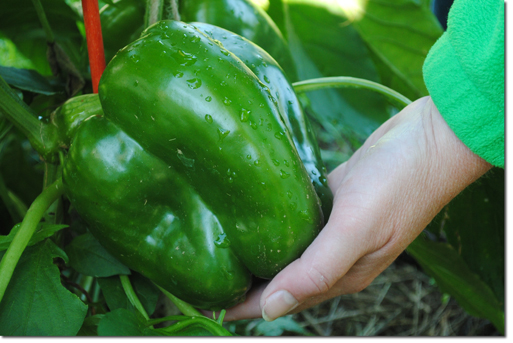
Pepper (heavy)
There is no international pepper class, but some shows do accept them. For competition purposes, peppers must be sweet bell peppers of the Capsicum annuum species. In large parts of Europe this type of pepper is known as paprika. Bell peppers lack capsaicin that causes a (strong) burning sensation when it comes into contact with mucous membranes. Sweet peppers are green when unripe. But they can be white, yellow, orange, red, purple and brown, depending on the cultivar.
The peppers must be sound and may contain only the stem that is attached to the plant. For competition purposes, peppers can be any of the above mentioned colours.
Pepper (long)
Long peppers are a Guinness World Record class, though there are few shows that actually accept them. There are many long cultivars which can be used, either sweet or hot (chili). Any colour is accepted as well. For the EGVGA it is a non-competitive class.
The pepper must be sound. The length is measured from the shoulder of the pepper to the tip in a straight line. The stem is not included.
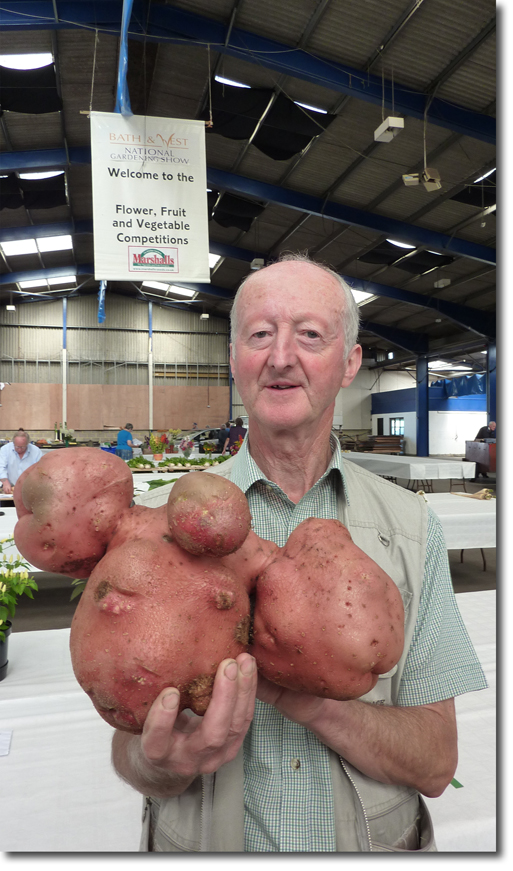 Potatoes
by Peter Glazebrook
Peter grew a new world record potato of 8 1/2 lb in 2010 and won the National Giant Vegetable Show at Shepton Mallet, UK. The previous record holder was a farmer in Scotland who accidentally found a red potato in his field that weighed 7 lb 1 oz. Peter also uses red varieties that are prone to mutation, or being knobby. His best results come from potatoes grown in a cold, well ventilated, greenhouse with raised beds.
Although it is important to get the correct variety of seed potato, more attention is needed to nurture the potato to gigantic proportions.
Each year Peter buys new, disease, free, seed potatoes; and after trying many varieties, the most successful have been: Kondor and Marfona. These are readily available from Scottish seed producers who are renowned for their disease free seed potatoes. They are best purchased in February, washed in weak disinfectant, and placed in a frost free environment with some light. Window sills make an excellent home while they sprout. This process is very important in growing large potatoes, one strong shoot is the goal. If you have too many shoots, there will be a mass of top growth that allows the energy to go to the plant and not the potato. All but one shoot will be removed before planting. Once the shoot gets to about ½" in height, half-bury the potato in a tray of F2 compost (see appendix).
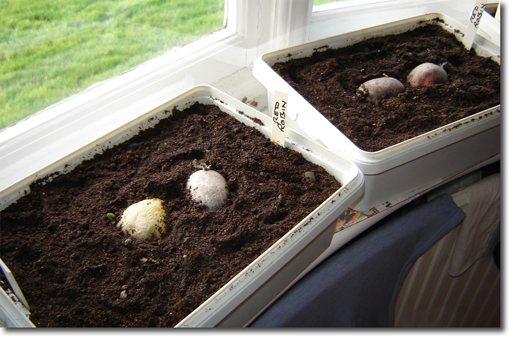
While the plants are producing shoots, dig a trench 2' wide and 1' deep, placing the removed soil along the side of the trench. Half-fill the trench with well rotted manure and sprinkle 4 oz of 7-7-7 fertilizer per square yard on the removed soil; then back fill. Water well and leave to settle.
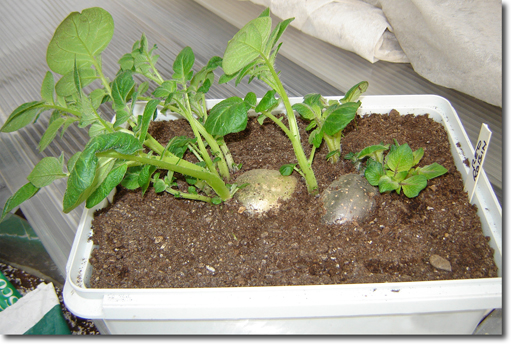
The potatoes will grow from stalks that come from the seed potato. The roots of the potato are beneath the seed. We put the compost and fertilizer in the loose soil of the "stalk zone" for the potato to expand into. Loose soil also helps in the searching process of culling potatoes that do not have knobs.
Remove all the shoots except one, and plant the potato in a 6" pot. If you remove the other shoots carefully, with their roots, you can pot them up as well in a medium nutrient compost such as M3 (see appendix). The potted potatoes are allowed to grow into small plants in a greenhouse until the last frost occurs.
The advantage of single stem plants is that they grow fewer but larger potatoes. This is Peter's preferred propagation.
The best place to grow potatoes is under cover, because of three reasons: to control temperature, protect against wind, and most of all, to protect from potato blight. Potato blight thrives in cold damp conditions, and is responsible for the damage of thousands of tons of potatoes each year. Although there is a partial cure for potato blight, prevention is better than cure. Growing under cover keeps the potatoes warm and dry – assuming you do not water the leaves instead of the ground. Blight does not appear until June, and attacks the leaves first, and eventually the potato and the whole plant. There are a number of cures, but the best plan is to spray weekly from June onwards, alternating a copper based fungicide and Dithane.
Slugs are a serious problem when growing potatoes for show, so work in some slug pellets into the soil, then sprinkle a few on the surface. Renew surface pellets every few weeks.
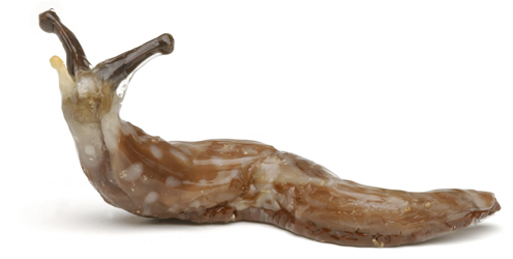
From late April through early May, plant the potted potatoes 6" deep x 2" apart, and level off the soil. Do not plant in trenches as we will not be earthing (hilling) up.
Keep the soil just moist from now on, and remove flowers as they appear. This prevents the plant from stopping growth prematurely, thus increasing the growing time. The tubers begin forming only after the flowers arrive.
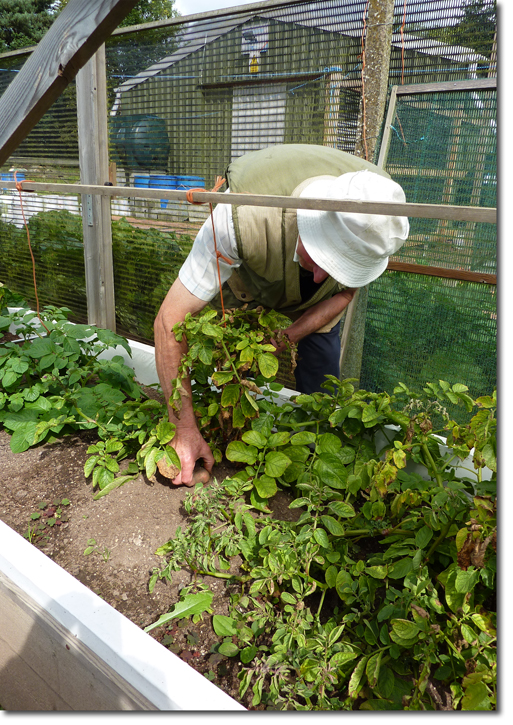
Ultimately, we want just one potato, so we remove any smaller potatoes as they develop after flowering. This is difficult to describe, because it is a question of judgement and guesswork. On a regular basis, probe the soil above the seed potato, and carefully pull out any small ones. Leave your fbest potato, doing as little damage as possible. This is when your loose surface soil becomes an advantage.
There is little fertilizing done during the season, because most of the requirements are put into the soil at the beginning. However, you will need to give a dose of calcium nitrate (21-0-0) at the end of May, and a dose of high, potash, Chempak No.4 (see appendix) in mid June.
Potatoes will turn green if left uncovered, so keep them at least 1/2" below the surface.
Support the plant to improve ventilation and prevent wind damage.
About Potatoes
- Soil pH: 5-6
- Soil: medium, free draining
- Use plenty of compost and manure at lower levels in your beds
- Prone to blight, greenfly, and slugs
- Grow from disease free seed potatoes
- Grow under cover to protect against wind and blight.
- Produce shoots in frost free semi-sunlight conditions
- Plant out the end of April, but protect from frost
- They like calcium in the form of calcium nitrate (21-0-0)
- They like potash –but not from wood ash which raises soil pH
- Potatoes do not like lime
- Potatoes have huge appetites, and love compost. They are even tolerant of straight animal manure
- Potash in the form of comfrey (an herb rich in potassium) can be laid in the trench
- Water sparingly before flowering
- Watering at flowering increases the amount of tubers – which is not wanted
- Watering and feeding after flower petal fall increases tuber size
Diary
February
1/ Wash seed pots with a weak disinfectant, Domestos, and put into trays – place to receive as much light as possible
10/ Shoots are starting to grow
26/ Shoots have reached 1/2" and some have been removed
March
4/ Planted seeds in small white trays, two to each tray, filled with Levington F2 compost and placed in sunny window
25/ Seeds showing signs of growth
April
1/ Removed some rooted shoots, and potted up in frost free greenhouse
8/ Excavated trench and half filled with well rotted manure, then back filled with soil, and added balanced fertilizer
21/ Removed more rooted shoots and potted up
25/ Planted out in 12" high, raised beds covered with a greenhouse frame with removeable sides
26/ Sides removed to vent. in full sun
May
13/ Removed flower trusses, all growth needs directing into forming potatoes
17/ Removed flower trusses from plants
18/ Soil "opening up" around largest plants indicating tuber growth
25/ Scratched around plants and removed small potatoes. Tried to leave only one visible on top, there may be more beneath
29/ Watered with calcium nitrate
June
6/ Scratched around raised beds again and removed one or two, trying to leave at least one large potato
16/ Watered with Chempak No.4 (see appendix)
19/ Scratched around and removed a few more small potatoes around stem
21/ Foliage appearance has changed – curled leaves and red stems
July
1/ Removed more potatoes
5/ Removed flowers
8/ Removed flowers
9/ Sprayed with fungicide
12/ Removed large apple-like growths on the plant. If left, they take nutrients from young potatoes.
18/ Removed more apples and flowers
21/ Sprayed with Chempak No.4
24/ Removed small surface potatoes and some top growth which is decaying
27/ Removed late flowers
August
1/ Cut off flowers
4/ Removed apples from top growth
8/ Hot and sunny but still cold nights 9º C
9/ Removed more potatoes
11/ Still removing late flowers
12/ Some tops seem to be blighted or just giving up
16/ Most tops looking tired, if not blighted
25/ Lifted most potatoes which are mainly 2-3 lb but two at 5½ lb and two at 4 lb+
September
3/ Won Giant Vegetable Show with
8½ lb Kondor – a new world record
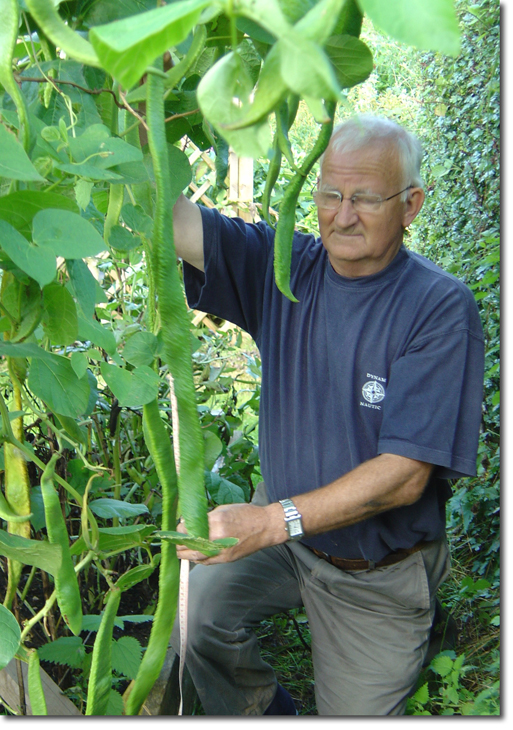 Runner Beans
As a boy I helped my father on his allotment, and the number one vegetable grown there was the runner bean – a culinary delight looked forward to every July. Picked fresh and young, there is no better green vegetable around, especially when it is served with spring lamb and mint sauce. Unfortunately, Runner Beans appear only to be grown in the UK. Here, the climate is ideal. The runner bean is very tolerant of heat, but not extreme cold or frost. Moisture plays an important part in its development – keeping the roots moist, and while high humidity persists, to pollinate the flowers. Regular watering and spraying in hot climates will produce excellent beans.
Giant runner bean pods are inedible if not processed in some way, because they are stringy and tough, and feel very unpleasant in the mouth. However, the smaller beans that are thinned out are delicious and should be eaten.
When the bean plants start to grow, they do so with a vengeance, and produce a prolific crop of beans, albeit only for a short period, two months. It is important to use a proper bean cutter that cleverly removes the outer stringy portion as it shreds the beans. Surplus beans can be lightly blanched in hot water and frozen – a welcome treat in winter.
Bean Facts
- Germination at: 65º - 75º F (18º - 24º C)
- Germination time: 7-10 days
- Preferred pH: 6 to 6.75
- A 10' row can produce 60 lbs. of beans
- They are nitrogen fixers, producing N
How-to-Grow
The seed is of utmost importance, and after many years of selection, there is a variety which is derived from Enorma that will produce beans up to a yard long. Normal commercial varieties will only reach a foot. The long varieties are available from such suppliers as Medwyn Williams and Clive Bevan.
Prepare the ground in autumn with a generous amount of old farm manure and dig it in well. Check the pH and adjust. Add dolomite if acid, or Sulphur if alkaline.
In spring, dig a trench 1' wide by 1-1/2' deep where the beans are to be planted. Pile the removed soil along the sides, and leave the trench open for a few days. Then, line the base of the trench with either a good layer of composted leaves or a layer of newspaper. This is to retain moisture around the roots. Add 2" of well rotted manure to the trench. To the removed soil, add a 1" layer of peat, and 6 oz/yd of base dressing . Rake it back into the trench and work into the manure. Water and leave to settle.
There is no need to rush to get the runner beans into the soil, for they will not grow well when the weather is cold. If they are put out too early, they may rot or be killed by frost. Ideally, start the seed inside, two weeks before the last frost is expected, and then plant outside one week after the last frost is expected – here the end of May.
I like to start the seeds in 4" square and 8" high pots. This gives the bean's roots plenty of room to grow and causes less stress when transplanting outside. Use a good quality seed compost. Coat the seeds with rhizobium seed inoculant – a friendly bacteria.
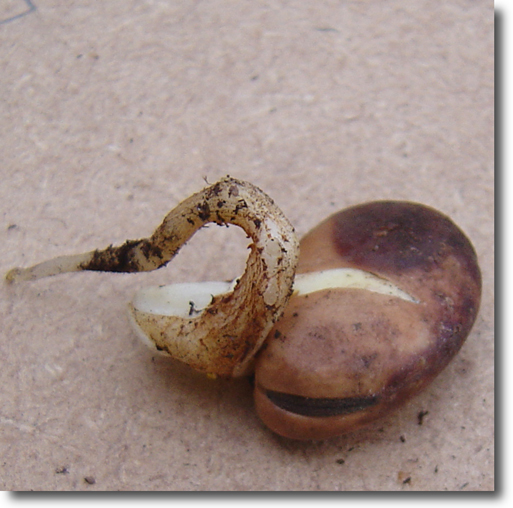
Set the beans sideways into their pots, covering the seed by at least a ½" of compost. Water well with warm water and place in a warm cupboard or greenhouse. Do not overwater. Keep just moist, otherwise disease can become a problem. As soon as the beans appear, place in good sunlight.
Place a thin support in each pot and tie the plant to it as it grows. When the roots are at the bottom of the pot, transplant into the garden.
Dig a hole bigger than the pot and sprinkle a handful of bone meal and dust some Derris insecticide powder in and around the hole. Put the bean and the pot into the ground, and replace the soil around it. Gently firm the soil, pull out the pot, tap out the bean and slip it into the hole along with its pot cane. Firm and water in with warm water. Space the plants 18" apart.
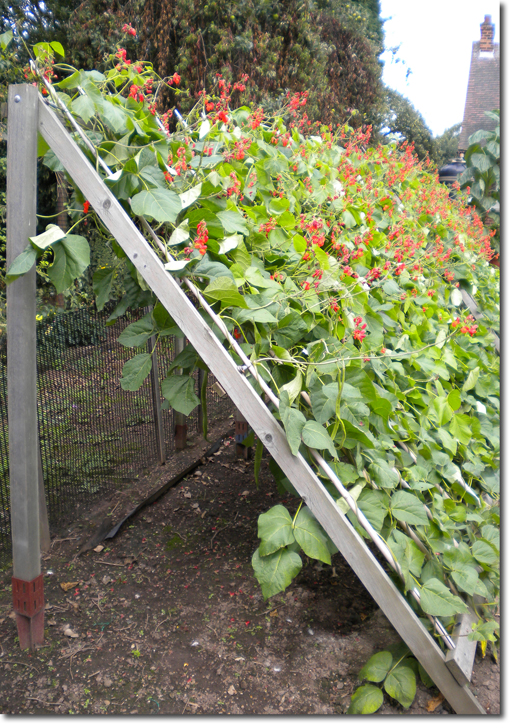
Rows should go from east to west, and the trellis or supports should face north where beans will hang Beans need to be shaded from the sun and this setup makes them easier to manage. Angle canes so that the beans will hang on the shadow side. Position an 8' cane angled north, and push it hard into the ground. Place a treading board adjacent to the cane to act as a guide and protect the soil from compaction. Take a 2" square post, 3' long, and drive it in at an angle of about 60 degrees. Add further posts every 4' and screw a cross bar along the top of the posts. Using the board as a guide, set up the remaining canes to suit the plants. Before planting, add a 5' cane to the 8' canes. This increase the support Overlap the canes by at least a foot and tie together. Long Runner Bean plants are very heavy when fully laden with beans. Tie the canes securely to the crossbar and add a cane crossbar 1' from the top.
Let the beans climb up the pot cane and then up the main cane. Tie them up every foot – helping them around the canes. Beans rotate counter clockwise as they grow, so do not force them in the other direction. Do not let the growing tip get too long before tying it up, for it will snap off in high winds.
As the vine grows up the canes, pinch (prune) any side shoots to leave just one vine. Watch for black fly and spray at first sign. They congregate around the growing tips and flowers, and if not controlled, they will stunt the growth quite considerably.
Pinch any flowers that form less than a meter off the ground, otherwise the bean will reach the ground before maturity.
To aid pollination, pass a soft, pollen laden paintbrush over the stigma. Squeezing the back of the flower will expose the stigma. Personally, I let the bees do the job.
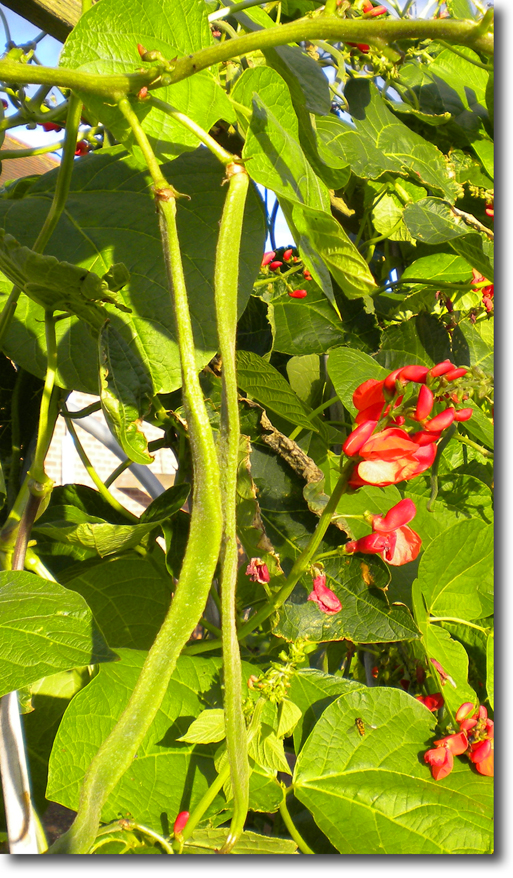
As the beans develop, remove the weak or curly ones, and leave two on each truss to grow on. Usually, the first two beans are the strongest.
Beans do not need a lot of fertilizer, because they get nitrogen from the atmosphere, but a drenching once a week with a soluble fertilizer (12.5-25-25) will give them a boost. Start feeding when the plants are halfway up the canes. Also, foliar feed once a week with seaweed extract. This will keep the plant healthy and give it molybdenum required for nitrogen fixing. Water regularly to keep the soil moist at all times. This will help in flower production and bean development.
When the vines reach the top of the canes, remove the growing tip. It serves no purpose to let it grow, for the best beans will grow around 6' up.
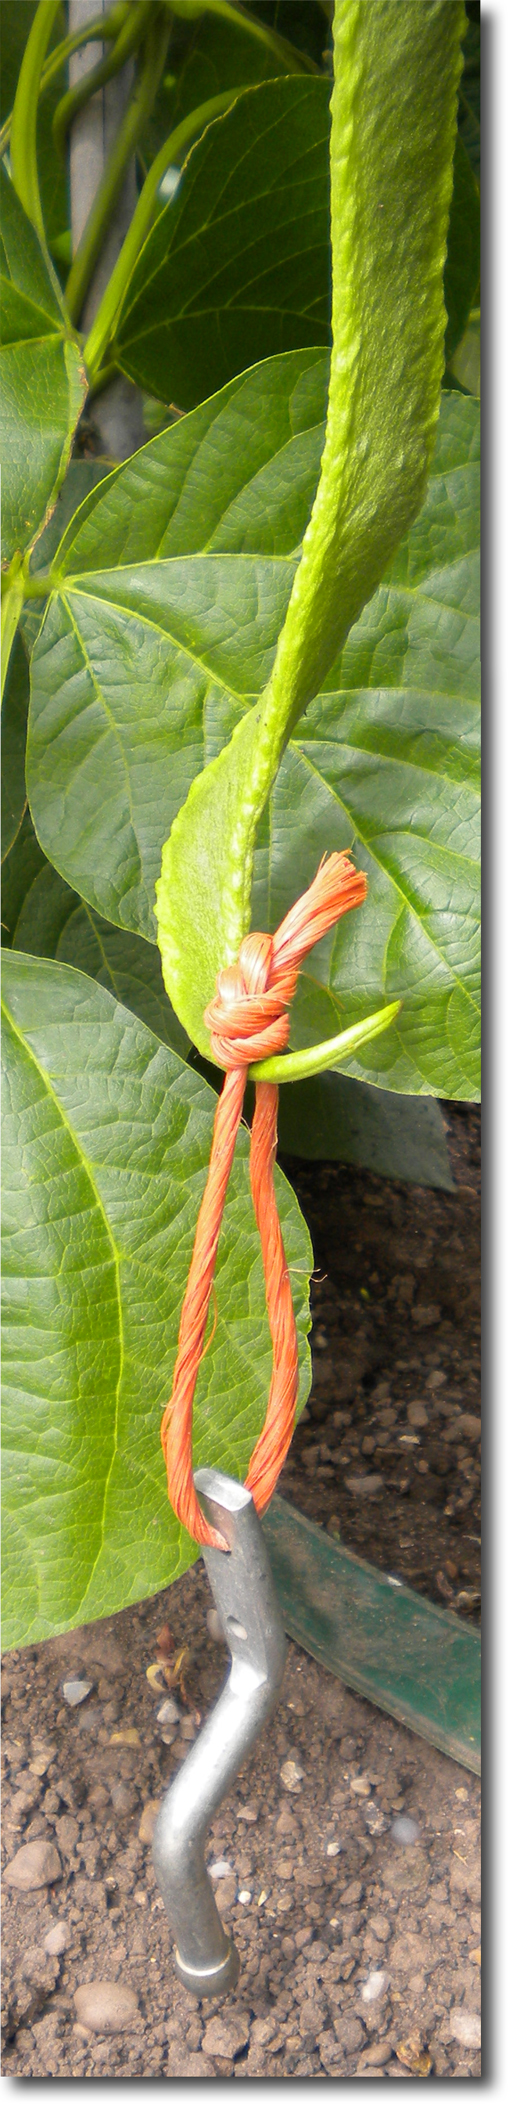
When the beans start to reach their maximum length, their ends will start to curl up. If you can prolong this, you can keep the bean lengthening. Carefully hang a 2-3 oz weight using an elastic band or a nylon stocking.
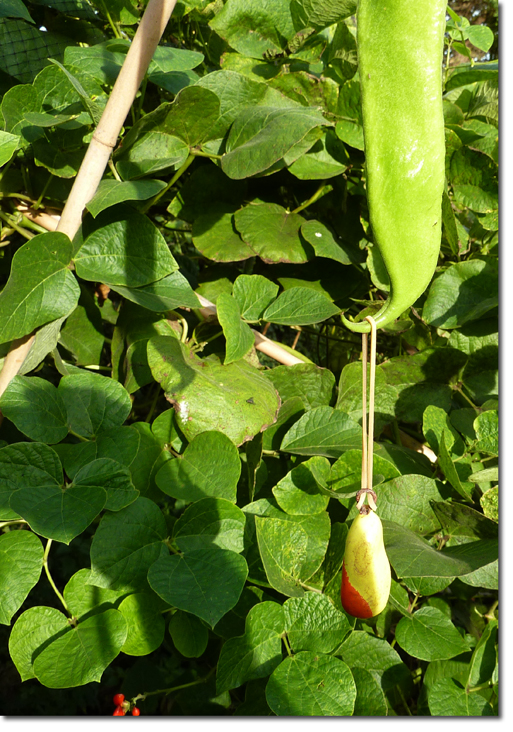
Measure from the shoulder to the tip – not from the end of the stork. Select your best beans for the show. Place them on a piece of wood and wrap with cling-film to secure in position. Keep them out of the sun to prevent shrinkage.
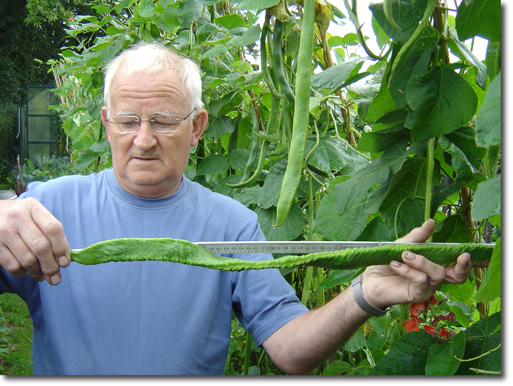
Diary
May
10/ Started seeds in a plastic container wrapped with wet paper towel
13/ Potted into 3" pots
19/ Re-potted into 4" square pots. Dressed roots with D.T. Browns Bean Booster (see appendix)
22/ Transplanted into garden and watered in with Viresco Mycorrhizae (see appendix)
23/ Foliar fed with seaweed solution
Saving Seed
It is possible to obtain the seeds from your best picked bean. Leave some good beans on the vine and let them mature. When the outside skin is brown and brittle, extract the seeds and store away in a cool dry place.
Saving Plants
It is possible to save your best plant and keep it over winter. Beans create corms just like dahlias. To keep the plant, dig it up before the frosts arrive, prune off all but one vine, dress it with sulphur and finally place in a pot full of damp compost or sand. Store in a frost free area until May. Water only occasionally, and plant out when you would normally grow beans.
Swedes/Rutabagas
by Ian Neale
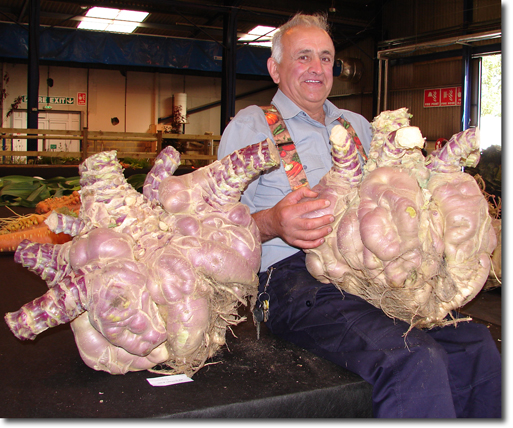
Ian Neale is one of the most interesting characters on the national vegetable show circuit. He is a delightful person with a big smile, especially when he has won a prize. Born in Birmingham, he has lived most of his life in Wales. He is a retired nurseryman who specialized in chrysanthemums. With many greenhouses at his disposal, he now only grows giant vegetables. He has recorded three world records for the heaviest beetroot, celery, and cucumber. He narrowly missed a fourth with a swede weighing 81.4 lb (37 kg), but was edged by a mere 0.7 kg. Knowing how competitive Ian is, he will not be content until he has achieved this record as well. This is the nature of the man, and his passion is infectious.
Swede, which is an abbreviation for Swedish Turnip, is also called a rutabaga, derived from the Swedish word "rotabagge." It originated from either Sweden or Russia, and is a cross between a cabbage and a turnip. The important characteristic of a swede is its purple skin and yellow flesh. The leaves can be eaten just like a cabbage. The root is often boiled and then mashed with butter or put into stews.
About Swedes
Ideal pH is 6.75
Soil should be well drained and deeply cultivated
Germination temperature: 65º - 70º F
Germination time: 5-6 days
Ideal growing temperature: 60º - 70º F
Time to grow: 20-26 weeks
Soil: rich, sandy loam – manured the previous fall
Requires full sunlight and ventilation
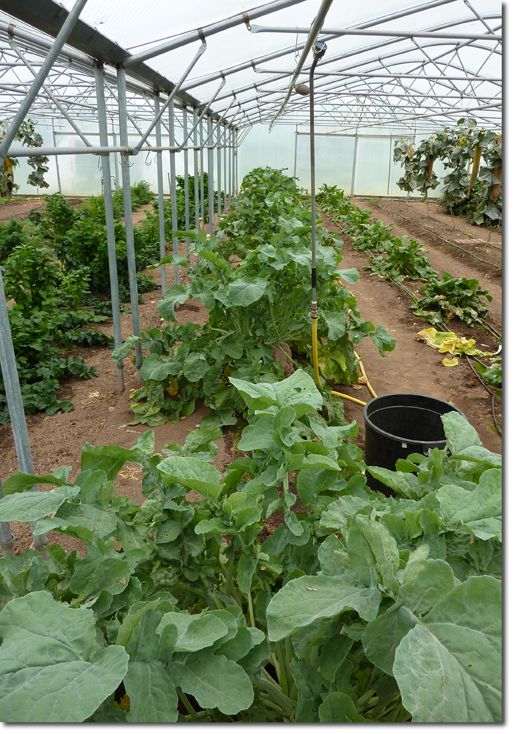
Growing
To grow world class giant swedes, they will need to be in a controlled environment inside. A polytunnel with good ventilation is the ideal shelter to keep temperatures cool. But, they can be grown successfully outside – weather permitting. Swedes prefer the cool to the hot, and they will grow well at relatively low temperatures. They like plenty of light, but not too much direct sun.
Since they get so big, it is necessary to space them quite far apart. Each plant will need at least 1 square meter, but to get sufficient light to the leaves, will need to be spaced 3 meters apart.
The seed used by Ian was a gift from Norman Craven some years ago, and it has been reselected over and over to produce the specimens he exhibits today. A commercial variety that grows quite big is Suttons Invitation. Two American varieties: Calder and Sensation also grow big as well.
Soil Preparation
The fall starts by rototilling the soil as deep as possible to loosen and bury any debris left over from the previous plants. Winter rye seed is sown and raked in, leaving it to grow over winter. In Spring, the rye is rototilled in with a generous amount of peat or spent mushroom compost to lighten up the soil.
Hill up the soil where each plant will be planted, leaving about 10' between hills. In the Spring, prepare the 1 meter square patch by adding 4-6 oz of slow release fertilizer and fork it in. Make a mound to help with drainage.
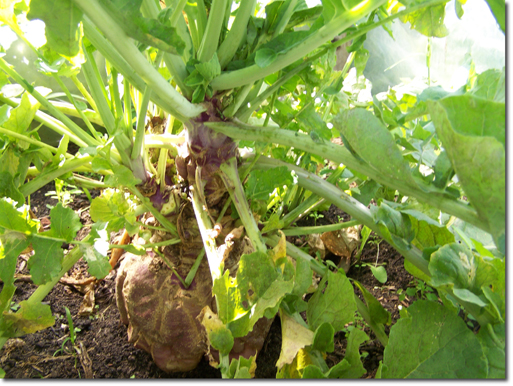
Sowing Seed
Starting off the swedes is quite straight forward and should be done around the first week in March. Take a 3 1/2" pot and fill it with a good seed compost with 25% vermiculite added. Sow two seeds and cover with 20 mm (3/4") of compost. Place in a propagator at 65º-70º F in full light. The seedlings will emerge within a week.
After two weeks, remove the weakest seedling from each pot and transplant the remaining plant into the newly prepared patch. The roots are not tampered with at all to prevent forking. Water in using a very weak seaweed solution.
After 2 weeks, start feeding with a half strength drench feed of Vitax 101 (see appendix) and foliar seaweed. Repeat this every 10 days until harvest. Watch for any insects such as aphids, and spray with a good systemic insecticide. Similarly, spray with a fungicide to control powdery mildew.
Remove decaying or dead leaves in order to prevent disease.
Watering
Water every other day to keep the moisture levels constant. This is best done early in the morning or when the heat has retreated. Watering the leaves in full sun will cause them to scorch and subsequently die. Hand watering is the best way to prevent problems. Remember to water the whole square meter, because the roots are quite spread out. Too much water will either cause splitting, or generate excessive foliage and small roots
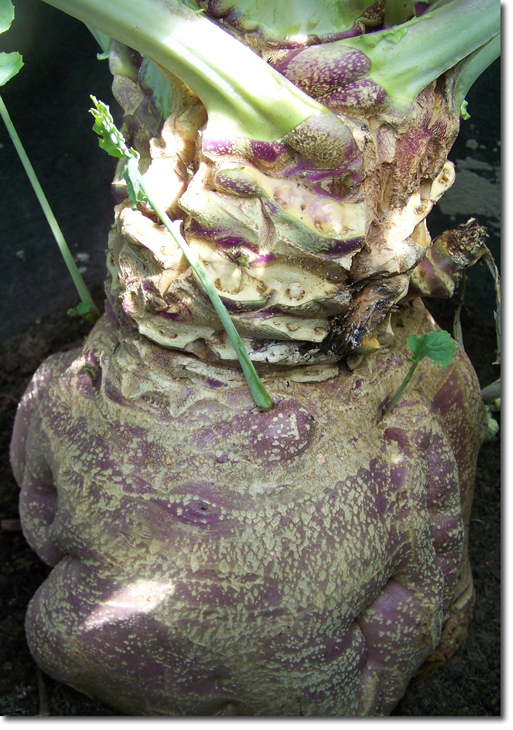
Diary
October
27/ Rototilled the whole patch to clean up and loosen the soil
March
3/ Sowed seeds in 3 1/2" pots
17/ Rototilled soil and added fertilizer, then made hills
25/ Planted out into 1 meter prepared sites
April
1/ Fed low strength seaweed solution
10, 20, 30/ Fed with soluble Vitax 101 and foliar fed with seaweed
May
10, 20, 30/ Fed with soluble Vitax 101 and foliar fed with seaweed
June
10, 20, 30/ Fed with soluble Vitax 101 and foliar fed with seaweed
July
10, 20, 30/ Fed with soluble Vitax 101 and foliar fed with seaweed
August
10, 20, 30/ Fed with soluble Vitax 101 and foliar fed with seaweed
September
3/ Dug best specimens for show
5/ Won first prize with 37 kg (81.4 lb) swede at National Giant
Pests
In the early stages, slugs and snails can be a problem so beware of it and put down slug pellets. The main culprits that attack Swedes are flying insects such as aphids, blackfly, whitefly, and spider mite; all of which can be eradicated with a good bug spray. Do this regularly as per makers instructions.
Diseases
Powdery mildew is quite common and must be controlled by spraying with a fungicide. The disease looks like white powder on the leaves and will affect the plant in all stages of growth.
Show Preparation
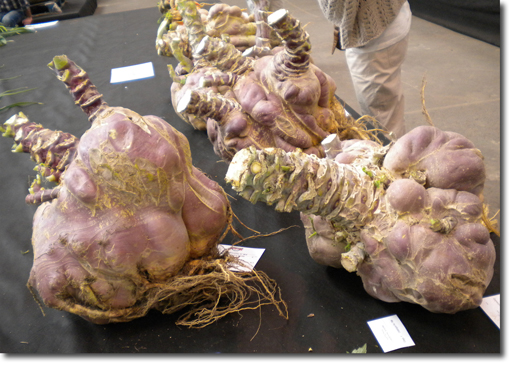
Digging up giant swedes is by no means easy. Ian Neale injured his back in lifting some early Swedes for a show and was then unable to lift a potential world record – he had to leave it in the ground.
Select your best swede, remove some outer leaves, and carefully unearth it with a small fork. Then clean up with your hands. Although the roots are small, it is worth trying to preserve them.
Saving Seed
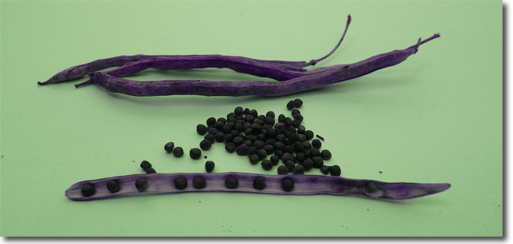
If you plan on trying to grow bigger swedes with seed you produce yourself, it will be necessary to prepare your best two swedes. This is done by taking a root cutting from each swede and potting each up in compost. When they flower, they will pollinate one another. Collect the seeds by cutting off the flower heads and hanging them upside down in an open bag. Allow the seeds to fall into the bag, and store in an airtight container. Use within 5 years – although seed that is 3 years or less old will have better germination results.
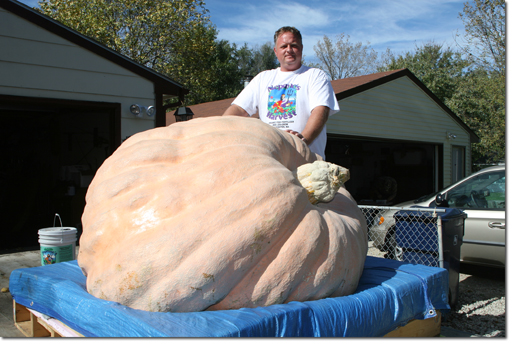
Pumpkins
by Don Langevin
History and Records
Giant pumpkins have been fascinating people for centuries, but the first 400 pound pumpkin was not grown until 1900. William Warnock from Goderich, Ontario, Canada traveled to the Paris World's Fair to have his pumpkin officially weighed at 400 pounds. He followed this up in 1904 at the St. Louis World's Fair, beating his previous best with a 403. That would be the end of record setting for more than 70 years, before the modern history of giant pumpkin growing was kick-started in 1976 by Pennsylvanian, Bob Ford's world record 451.
Howard Dill of Windsor, Nova Scotia, Canada was able to break Ford's mark with a 459 in 1980, and then repeated in 1981 with a new world record 493.5. Howard's seed variety, the Atlantic Giant, would become the seed of choice for all giant pumpkin competitors from that day forward.
Howard's fame brought many new gardeners into the sport, and an offshoot of this popularity was the organization of several North American associations of giant pumpkin growers. The first was the WPC, the World Pumpkin Confederation, cofounded in 1983 by Howard and a chicken farmer, restaurateur, and marketing magician from Collins, NY, Ray Waterman. So confident were Dill and Waterman in Dill's 493.5 being unbeatable, they offered a $10,000 prize and a trip to Hawaii for anyone who could. They didn't have to wait long. In 1984, Norm Gallagher of Sequim, WA stunned the WPC with a record breaking 612. Five years later, 700 pounds fell with Quebec gardener, Gordon Thomson's 755.
800 pound records started in 1991 with Ed Gancarz's 816.5. Joel Holland of Puyallup, WA raised the bar with an 827 in 1992, and Donald Black of Winthrop, NY broke that record the following year with an 884. Competitors considered this the limit of the Atlantic Giant's potential, but that all changed in 1994 when four growers across North America grew 900 pound pumpkins, with Herman Bax of Ontario, Canada missing 1000 by just 10 pounds at 990.
Two years later in 1996, 1000 pounds would be accomplished for the first time by Paula and Nathan Zehr at the WPC weighoff in Clarence, NY. For several years, the WPC had offered a $50,000 prize for the first pumpkin grown over 1000. The Zehr's walked away with a check for $50,000 for their 1061 pound pumpkin. 1061 stood for two years, then in 1998, Gary Burke of Quebec elevated the record to 1092. Competitive growers everywhere were convinced that weights could go no further.
Then, in one of the most amazing horticultural phenomena in history, the world record for giant pumpkins was broken 10 consecutive years from 1998 to 2007. The first 1100 pound pumpkin came with Gerry Checkon's Altoona, PA entry in 1999 at 1131. The first 1200 pound pumpkin was emphatically recorded with Geneva Emmon's Pacific Northwest entry at 1262 in 2001. The first 1300 pound pumpkin came a year later from a New Hampshire grower, Charlie Houghton, with 1337.6 in 2002. The first 1400 pound pumpkin came in 2004 by way of Al Eaton of Ontario, Canada who grew a 1446 just 400 miles from Goderich, Ontario where William Warnock had grown the 1904, world record 403.
The first 1500 pound pumpkin (a seemingly impossible feat) came in 2006 with Ron Wallace's RI entry of 1502 pounds, and then, just 10 miles from Ron's pumpkin patch, Joe Jutras annihilated the world record in 2007 with a 1689. Christy Harp of Ohio furthered the record again in 2009 with her 1725, and Chris Stevens of Wisconsin bettered the mark by 85.5 pounds with his 2010, 1810.5. In 2011, Jim and Kelsey Bryson of Washington bettered the record again at 1818.5 pounds, and in 2012, Ron Wallace, who was the first grower to grow a pumpkin over 1500 pounds, broke the one-ton barrier witn a 2009 pound pumpkin.
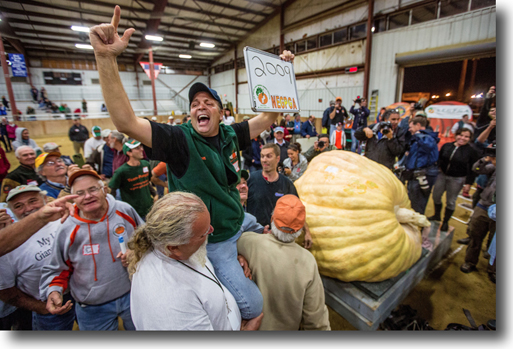
Now, average backyard gardeners are consistently growing pumpkins of 800 to 1000 pounds or more. With ten consecutive years of records, and a new world record being set in thirteen out of the last fourteen years, will the world record be broken again?
How-to-Grow World Class Giant Pumpkins
If you ask ten competitive pumpkin growers how to grow a giant pumpkin, you're likely to get ten different answers. It seems everyone has his or her own way of coaxing the most weight out of their giants. But, there is a thread of consistency that runs throughout all the instructions, and adhering to three basic tenets will get you well on the way to a world record. Above all else, you need good seed, good soil and good luck.
Good Seed
If you want to grow a world-record pumpkin, you can forget about every variety of pumpkin out there except the Atlantic Giant. No other pumpkin variety has been a world champion since 1979.
Good Soil
Pumpkins are large consumers of all the major plant nutrients (nitrogen, phosphorus, and potassium), as well as many minor nutrients like calcium and magnesium, and other trace elements. The key for big growth is soil well amended with organic matter and balanced in plant nutrient composition. In the fall or early spring, add two to five yards per plant of compost and/or rotted manures. Cow and horse manures are best. Use chicken manure sparingly and only in the fall. Cover crops of winter rye, plowed down in the spring, are fabulous.
Good Luck
If you can grow a good vegetable garden, you have the skill to grow a world record pumpkin. I've seen newcomers grow 1000 pound pumpkins their first year with good seed, some rudimentary help from an experienced grower, and some luck. With the right soil preparation in the fall and spring, you might just be a contender for the world championship!
Ten Basics1. Prepare Your Soil
Start with a pH test in fall and adjust your pH to between 6.5 and 6.8 by adding sulfur to lower the pH or lime to raise it. Apply 2 to 3 yards of composted manure per 30' diameter circle where you expect to plant. Plant a cover crop of winter rye in fall to be turned under in early spring, broadcasting 5 pounds of seed per 1,000 square foot area.
2. Sow Seeds
Start seed indoors in 3"-4" peat pots about four weeks before your last spring frost date. Plant the seed with the pointed end of the seed facing down. Keep the soil temperature at 85º-90º F (29º-32º C). Most seeds will emerge within five days.
3. Transplant Seedlings
Transplant seedlings into the garden once the first true leaves appear or when roots begin to grow through the peat pot (usually 7-10 days after germination). Handle with care because pumpkins are easily set back during transplanting.
4. Protect Seedlings
Place a "mini-greenhouse" over the seedlings for six weeks to shield plants from wind and frost. These mini-greenhouses can be as simple as two storm windows nailed together to form a teepee, or as elaborate as a 4' x 8' wooden structure made from 1" x 2" lumber nailed together with 6-mil clear plastic stapled to cover the frame. Once seedlings outgrow the mini-greenhouse, use a temporary fence to screen wind. I use "conservation" fence, which has wooden stakes attached, and is commonly used at new construction sites. A 100-foot roll cut into three pieces is enough to protect three, 11' diameter areas.
5. Pollinate Flowers
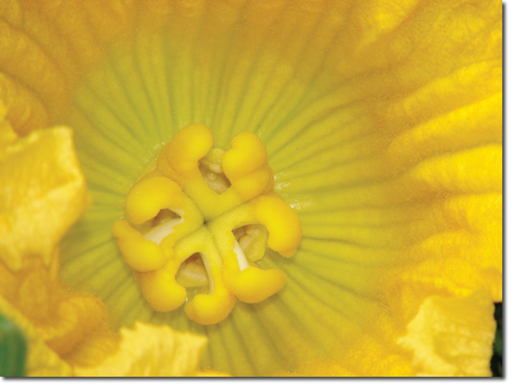
Eight to ten weeks after seed starting, the first female flowers will appear. They're easy to distinguish because they have a small pumpkin at their base. If you want to get a jump on your rival, you'll need to hand pollinate the flowers. In the early morning, locate a freshly opened male flower. Pick it and remove the outer flower petals, exposing the stamen and fresh pollen. Locate a newly opened female flower and gently swab the stigma (internal parts) of the female flower with the pollen laden stamen. Pollinating fruit on the main vine is much preferred to side vine fruit, and pumpkins out 10' or more on the main vine will grow best.
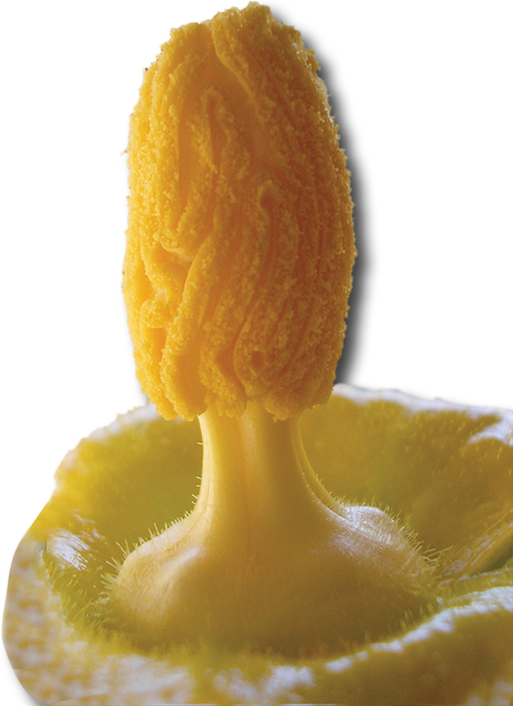
Getting a pumpkin set as early as possible, preferably before July 10, is key. The earlier you set a pumpkin, the longer it has to grow until harvest. Since these monsters can gain 25-45 pounds a day, losing 10 days in the early part of the season could put you well down the list at your local pumpkin weigh-off.
6. Reposition Set Pumpkins
Once a pumpkin has set, its position on the vine becomes extremely important. Most often the stem grows at a very acute angle to the vine. However, for optimal long term growth, the best position is to have the stem perpendicular to the vine. If yours is not at right angles to the vine naturally, coax it gradually over a week's time, until it is in that position. Be careful; because at this early stage pumpkins may still abort or you may injure the fragile stem.
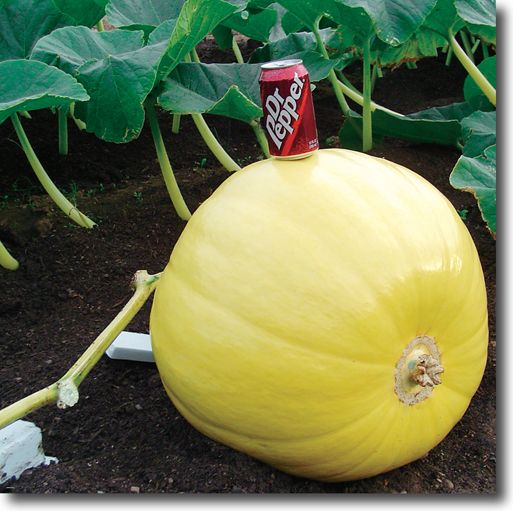
7. Select the Best Pumpkin
If you have three fruit set and growing by July 20th, measure each pumpkin's circumference at the widest point daily with a cloth measuring tape. Choose the one that's growing the fastest, and remove the rest gradually over 3-4 days. Also, keep an eye out for the optimum shape. Young pumpkins that are long and wide grow the heaviest.
8. Prune Vines
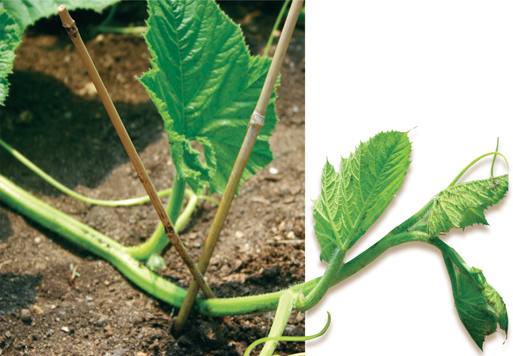
Begin pruning vines early in the season to discourage random growth and an out-of-control patch. Deadhead each side vine when it has reached 10' to 12', and remove all growth from leaf axils on these side vines. 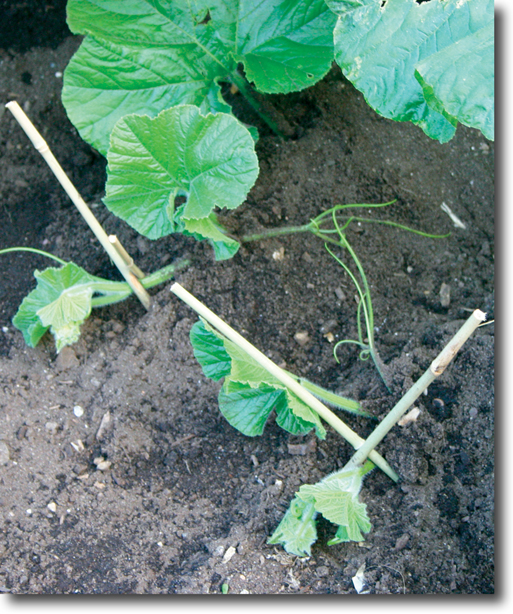 Train side vines so they are perpendicular to the main vine to accommodate access to the vines and pumpkins.
 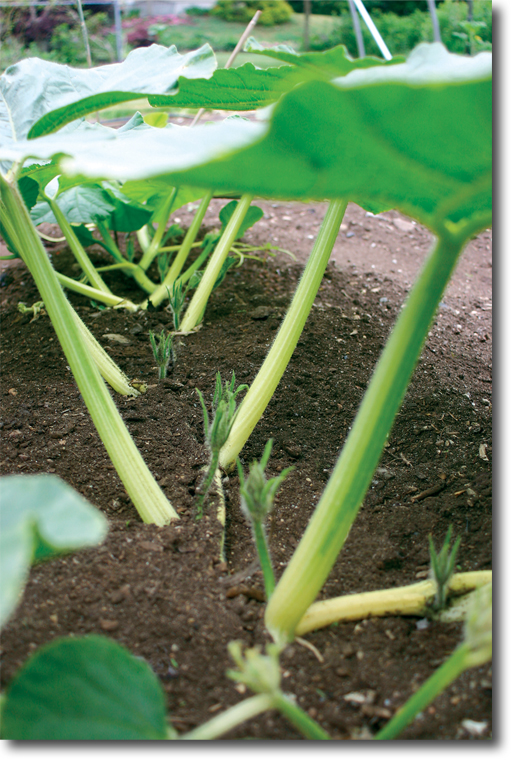 Bury the ends of cut vines to reduce water loss, and bury all vines at their leaf axils to provide better and faster rooting and aid in stabilizing the plant against wind.
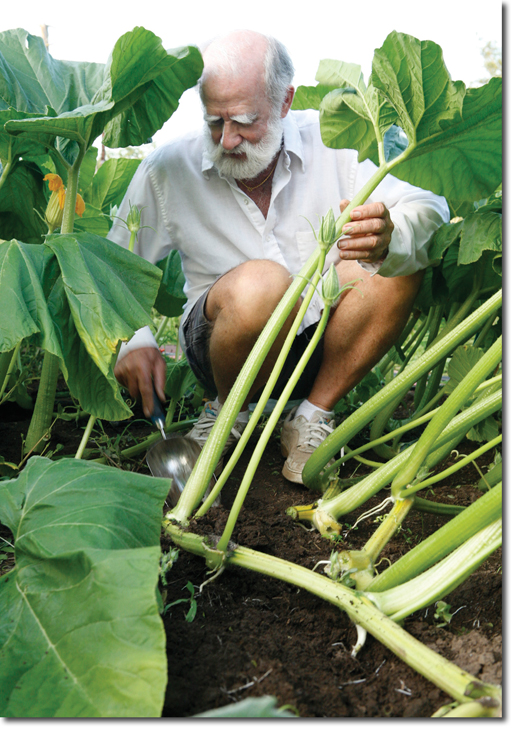
9. Fertilize
During the growing season, most fertility needs of pumpkins can be met by applying water soluble plant foods once or twice a week over the entire plant area. Give seedlings a fertilizer that stresses phosphorus, such as 15-30-15, at transplanting and at pollination. Use a more balanced formula, such as 20-20-20, when vines are aggressively growing before pollination. Once fruits are set, switch to a high potash fertilizer such as 0-0-60.
I apply water-soluble fertilizer at the rate of 1-2 pounds per week per plant from fruit set until the end of the growing season. Some competitive growers will err on the side of overfertilization. But, too much fertilizer can hurt more than help. If the pumpkins start growing too fast, they will literally tear themselves from the vine or split. A very fine grower in New England once told me, "Slow and easy wins the race." Remember this whenever you feel the urge to overfertilize.
10. Keep Track
Measure your pumpkins at least weekly. Gains in circumference can average 4"-6" in a 24 hour period. First, measure the circumference of your pumpkin about parallel to the ground around the entire pumpkin, from blossom end to stem, trying to get the biggest measurement possible. Next, measure over the top in both directions: from ground to ground from side to side, then from ground to ground stem to blossom end. The tape should go straight down from the sides to the ground. See the illustration below.
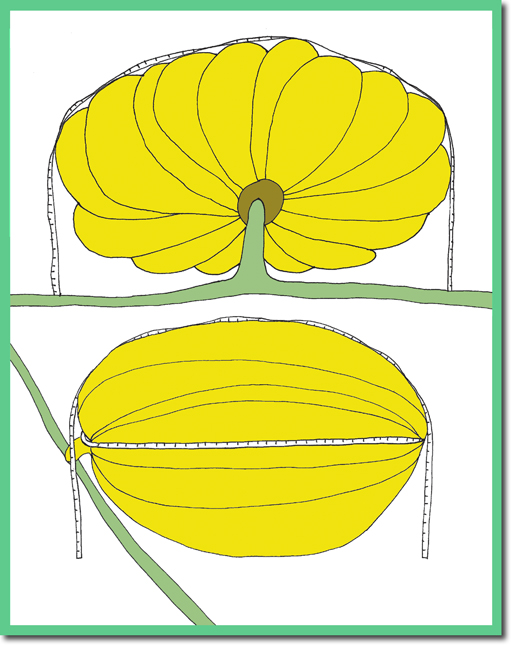
Add these three measurements together, then refer to a table for OTT estimates in one of Don Langevin's books.
Remember
These ten tips will get you on the way to success, but just about anything can stop you in your tracks if not attended to. Soil compression, diseases, insects, weeds, and more can all end your season (or, at least limit your true potential).
Don Langevin is the author of four books and numerous articles on giant pumpkin growing. For more information go to:
http://www.GiantPumpkin.com/books.php
Squash
Giant squash are grown the same as giant pumpkins. Only the color differentiates them from pumpkins. New rules adopted in 2003 came as a result of disputes related to the subjective determinations of color at weigh offs, and therfore the category of competition - pumpkin or squash. The old rules created conflicts at weigh offs, and the new rules seem to have quelled disputes that pitted friend against friend.
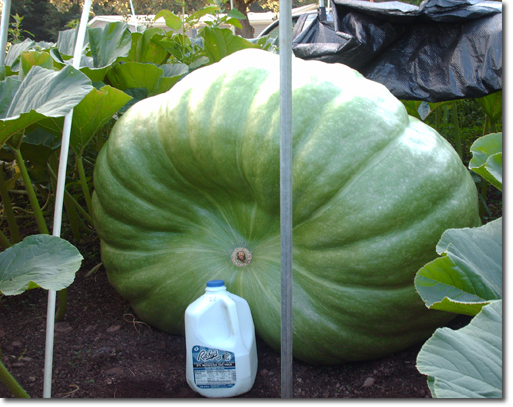
The new rules state that any fruit that is not entirely green or gray in color is a pumpkin, and any fruit that is, is a squash. This has led to some beautifully large squash being grown in recent years, and a lot of excitement at competing for a world record.
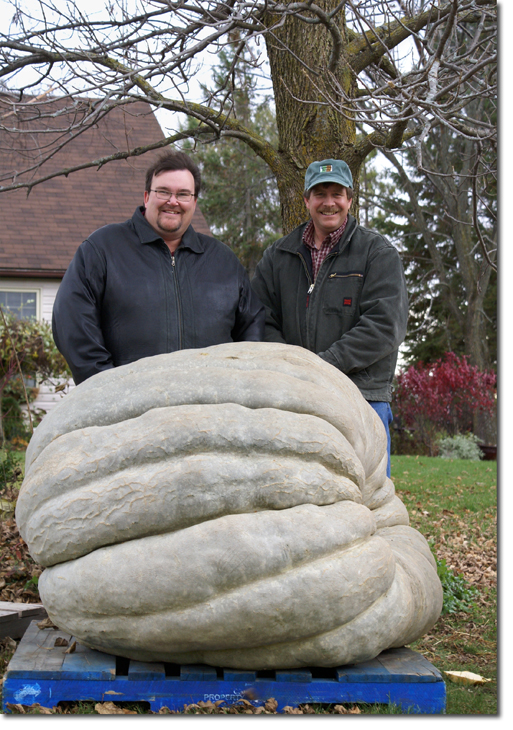
An official record was set in 2009 by John Vincent and Brian McGill with their 1236 pound squash, and this record was subsequently broken by Joel Jarvis of St. Thomas, Ontario in 2012 with a 1486.6 pound squash.
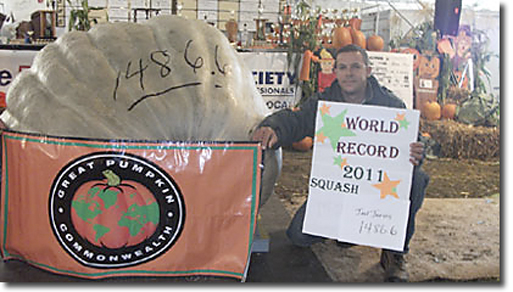
The GPC now awards special honors and prizes for squash, including a coveted green jacket at the annual giant pumpkin growers seminar in Niagara Falls, Canada.
Most of the seed used for giant squash are descenedents of the same strains of seed used by giant pumkin growers – the Atlantic Giant. These seeds have been selected for color to acheive squash status. Howard Dill Enterprizes of Windsor, Nova Scotia Canada sells a variety developed by Dill called Show King. This is a good place to start your pursuit of the right seed to grow.
Squash have been repeatedly crossed with the Atlantic Giant Pumpkin so that pumpkins might inherit genetic traits that squash possess – like thicker walls and more aggressive plant growth. Squash tend to be harder to pollinate because of this quick growth that seems to result in many fruit sets that abort soon after pollination attempts.
With the new rules and relative low success of growing large fruit as squash (the squash record is 1486.6 and the pumpkin record is 2009), many growers have gravitated to squash as a way to better compete on an international scale.
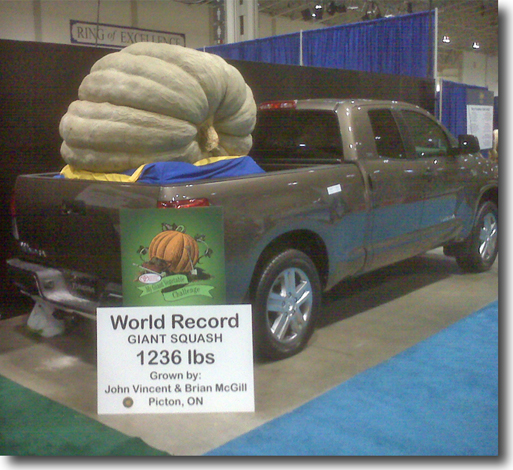
More Squash - Marrows
by Brad Wursten - The Marrow Man
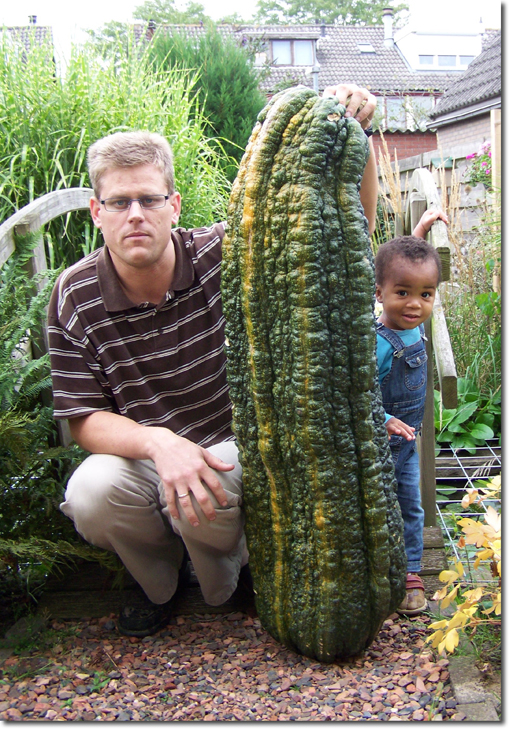
The marrow is a member of the Cucurbita pepo genus, also known as summer squash. Marrows need to be harvested very young in order to eat skin and all. Unlike most courgette or zucchini plants, the marrow plant does not form a bush with the fruit coming off the central, upward-growing stem. Marrows produce vines like the pumpkin and cucumber species.
For as long as people can remember, marrows have been grown for competition in Great Britain, and especially in England and Wales. Today, it is one of Britain's most popularly grown giant vegetable, with competitions at local, regional, and national levels. Although Canadian and American growers have been growing giant marrows for quite a few years, it wasn't until the European Giant Vegetable Grower's Association organized a marrow contest for its members in 2008 that marrow growing took off in other countries. In 2009, the world record was set outside of Britain for the first time in its history when I grew a 206.5 lb fruit.
Finding the right seed is the key to success. Without the right genetics, it is impossible to grow a world class giant marrow. While the marrow record had been stuck in the 40 to 50 pound mark for quite some time, growers like Bernhard Lavery managed to get weights above 100 lb by 1990. In 1998 the top weight suddenly jumped to 135 lb where it stayed until 2005, when that record was eclipsed by a mere pound. In 2008 a new world record of 143 lb was grown, but a year later that record was smashed by a 206.5 pound monster grown in The Netherlands [by author Brad Wursten].
Many of the British growers kept their seeds to themselves and their crosses have remained mysteries. The most successful grower was the late Ken Dade who, with his superior seed line, managed to win the national marrow championship at Shepton Mallet four years in a row, culminating in a new world record of 143 pounds. His line was passed on to a number of fellow growers who became successful with it as well. But, the new hot seed stock came from a totally different source.
Peter Glazebrook of Hallam, England produced the winning cross. It was a seed from his 118 pound marrow grown in 2008 that produced the world record in 2009. It is a most successful stock, but there are several other excellent seed stocks in Great Britain that are worth trying. The best way to get seed is to join a club like the EGVGA (European Giant Vegetable Growers Association) or contact a grower personally. There are one or two seed companies where good seed can be purchased, but a grower is always a better source option as most growers keep track of lineage and progeny – a custom inherited from the giant pumpkin world.
The right seed is critical, but not the complete recipe for success. That recipe starts in the fall with soil preparation.
Soil Preparation
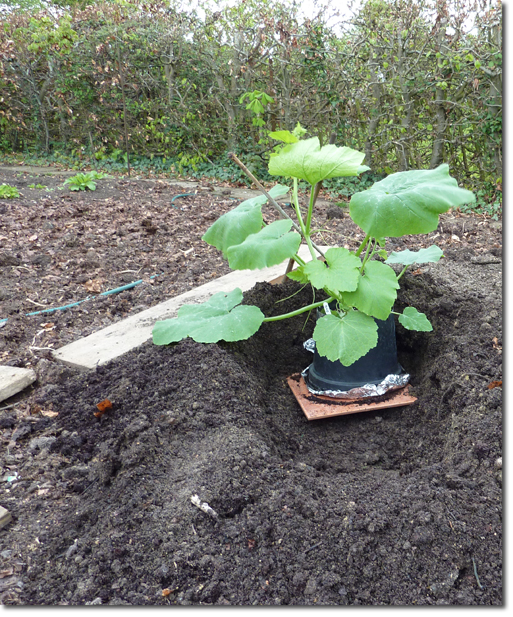 Giant marrows and giant pumpkins are relatives and require much the same soil preparation and growing techniques. Add well-rotted cow manure and compost (and/or leaves) to your patch in the fall. Let the fungi, bacteria, and worms do their work during the winter months. You will need a 15' by 15' space per plant (5 x 5 meters).
 Make sure your patch is in full sun but sheltered from wind. The soil should be rich but must drain well. Marrows seem to respond best to a pH level of 6.0 – lower than what is required for pumpkins.
Seed Starting and Transplanting
Marrows can be started later than giant pumpkins and squash. They do not need as much time to grow. The best time to start is early May. The seeds do not need soaking ahead of time. They usually germinate quickly at just room temperature. In general, marrows like it a bit cooler than pumpkins. Make sure the pot is big enough to hold the plant for a few days. Once the first true leaf appears, you can transplant it outside as long as there is no danger of frost. The plant will always grow in the opposite direction of the first true leaf.
It is smart to start your plant off in a hoophouse which will keep it out of the wind and protect it from low temperatures. Make sure the hoophouse is ventilated during warm days. The hoophouse should be twice as long as wide, because the main vine of a marrow plant grows much faster than the side vines. As the weather warms up, remove the hoophouse as marrows do not appreciate hot temperatures and will not thrive in a hot greenhouse.
Slugs really like young marrow plants (especially freshly pollinated marrows), so make sure you prevent them from attacking your plants.
Some growers who have properly prepared their soil, do not add any fertilizer during the entire growing season. The 2009 world record was grown this way. In general, they need the same feeding and watering as pumpkins. Like pumpkins, they do not appreciate water on their leaves, especially during the day. This can lead to scorching and can contribute to the spread of powdery mildew.
The soil should never be soaking wet or dry. Both can lead to irregular growth and splitting. Marrows seldom or never have stem stress, but do suffer from rib and blossom end splits.
Once the fruit has started to grow, you can feed with a higher potash fertilizer up to two times per week.
Disease
Spraying an anti-mildew fungicide, or a 90% water, 10% skimmed milk solution once a week, can help prevent mildew which will otherwise eventually kill the plant. Remove any old, diseased leaves if they appear. An insecticide can also prevent damage to the plant.
Pruning
There are a few different plant pruning schemes which can be used. In general, the plant should be allowed to grow about 15' (4.5 meters) long with a fruit set on the main vine at about 12'-15' (3.5-5.0 meters). The side vines should be deadheaded at about 2-2.5 meters (6'-8'). All shoots and tendrils on the side vines should be removed as soon as possible. A very successful pruning technique is to let the first two secondary vines grow to the edge of the patch, and then swing them parallel to the main vine to continue growing. Do the same to the next sets of side vines. Each consecutive set gets shorter, and eventually there will be no room for the last side vines to grow. At this point, you can set a marrow on the main vine. Set a marrow only when the plant has filled the patch. Some growers also bury the main and/or side vines to help stabilize the plant and promote growth. Marrows often produce side vines irregularly, and side vines might not appear at every leaf node. There are extreme cases where plants have no side vines, but the missing vines are not a problem, as the rest of the plant will fill up the empty space.
Pollination
Pollination procedures are the same as used with pumpkins. For a controlled pollination, the male and female flowers must be covered the evening before. The female should remain covered (or tied up) for up to a day after pollination. Do not forget to write down the date and cross you make. It is usually best to set up to three marrows on a plant and finally keep the fastest growing, which is often the first marrow set. If necessary, you can allow the main vine to continue to grow. The 2009 world record was grown on a plant 15'x15', but the main vine was doubled back and the marrow grew at 17' from the main root.
Marrows only grow a short period of time. The shortest fruit growth cycle is about four weeks, but five to six weeks is quite regular. Some marrow seed lines will grow on into the seventh week. The 2009 world record was still growing in the eighth week, which is new evidence that better seed genetics and cultural procedures are extending the growing season for marrow fruit. Marrows should be set about eight weeks ahead of the weigh-off date. Once the skin is hard, the marrow has stopped growing. They can stay on the plant for a few weeks without significant weight loss. It is also handy to measure the width (ground to ground) and length (ground to ground) of the marrow. This will help you know when it has stopped growing, and you can also use these measurements to estimate the weight. For this purpose a marrow estimate chart has been developed.
Estimating Weight
If you use this equation where EE is a measurement in cm, ground to ground from end to end; and SS is a measurement in cm, ground to ground from side to side, you should get a fairly accurate weight.
EE (cm) x SS (cm) / 150 = weight in lb
Note that you measure in centimeters (multiplying the two together, then dividing by 150), and get an estimate in lb.
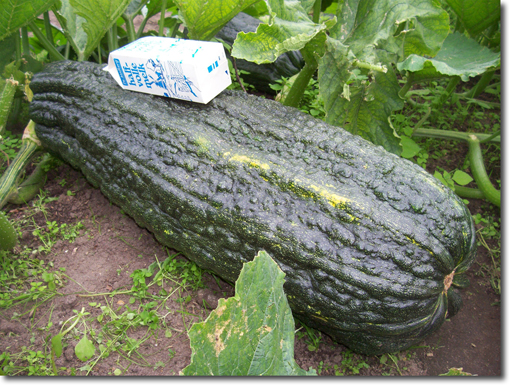
Marrow Types
There are several types of marrows. Although most marrows are green, some are yellow and some are striped. Some have smooth skin and some have lumpy skin, which are referred to as alligators or "crocs." The green croc-type has won all the recent world records. The shape can also differ. They can be short, fat, long, or skinny.
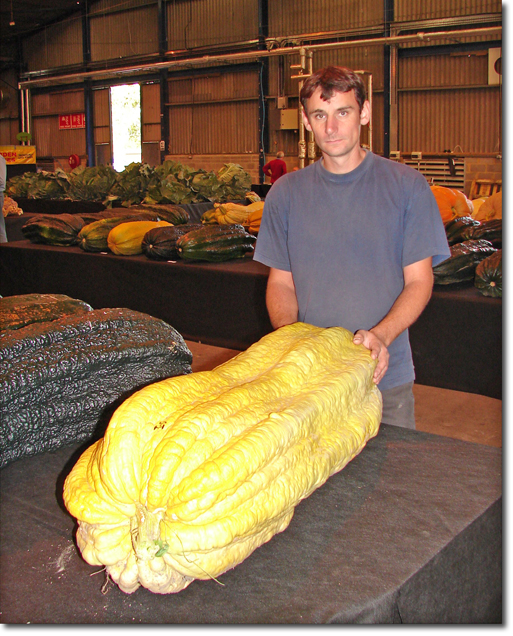
The long skinny ones will weigh more than the others; the short, fat ones less. A short, fat marrow is any marrow that is less than 150% longer than wide (using end-to-end and side-to-side measurements). A regular marrow will be between 150%-175% longer than wide, while a long marrow will have a factor of more than 175%. Recent measurements have shown factors ranging from 119%-217%.
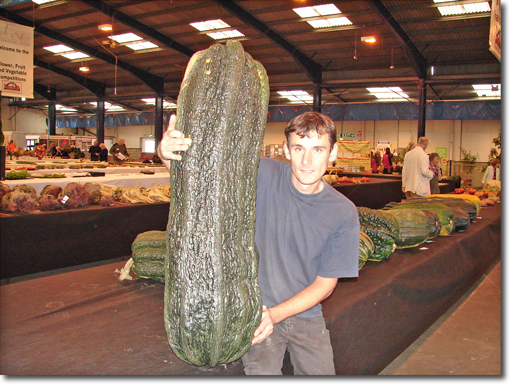 Younger marrows tend to be more dense than older marrows and therefore heavier. Lumps and bumps and wall thickness will also have an influence on the final weight – two other things measuring cannot predict. At the end of the day, it is the scale that is right – everything else is an estimate.
More Squash - Zucchinis
"The secret to my success," John Evans says, "is compost tea. The reason it's called tea is because it looks like tea, but it doesn't act like tea."
Most gardeners know compost is good for the garden, but Evans says compost tea is even better if you want to grow bigger.
To grow a large zucchini – say, a 35 lb zucchini – Evans recommends growing the plant in its own contained, raised area, which helps hold in moisture and warmth. And he grows only one zucchini on each plant.
Botanical name = Cucurbita pepo
Courgettes

Zucchini, as it is most commonly known in America, is an Italian word, but are known as "courgettes" in Europe. It is a summer squash, having soft, edible skin. It can be harvested in as little 35 to 55 days. Most plants yield 3 lb - 9 lb of young fruit, but culling flowers and growing just one fruit per plant can yield monsters. We've alll thrown baseball-size squash into our compost piles that somehow escape our earlier detection.
Squash is a member of the cucurbita genus, and pepo species, which includes melons, pumpkins, cucumbers, and gourds. If other C. pepo are present in your garden, special precautions should be made to isolate and protect male and female flowers on your competition plants. This insures that seeds will be true to the parent; if the parent is an open pollinated variety.
History
Archaeologists have traced the origin of summer squash to Central and South America dating to 5500 BC, where they were an integral part of the ancient diet. European colonization brought summer squash varieties to Europe. It is believed that the Italians developed zucchini, giving it the name we now use.
Description
Zucchini grows on bushy non-vining plants. It bears cylindrical fruit, but new cultivars include other shapes. Fruit color varies from yellow tones to greens to black. Many have speckles and/or stripes.
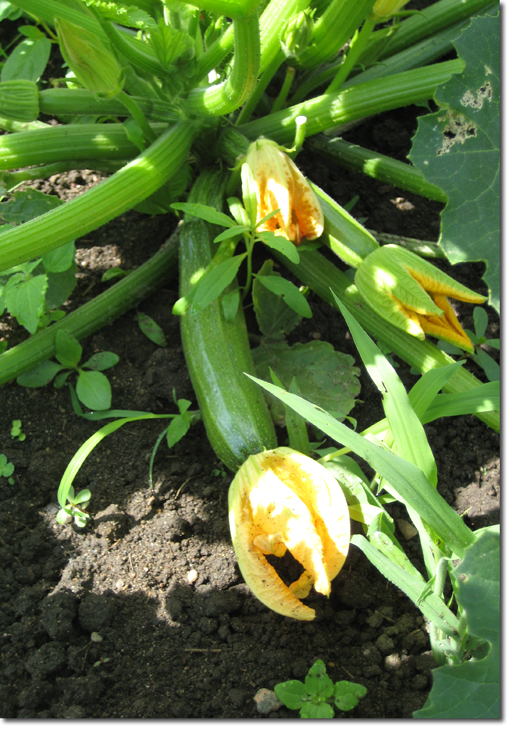
The leaves of the zucchini plant are large and dark green; and mature leaves are characterized by mottled silver-gray splotches and streaks. These light markings can sometimes be mistaken for powdery mildew.
Squash plants produce male and female flowers on the same plant. The female squash flower has a fruit at its base and is borne on a short stem. The male flower can be identified by their long slender stem and a stamen in the flower that provides pollen – much the same as giant pumpkins.
How-to-Grow World Class Giant Zucchinis
Optimal conditions for growing zucchini include the right location, proper soil and preparation, and warm temperatures – zucchinis are not frost hardy. Plants should receive at least 6 to 10 hours of direct sunlight daily. The most common method of propagation is direct seeding into prepared beds.
After the danger of frost has passed, seeds should be planted to a depth of 1" in light, well-drained soil. Seed germination requires a minimum soil temperature of 60º F (16º C). The preferred soil pH range is 6.0 to 7.5. Giant zucchinni shoud be planted 5'-6' apart to contain their sprawling nature.
Monitor plants closely and often for pests or disease. Be sure to look at the undersides of leaves where many zucchini pests reside.
When planted in compost- and/or manure-rich soil where nutrients are released slowly, additional fertilizers may not be required. An organic liquid fertilizer such as liquid fish and seaweed may be applied at 1- to 2-week intervals, but avoid high-nitrogen fertilizers; they will only encourage more leaves and stems at the expense of fruit size.
For best fruit production, hand pollinate the zucchini flowers by cutting off a male flower and rubbing the stamen on the female stigmas. This same procedure is used for all competition squash including giant pumpkins.
Watering
Adequate soil moisture is very important, especially during flowering and fruit development. Soil should remain moist, drying only slightly between waterings, but it should never be allowed to dry completely, nor should it remain soggy over extended periods – thus the importance of well drained soil. Avoid overhead watering as it will encourage disease. Water 2-3 times a week in the summer, and mulch heavily 2-4 weeks after germination with organic material to help maintain and moderate soil moisture and temeperature.
Pests and Diseases
Common zucchini pests are aphids, spider mites, squash bugs, squash vine borers, and whiteflies. Spray leaves on both sides with an insecticide as many of the sucking type insects will reside on the undersides of leaves. To control squash vine borers, make sure you spray the base of stems with a good insecticide.
Diseases include bacterial wilt, downy mildew, powdery mildew, and viruses. Bacterial wilt is spread by Striped and/or Spotted Cucumber Beetles, so controlling them will reduce the incidence of bacterial wilt. The other common diseases can be prevented with a once every two week spray program using a general purpose fungicide like Daconil. The exception are some of the notorious viruses that are soil borne and almost impossible to control. Either select zucchini varieties with resitance to viruses or plant in another garden entirely.
Variety of seed is of less importnace than the solitary growing of one fruit per plant and the maintaince of good growing conditions throughout the season.
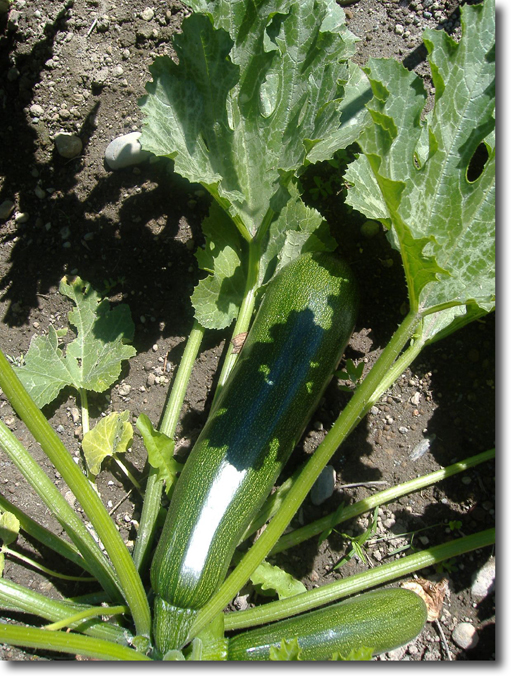
The world record for zucchinis was set in 1990 by legendary, UK, giant vegetable grower, Bernard Lavery, with an astounding 64 lb 8 oz (29.96 kg) monster.
Tomatoes
by Marv Meisner
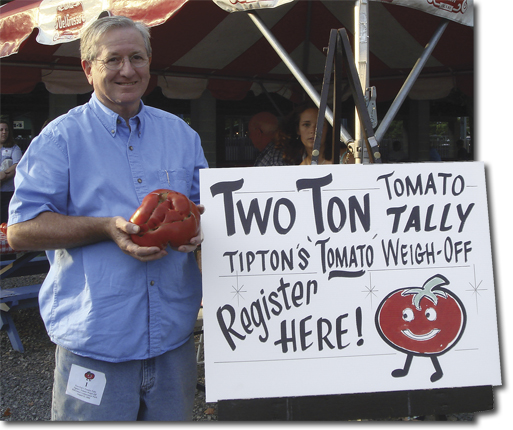
The major difference between growing a tomato to eat and growing a tomato for size has to do with selecting a tomato variety that can grow big, and then using soil preparation, watering, fertilizing, and pruning techniques to assure that it does.
The growing season for giant tomato growers begins in the fall with soil preparation. All giant tomato growers agree that the addition of organic material to the garden soil is a must if the plants are to be provided the proper nutrients. Most growers do this in the fall after the garden has been cleaned and plant debris removed. Growers will incorporate compost, or manure into their gardens, depending on what is available. If you are uncertain about the status of your soil, a soil test is useful and should be done before anything is added to the garden. Along with your soil test results will come some suggestions about steps that need to be taken to improve your soil. Follow these recommendations.
Usually, seed selection takes place during the winter months. Seeds can be purchased, obtained from other growers, or selected from seeds saved from tomatoes grown in the past. Some of the most commonly grown varieties for size in the United States include Big Zac, Delicious, Slankards and Brutus Magnum. Seek out seeds from successful growers. They will almost always share.
Starting Seeds
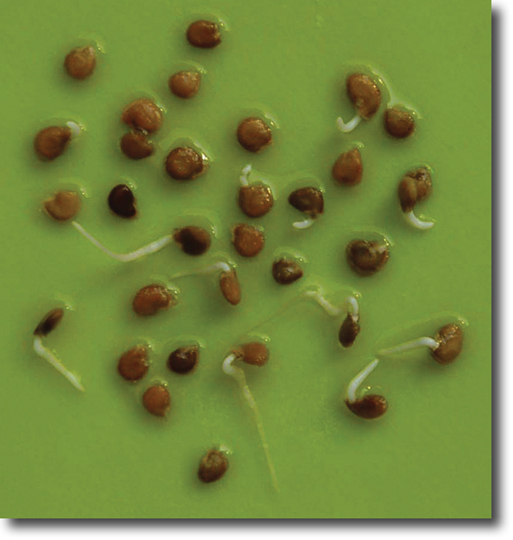
Starting your plants from seed is important since you want good strong plants and the varieties you will be growing are usually not available in stores. There are many ways to germinate seeds and you may already know how to accomplish this. Every technique requires the presence of warmth and moisture. The ideal temperature for germination falls somewhere between 70˚ and 80˚ and the most favorable is closer to 80˚. Germination can take anywhere from 2 days to 2 weeks for some tomato varieties. Seeds are usually started 6 to 8 weeks before the grower's final frost date. Start 2 to 3 times the number of seeds you want plants as not all seeds will germinate and so that you later can select only the strongest plants.
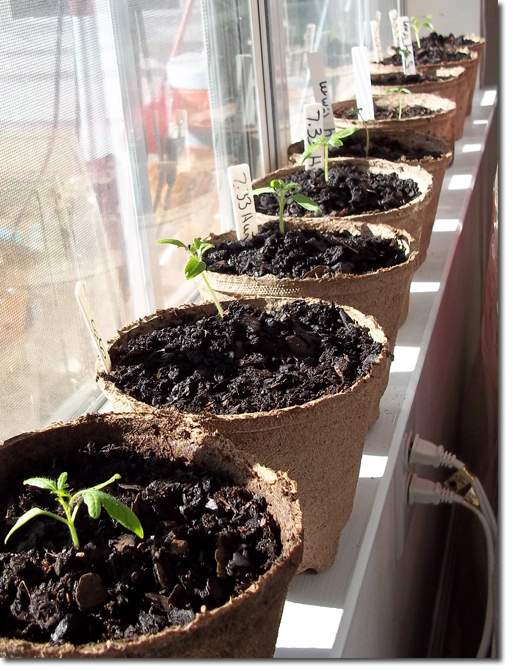
The seedlings must be provided an environment in which they can thrive. Initially they will require some artificial light with fluorescent lighting being the most often used source. A south-facing window will work but not as well as florescent lights. As the plants grow, continue to transplant them into progressively larger containers. If you find that your plants are becoming tall but not sufficiently wide, you are either not providing them enough light, overwatering or over-fertilizing them.
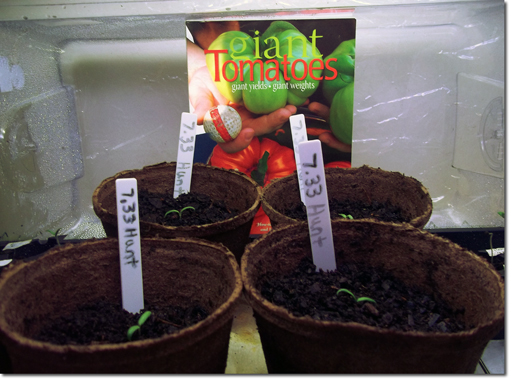
Hardening Off Plants
Tomato plants started indoors have been protected from the outside environment and need to be transitioned from the greenhouse to the garden. This usually takes about a week. Start by putting your plants outside in the shade and then slowly moving them into full sun for progressively longer periods of time. If you harden your plants properly, they will be able to withstand full sun, lower temperatures and breezes when permanently placed outside.
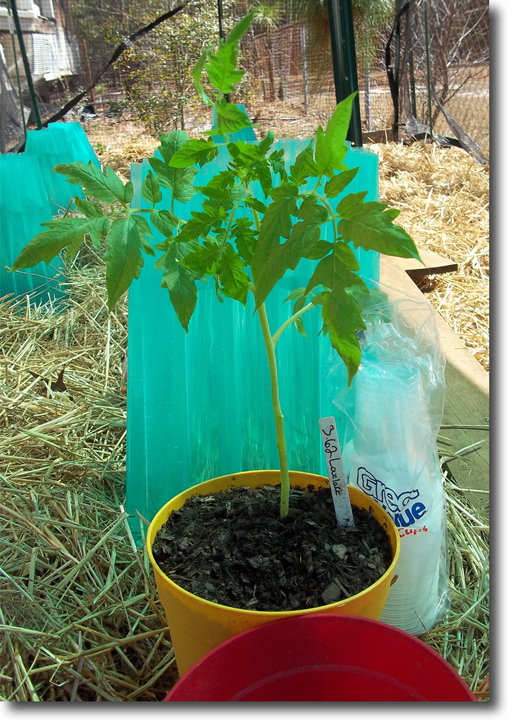
Planting Preparation
In preparation for planting your tomatoes in the garden, you should prepare planting holes. Dig a hole 12 inches deep and 24 inches wide in preparation for the arrival of your tomato plant. Place the first 6 inches of soil removed from the hole in a 5 gallon bucket. The lower 6 inches of soil removed can be spread around the garden. Add a handful of bone meal and a handful of tomato-tone to the bucket and then fill it with compost. Mix this up and pour it into the hole.
Plants can be moved to the garden, with protection, 2 weeks prior to the last frost date in your area. Planting tomatoes out too early gives little advantage and exposes the plants to the risk of cold injury. When you do transplant, remove the lowest leaves from the plant. Make a place with your hands for the tomato plant and gently pull the soil to the plant and then lightly compress the soil. Water the plants to remove any pockets of air. I add fish/seaweed emulsion to the water.
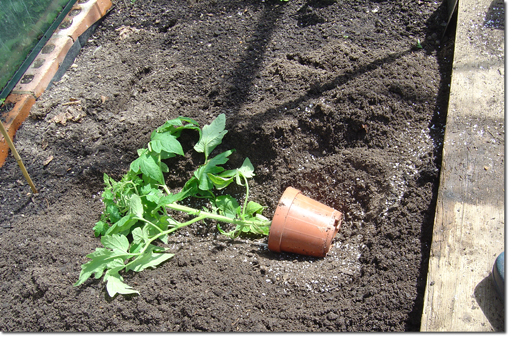
Pruning
One of the secrets of growing big tomatoes is pruning. The first and only sucker allowed to grow should be the one directly below the very first fruit cluster on the main vine. This sucker should grow to become your second main vine. Any other suckers should be removed after forming one or two leaves. The number of tomatoes per plant begins with four to six and is reduced to one if there is a big tomato present on the plant. Of the two main vines, the one without a big tomato is terminated at around 4 feet. The other main vine's growing tip is terminated at the 6 foot level. Once the tomatoes of choice are set, all new blossoms are pruned off. Little or no new growth is allowed on the plant during the last month of the tomato's growth, so that all energy is directed into that one big tomato.
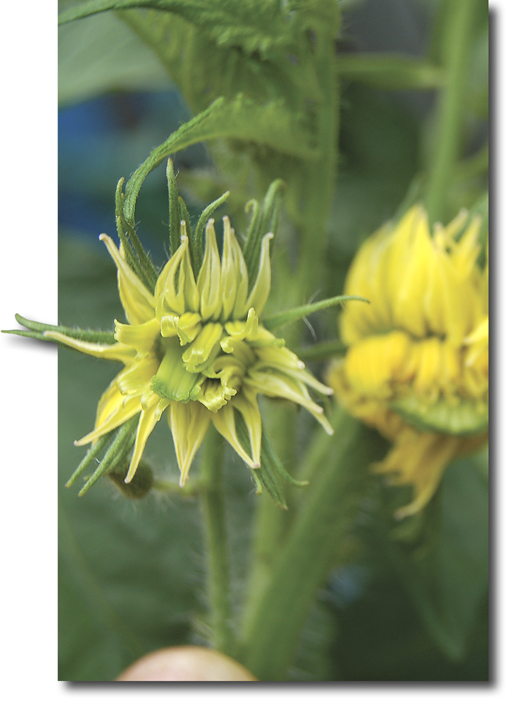
The Megabloom
To grow a really big tomato you must be able to recognize and care for a megabloom. This is the blossom that will give you a big tomato. The megabloom (MB), when closely examined, has more than one anther. It is made up of two or more regular blossoms which have fused together. A megabloom is defined as a blossom made up of two or more blossoms that have fused into one. Recognizing an MB is key to success in growing giant tomatoes. All tomatoes, 5 pounds or more, were the result of fused blossoms.
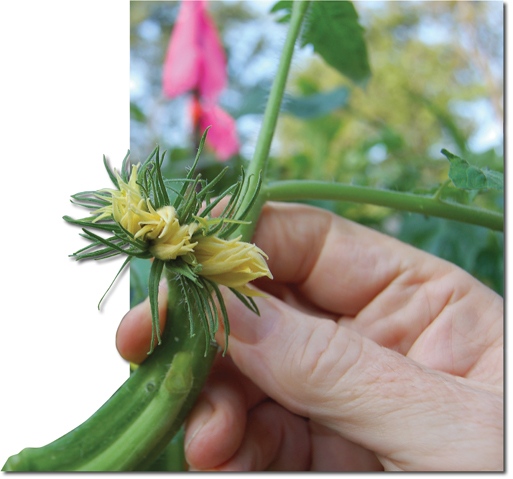
Once you have several large tomatoes growing on your plant you can begin the process of pruning the smaller ones off and not allowing any new ones to form. If your plant does not produce any megablooms, allow all the tomatoes it produces to grow and later these will be the ones you eat.
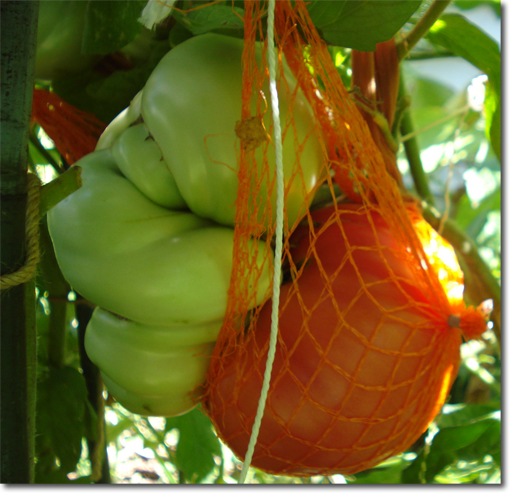
Supporting Plants and Tomatoes
Tomato plants need support. Most growers use 8 foot long wooden stakes, rebar, or pipes buried one to two feet in the ground to support their plants. Some construct cages using concrete reinforcing wire. Tomato ties can be made from a multitude of materials. Be certain you are attentive to supporting your biggest tomatoes; else they will tear away from the vine.
Feeding
If your soil has been prepared properly you will not need to do a lot of fertilizing. I would suggest giving each tomato plant a drench of one gallon of water every 10 to 14 days to which has been added one ounce of fish/seaweed emulsion. If your plant appears to need more I would suggest giving give each plant a drench of one gallon of water to which has been added either Miracle Grow All purpose Fertilizer (12-4-8) with micronutrients or something comparable.
Watering
Properly watering your plants is dependent on the type soil you have. An important concept to remember is that you need to maintain the moisture level of your soil as constant as possible, and you must keep your soil moist but not wet. There is great variability from garden to garden as to the sand, clay and organic content of the soil. Sandy soil drains rapidly and requires frequent watering while soil which is high in clay or organic matter content drains slowly and requires much less water. Recommendations for watering can range from 3 gallons per plant per week to 2 gallons per day, less if it rains and more if it is hot. Besides being dependent on soil type there is variation depending on size of the plant. Bigger plants need more water.
There are many ways to water. The use of a watering can or watering with a drip watering system keeps the water off the leaves and decreases the likelihood of fungal infections. I would suggest installing an inexpensive drip watering system. When you are away from home you can relax knowing that your plants are still being watered.
Mulching is important. Mulch reduces the germination of weed seed and prevents their emergence. Mulch reduces the evaporation of water from your garden and reduces the need to water. Many different materials can be used to mulch. I prefer straw, compost, partially composted leaves or dry grass clippings. A 3 inch layer of whatever you decide to use will provide good weed control. After the growing season is over the mulch can simply be tilled into your garden for an addition of wanted organic material.
Disease
Disease management in your garden should emphasize prevention rather than treatment. Keep a close eye on your plants and if you see a problem, respond to it. Fungal infestations can be prevented by removing deteriorating leaves and leaves that are touching the ground. The use of a milk spray to prevent fungus works by altering the pH on the surface of plant leaves. Preventative gardening practices should be emphasized. Be certain to remove all organic debris and weeds from your garden at the end of the growing season.
Grow 'em big.
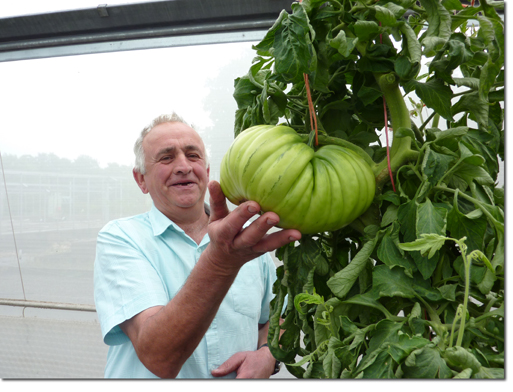
Marv Meisner's Book, Giant Tomatoes
Sunflowers
with Brian Moore
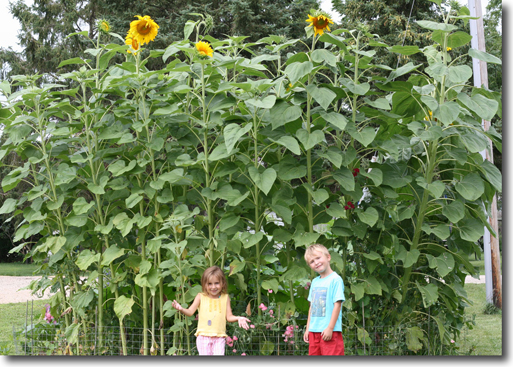
Sunflowers are some of the easiest plants to grow; even inexperienced gardeners can have considerable success.
Separate competitions are staged for size of flower, height of plant, and number of flowers on a plant.
Measured in diameter, the world record is 32¼" (82 cm) grown by Emily Martin in Maple Ridge, British Columbia, Canada in 1983. The tallest plant was grown by M. Heijms in Oirschot, Netherlands in 1986 at 25' 5½" (7.76 m), and the most flowers grown on a single plant is 837, grown by Melvin Hemker in Saint Charles, Michigan, USA in 2001.

The most important thing you can do when growing giant plants is find the best genetics available. Of course, a variety that might well for me, may not work as well for you because you have different environmental needs. Whichever variety you decide to use, it's important to understand how to breed (mass selection, back crossing, etc.) for a particular flower/vegetable. By saving seeds from your best plants, you will be breeding for plants that do well in your environmental conditions.

I spend most of my time doing searches on the web for new plant material. Usually, it's just a new article from a local paper, and I track the person down from the information in the article. I usually trial plants for a few years before I give up on them. I've trial almost every commercial variety of sunflower. I find varieties that were bred by individuals for many years generally produce better. When I grow for height, I've broken it down to three different varieties that consistently produce tall plants – Bott's Strain, which was bred by Richard Bott from Michigan, Craven, which was bred by Norm Craven from Ontario, Canada, and Richard Hope's Giant Single, which was bred by Richard Hope in the UK. These are adopted names for these seed stocks, which are generally named by the grower/competitors themselves.
When I grow sunflowers for a large head, I use a Mammoth Russian named Diane's Strain. I've had some heads over 20" in diameter with this variety.
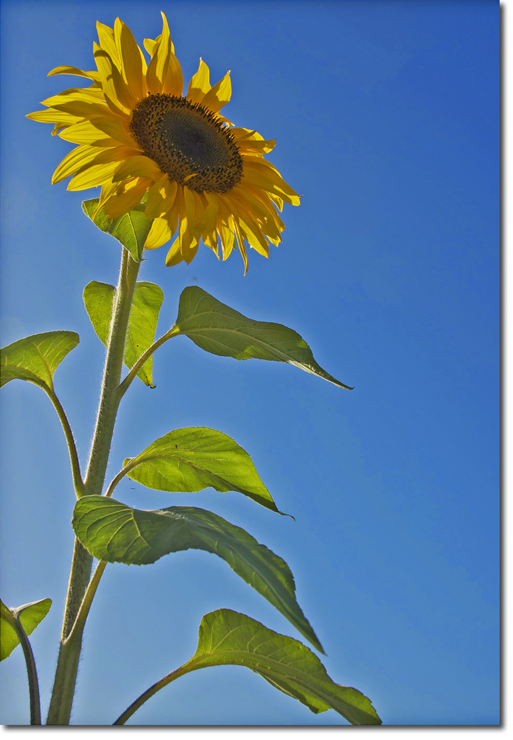
Site Planning
You are planning on setting aside some land to plant some of your potential record breakers, but before you start digging, you need to plan your site. It's important to experiment with different sites and find what works best for you.
Planning your site for tall plants
Plan your site on the northern side of a building, fence, wall, line of trees, or other object. The theory is that your sunflowers will stretch to reach the morning sunlight. Planting too close to the object may have the opposite effect because your plants are not receiving enough sun.
Planning your site for large flowers
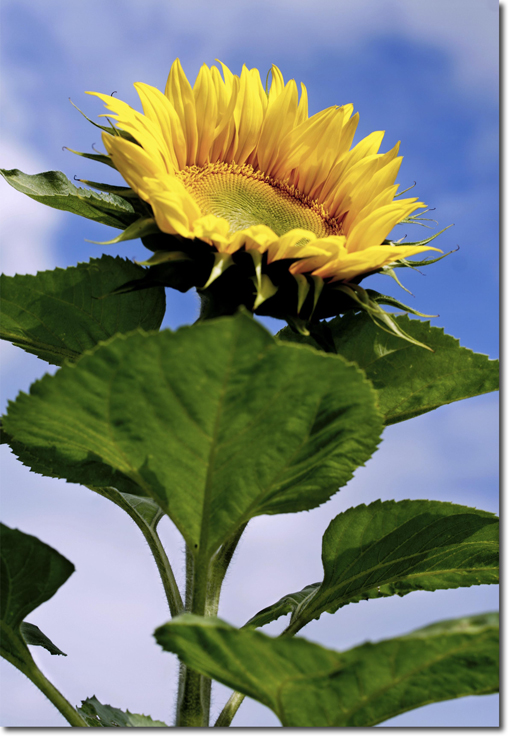
Plan your site on the southern side of an object, such as building, or in an open area where the plant can receive a full day's sun. Planting near a fence, building, or wall gives you the benefit of having an object that you can fasten your sunflower.
Planning your site in windy areas
You take a big chance planting sunflowers in an open field with little or no windbreaks. Large sunflowers, because of their large leaves, and heavy seed heads are susceptible to blowing over or snapping at the stem during large storms or on windy days. If you live in an area where you have a lot of high winds then you should try to find a place that you can balance the needs of the plants sunlight requirements with that of a sheltered location. If you plant in an open area you can help stabilize your sunflower through the use of stakes and soil mounding.
Spacing between plants
One of the most common mistakes when growing giant sunflowers is incorrect spacing. I can't count the times that I've seen people plant sunflower seeds and then fail in thinning-out because they feel bad about killing the seedlings. What they are left with at the end of the year is a bunch of spindly, stunted plants that are only inches apart. You can grow a giant sunflower with about a 2 sq. ft. piece of land. From personal experience, I've found that a wide spacing, about 4 feet generally gives you bulky plants, while closer spacing give you taller plants. I've grown a plants 15 feet tall with less than 8 inches of distance between its closest neighbor. You can have extremely close plantings as long as there are several feet of spacing on each side of the plants for root growth. Some of my tallest plants have been grown using this method. I usually stagger the two plants by a week or two, giving one plant the edge on it's nearby neighbor. It seems that the close proximity spurs growth in a competition for sun."

Watering your Sunflowers
After the seedlings appear, I generally give my plants a heavy soaking once a week for the first month, depending on soil conditions and the amount of rain during a given week. It's important not to water your sunflowers too much during the first month, because it's the time when the plant is establishing a healthy root system. Constant watering of the upper soil leads to shallow roots, which will affect your chances of getting a large sunflower, and may lead to wilting during the hottest days of the summer. Once the sunflowers have a strong root system, and the sunflowers enter the hottest part of the summer, you should use shallow, but frequent watering. In fact, you should water at least once every evening. Bernard Lavery, in his book, Bernard Lavery's Secrets of Giant Sunflowers, mentions experiments with a polythene capillary growing system that he could use to measure sunflower water intake. He found that a sunflower 6 feet tall would consume 8 gallons of water a week, and a sunflower 10 feet tall would consume 10 gallons of water a week. He also found that much of the water poured around the roots was quickly lost when it passed beyond the reach of the roots; so watering should be light and frequent.
Stabilizing your Sunflowers
Sunflowers, because of their large size, are susceptible to high winds and storms. There are two ways to help stabilize your plants from bad weather.
Staking
Staking requires the use of a large bamboo pole or rod which is firmly place in the ground near the sunflower, in which the sunflower is tied to the pole for support. Despite everything you read, a sunflower, even a giant variety, will stand by itself with no support throughout the plant's life cycle. For several years I've grown sunflowers that were over 14 feet tall that were never staked. Staking is used for securing the plant during windy conditions. If you have consistently windy conditions, and your site is not in a sheltered position, such as near a tree line, fence, or building then I recommend staking your sunflower. It only takes one severe windstorm to knock down your entire crop.
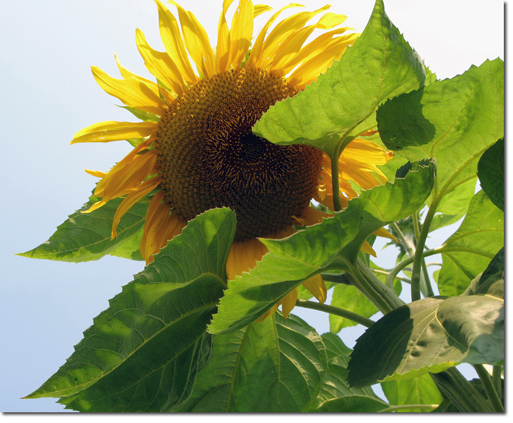
Plan ahead
If you plan on staking your sunflowers then the proper time to drive your stakes are before you even sow your seeds. Driving your stakes into the ground after the sunflower has started developing could damage the root system.
Secure your stakes
Drive your stake several feet into the ground until the stake is secure. The point of staking is to secure your sunflower; so a stake that isn't firm in the ground will not help your plant.
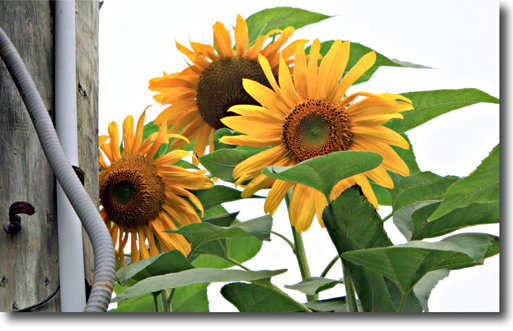
Where can I find stakes?
Most garden centers carry bamboo stakes in sizes ranging as small as a couple feet to giant 12-foot poles
What size of stakes to use?
I recommend using stakes that are around size of the plant. If you are growing smaller, ornamental varieties of sunflower that only grow 6-8 feet then I would use stakes around 7 or 8 feet. For Giant variety sunflowers I would use 12 foot bamboo rods with a large diameter.
Tying your sunflower
It's important that you do not tie your sunflower too tightly to the stake. This may damage the sunflower and possibly choke out your plant. I loosely tie my sunflower to stakes, leaving a loop slightly larger than the stem giving the sunflower some room for movement. It's also important to use a non-abrasive cord or string that will not cut into the sunflower stem.
Mounding
Mounding is achieved by placing large amounts of top-soil, humus, or composted manure around the base of the sunflower to help secure the roots. You can dig a pit at the beginning of the year and fill it as the plant grows, or you can just mound dirt around the sunflower on level land. This will help prevent your sunflower from up rooting during high winds. This technique also has the added bonus of promoting extra root growth and adding more nutrients to the soil. I generally spread a 40 pounds bag of composted manure around the base of my plants every couple weeks. Do not make too steep of an incline in your mound, or much of the soil will wash away during heavy storms, exposing the roots of the sunflower."
What's the key to getting extra-large plants?
No matter how great a gardener you are, if your plants do not have the proper genetics then you will never get a large plant. When growing sunflowers, I use varieties that I trade with other giant-vegetable growers. Those seeds usually produce the tallest plants. I then grow them and save the seeds from the best plants. Most sunflower varieties from commercial seed companies do not produce world class plants.
When growing tall corn, look for tropical varieties from Mexico, Columbia, or Ecuador. When I first started growing corn, I used a type called Mexican June and it grew about 15' on average. Now I grow a variety called Tehua, and this year it averaged about 25'.
What are some of the gardening techniques you use?
Proper spacing is one of the best ways to get plants tall. If you plant them too close, the plants will not reach their ultimate height. However, if you plant them too far apart, they don't compete for sunlight. In the case of some plants, such as giant amaranth, they will bush out instead of growing up. I also find that controlled competition is good for my plants. I'll plant a row of sunflowers and I will let various weeds and self-sown plants from my garden grow alongside the sunflowers. I let them compete to a degree,, but as the sunflower gets taller and the root zone extends outward, I cut down or pull out the competitors. The competition for sun and resources speeds up growth so I can get more growth into a season.
Do you start seeds indoors?
The only time I start the sunflowers indoors is if I have a limited amount of seed and I want to guarantee to get a plant. Sunflowers do not transplant well. There are some seeds that I always start indoors. For instance, giant amaranth (Amaranthus australis) is much more sensitive to day length; so the longer the season the taller they grow. I start them in pots in January. I've been able to get those amaranth to 21' direct-sown (planting outdoors), but the season is too short to get them much taller.
What about staking and support?
Many of my sunflowers were grown without any stakes. If you do not stake your plants, be prepared to lose some of your crop by the end of the season. I think it makes the growing season rather exciting by not staking plants. It's much more challenging to grow these plants without stakes. If I think a plant has a shot at a world record, I will get serious with staking. When I had my world-record amaranth I used a 21-ft. aluminum flagpole to secure the plant. When I grow plants along my house I use twine to tie them up from inside my second story window. I also find that if you just tie plants to one another, they all help keep one another up.
What's your fertilizing routine?
I fertilize once or twice a day with small amounts of high-nitrogen, water-soluble fertilizer. However, the average gardener can still grow giants with little fertilizing. Every year I grow sunflowers at my wife's parents house. I throw down some Espoma Garden-Tone when I turn the ground in the spring. With this approach, I've had them grow to almost 15 feet.
How does a person get started growing giant vegetables?
You have to do some research online. That means going on a search engine and type in "tallest sunflower" or "largest sunflower head". There are communities of giant-vegetable growers on the internet. They usually deal with giant pumpkins, but those same people also grow other giants as well. Another good resource: your local county fair. Get to know some of the growers and try to get some seeds from them. Many growers are willing to help out someone new with some seeds and advice.
Watermelons
by Phil & Jane Hunt
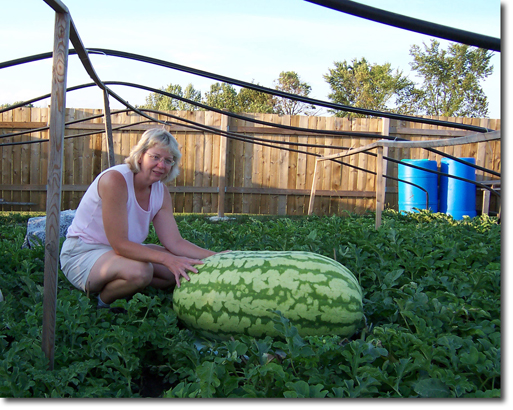
One of the joys of being involved with giant vegetable growers is that they are such a pleasure to talk to. Phil and Jane are no exception and give their time freely to nurture their hobby. They are executive members of the GVGO the Giant Vegetable Growers of Ontario and this year alone they have produced a 1677.5 lb pumpkin and a 207.6 lb watermelon, both of which are Canadian records.
What is important is that they have grown the two in a relatively cool climate – proving that it is possible to grow monsters almost anywhere in the world with the right techniques and determination. The previous world record holder was Lloyd Bright with a 268-pound watermelon grown in Hope Arkansas USA where the weather is more conducive to watermelons. Chris King broke his long standing family, world record with a 291 lb watermelon in 2010. So Phil and Jane are not too far away from giving Lloyd and Chris a run for their money. Here is how they grow them.

About Watermelons
World record is 291 lbs. held by Chris Kent of Sevierville, TN, USA, grown 2010
Soil needs to be self-draining with plenty of compost and manure
Ideal PH 6.5-6.9
Growing time 120 days
Germination temperature for Carolina Cross 85º - 90º F (30º - 32º C)
Growing temperature 68F at night and 80/90 daytime
Watermelons need a good supply of chlorine, calcium, sulphur and magnesium.
Roots run near the surface at about 2"
Raised beds are favoured
Gain weight during the day
Allocate 10' x 20' to each plant
Maximum growth is about 6 lb a day

Seed
The seed was given by Bill Donkers of Brights Grove Ontario. It is a strain of the Carolina Cross, but many other seeds will produce good melons. To name but a few, they are Triumph, Tom Watton and Cobb Gem all of which are available, but the Carolina Cross is the easiest to obtain and regularly goes over 100 lb.
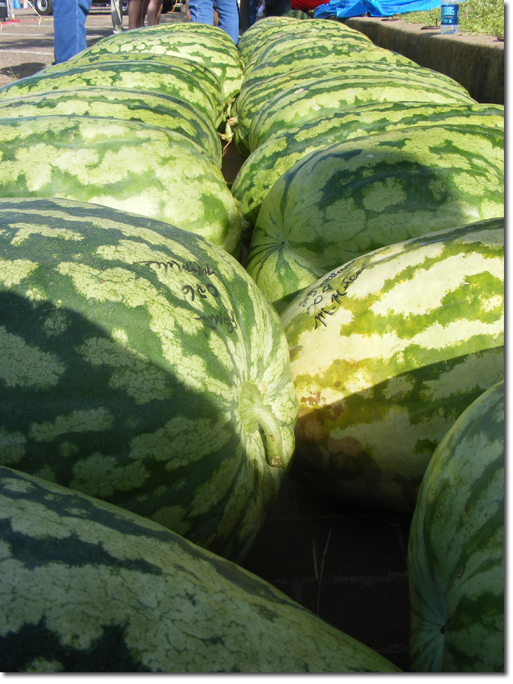
Autumn Preparation
The patch needs to be worked over a number of years to get it in good shape for watermelons. Copious amounts of compost and aged manure are dug in to bring the organic level up to around 25%. Ideally the pH should be 6.7 but the 207 pounder was grown in soil that had a pH of 7.2.
In autumn put 2" of well rotted cow or sheep manure onto the whole patch plus 1" to 2" of compost. Rototill it in and sow a crop of winter wheat.
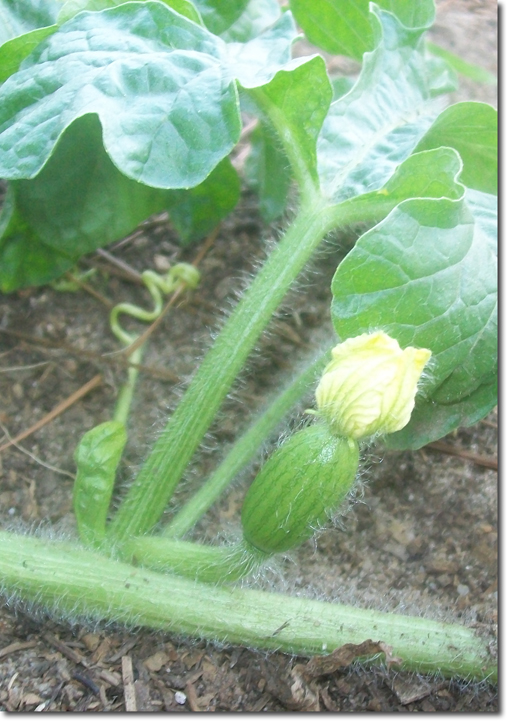
In spring when all the ground frost has melted a pit is dug 3ft x 3ft x 18" deep. To the removed soil add an equal amount of well rotted manure, compost and peat. In addition a cup full of Humate, a cup full of organic balanced fertilizer and ½ cup of mycorrhizae fungi are added to the mix. Thoroughly mix the whole lot together and place back into the hole.
Now because the amount you're putting back is a great deal more than was removed a mound will be created. That is just what you need to give good drainage and warmer soil for the young seedling. They are prone to stem rot if they become too wet or too cold.
Build a small green house over the mound about 5ft x 8ft x 2/3ft high and leave in position to warm up the ground prior to transplanting the young plant. Do this at least a week before putting the plant.
Over the rest of the plot spread 10lb of humic acid and 10lb of kelp meal. Then the plot is rototilled.
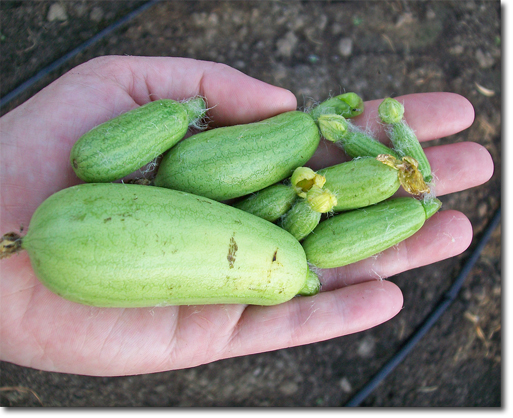
Getting Started
The seeds are started off on 15th of April by filling away the edges of the seed to let the embryo break out of the hard casing. Germinating seeds can be a bit of a challenge so to give them the best chance of germinating soak the seeds in a dilute solution of 3% peroxide for up to 6hrs. The peroxide must be diluted by 20 to 1, just enough to kill off any diseases being carried.
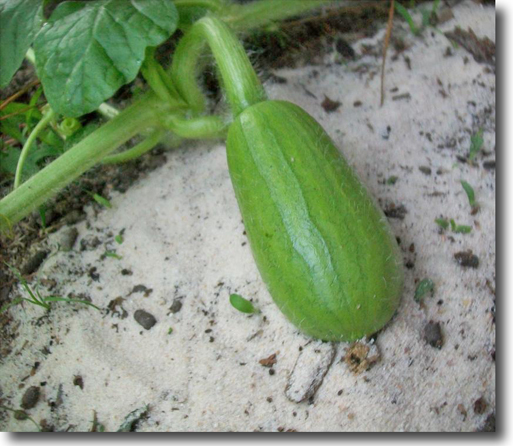
The seeds are sowed on their sides directly into a 2 liter pot full of Miracle Grow seed compost and placed in a special germination cooler box. In the bottom of the cooler box is a germination pad that keeps the temperature at 85F. After a few days the seeds start to germinate, but may not appear for 2 weeks. Once they break through the soil place them under artificial light to stop them getting leggy. Keep the light close to the seedlings and move up as they grow. This will stop them from trying to reach for the sunlight which will again make them leggy.
Transplanting
On the 3rd week of May or when conditions permit transplant the plants to the patch. Dig a hole just big enough for the plant and sprinkle a little mycorrhizae fungi powder over the roots and in the hole. Make sure it makes contact with the roots otherwise it will not work. The fungus attaches itself to the roots and exchanges nutrients for sugar. The net result is a massive root ball that will surely increase the yield. Water in with an organic high phosphorus fertilizer with a NPK of 10-52-10 at the rate of 1oz per gallon to increase root growth. Place the mini greenhouse over it and place water bottles around the plant to collect heat during the day. Remove the green house and bottles as soon as the weather warms up. If the nighttime temperature drops dramatically then cover the greenhouse with a blanket and use heat lights.
Once established and the plant starts to vine switch to a more balanced water soluble feed 20-20-20
Running
As the plant starts to grow let the main vine go to the end of the patch and terminate. Also let the secondaries grow to the limits of the patch. The vines should not be pruned like the pumpkins.
At each leaf node, that is the point where secondary vines come out of the main vine, a root will form. To take advantage of this, cover every 4th or 5th node with soil. This will help to hold the vine down and give the other nodes a chance to root also. Sprinkle a little mycorrhizae fungus under each leaf node and pin down with hoops or canes. Some people bury the whole vine but this can lead to unnecessary disease.

Pollinating
Pollinating the fruit is often a challenge; the flowers are small and fragile. They are hand pollinated and covered up afterwards. This is best done after the morning dew has evaporated away about 9am. For some reason or another the pollen never forms on the flowers until then. Take the male flowers and peel off the petals. Gently rub the male around the female flower.
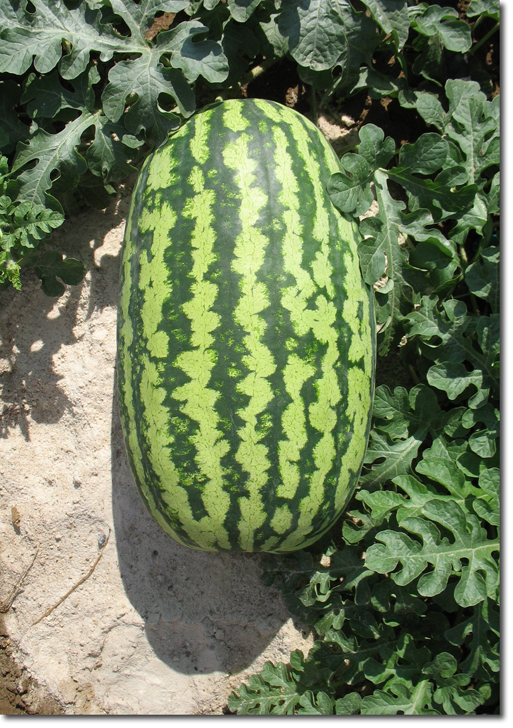 Make sure pollen is visible on the female or it will not take. Cover up the flower with a small bag or a plastic cup. Do not try to cover up as with pumpkins, the flowers are too delicate. Female flowers have only a single day to be pollinated, so visit the patch daily. If for some reason you need to handle the newly formed fruit be very gentle for they may abort easily.
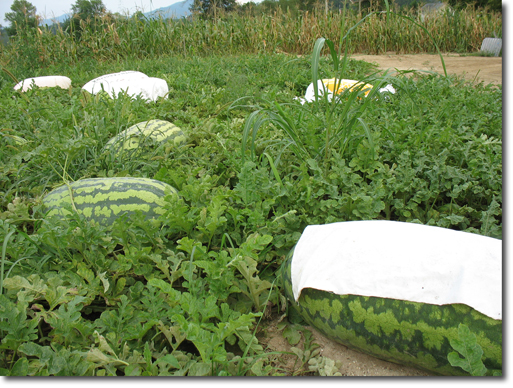
Fruit
Once the fruit begins to grow, watch the shape very carefully. You need to make sure that the fruit is growing straight. The shape of a bottle of water is what you are aiming for. Allow the baby melons to get to 6" long and then choose the most promising for shape and growth rate. Prune out the rest and continue to remove during the season leaving just one watermelon per plant.
Watering
During the early part of the season give the plant about a gallon of water a day or just to keep the soil moist not soaking wet. As the season progresses increase the water as much as 5-8 gallons per day. Water morning and evening to prevent leaf scorching, ideally with warm water. Do not water directly around the stem for it may rot a common problem with melons.
Feeding
Continue to fertilize with 20-20-20 right through to the end of the season. Also foliar feed with Neptune's Harvest fish/seaweed mix every 2 weeks and once a week Nutri-cal mixed with half strength Humate and/or fulvic acid Remember that the roots are only 2" below the surface and extend just past the vines, do not tread on them whilst watering etc.
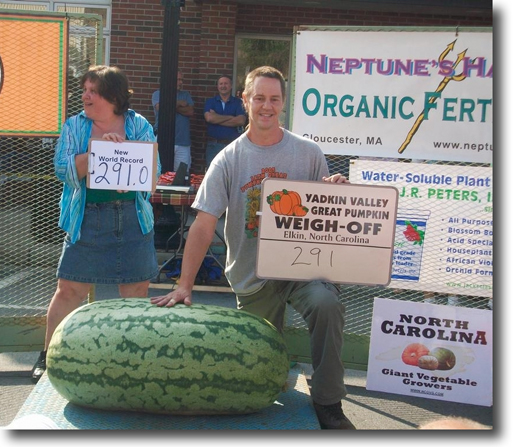
Moving
As the best melon grows move it gently away from the vine to prevent stem stress. This is best done by pulling at the flower end This must be done slowly and very carefully otherwise the stem will break and it will be all over. This fact can not be over emphasized. Similarly rotate the melon to keep the rind in good shape. Remove any sharp objects or debris from under the melon.
Shading
The melon will need shading during the summer to prevent the rind from becoming hard and blistered. Use the leaves initially and then place a table over it during the heat of the day. A table height of 30" is ideal for it will give adequate ventilation.
As the temperatures start to drop in September cover the plant completely at night with a fleece of polythene to keep the heat in. Also cover the fruit up with a blanket and place Styrofoam underneath it to keep it warm and stop any rotting.
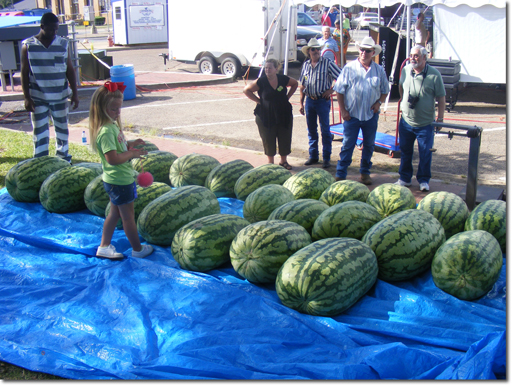
Harvesting
When it's time to cut and carry your giant use a blanket or similar and 4 persons to lift it, 2 people run the risk of damaging it. Wrap in damp cloths in order to reduce weight loss.
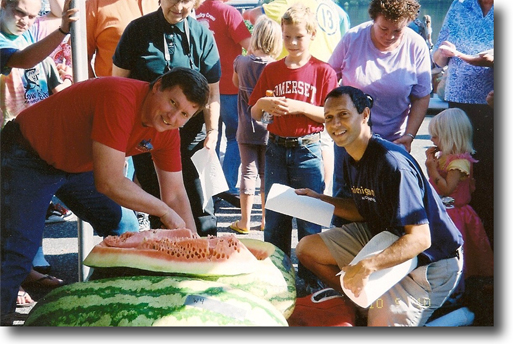
Feeding Program
Once a week spray Nutri-cal and humate and/or fulvic acid at ½ strength
Every two weeks foliar feed with fish/seaweed mix.
Start program with high nitrogen feed to get high plant growth then low nitrogen high potassium 5-50-17 for fruit growth. When it turns cold go back to high nitrogen.
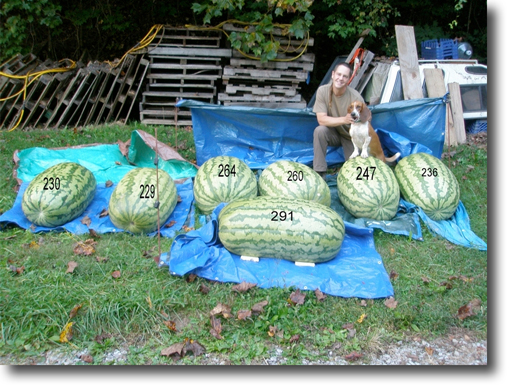
Diary
April
15/ started seed off germination box
25/ Seeds showing—moved into light
May
15/ Planted out into the patch, watered with diluted 10-52-10
June
7/ Last frost
July
20/ Spray with fungicide to prevent powdery mildew
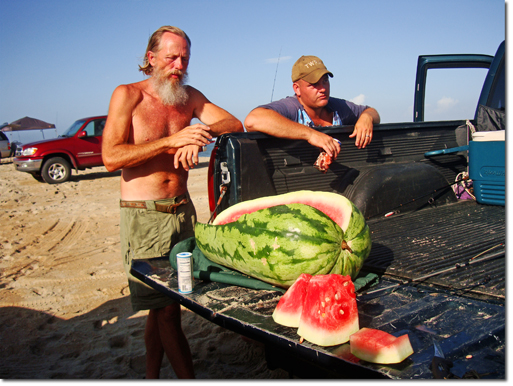
Pests and Diseases
Disease and pest control are a must. Spray with Sevin or similar systemic pesticide to control bugs and spray with Benemyl fungicide before August for powdery mildew Mice, moles and rabbits can all attack the vines, beware of there presence and eradicate.
In wet climates, put a few slug pellets down when transplanting.
Saving Seed
Let the melon reach maturity, this is evident when the rind becomes dulled and the underside changes from pale white to dark white and has black mildew spots. Remove the seeds from the flower end and the middle. Wash and dry them with a paper towel and leave in a warm place for a few days. Check for dryness by bending them. If they are too wet they will bend but if too dry they will break. Store away in an airtight container and keep in the cool.
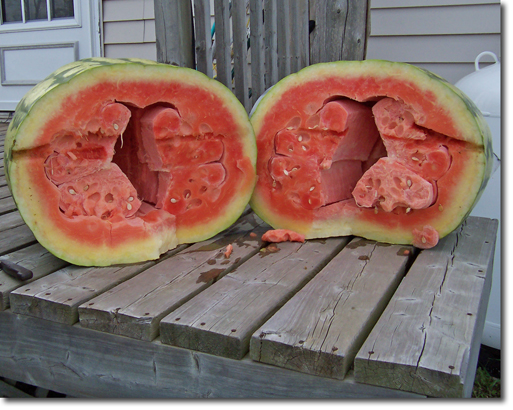
Records
| Category | Criteria | US | Metric | Grower | Country | Year |
| Artichoke | heavy | |||||
| Aubergine/Eggplant | heavy | |||||
| Beet | heavy/table-type | 51 lb 10 oz | 23.4 kg | Norm Craven | ON, CA | 2010 |
| Beet | long | 21' | 640 cm | Peter Glazebrook | UK | 2008 |
| Broccoli | heavy | 35 lb | 15.87 kg | John Evans | AK, US | 1993 |
| Brussel Sprout | heavy | 18 lb 3 oz | 8.25 kg | Bernard Lavery | UK | 1992 |
| Cabbage, Green | heavy | 138.25 lb | 62.7 kg | Scott Robb | AK, US | 2012 |
| Cabbage, Red | heavy | 45.25 lb | 24.58 kg | John Evans | AK, US | 1994 |
| Cantaloupe | heavy | 64 lb 13 oz | 29.4 kg | Scott Robb | AK, US | 2004 |
| Carrot | heavy | 18 lb 13 oz | 8.61 kg | John Evans | AK, US | 1998 |
| Carrot | long | 19' 2" | 584 cm | Joe Atherton | UK | 2007 |
| Cauliflower | heavy | 54 lb 3 oz | 24.6 kg | Alan Hattersley | UK | 1999 |
| Celery | heavy | 74.8 lb | 34 kg | Ian Neale | UK | 2011 |
| Corn | height | 31' | 9.45 m | Don Radda | US | 1946 |
| Corn, ear | long | 36" | 92.08 cm | Bernard Lavery | UK | 1994 |
| Cucumber | heavy | 27.3 lb | 12.4 kg | Alfred Cobb | UK | 2003 |
| Cucumber | long | 48.3" | 107 cm | Ian Neale | UK | 2011 |
| Kale | heavy | 105.9 lb | 48.0 kg | Scott Robb | AK, US | 2007 |
| Kohlrabi | heavy | 96.9 lb | 44.0 kg | Scott Robb | AK, US | 2006 |
| Leek | heavy | 19.3 lb | 8.8 kg | John Soulsby | UK | 2006 |
| Long gourd | Length | 137.75" | 3.43 m | Tom Wright | PA, US | 2012 |
| Marrow | heavy | 206.5 lb | 93.7 kg | Bradley Wursten | Netherlands | 2009 |
| Onion | heavy | 18 lb 6 oz | 8.33 kg | Peter Glazebrook | UK | 2012 |
| Parsnip | heavy | 17.3 lb | 7.88 kg | David Thomas | UK | 2011 |
| Parsnip | long | 18' .39" | 520.7 cm | Peter Glazebrook | UK | 2012 |
| Pepper | heavy | 1 lb 3.2 oz | 545.7 g | Debbie Richards | AK, US | 2004 |
| Potato | heavy | 10.95 lb | 4.98 kg | Peter Glazebrook | UK | 2011 |
| Potato, sweet | heavy | 81 lb 9 oz | 37 kg | Manuel Perez | Spain | 2004 |
| Pumpkin | heavy | 2009 lb | 911.27 kg | Ron Wallace | RI, US | 2012 |
| Radish | heavy | 68.6 lb | 31.1 kg | Manabu Oono | Japan | 2003 |
| Runner Bean | long | 4' 3" | 130 cm | Harry Hurley | NC, US | 1997 |
| Rutabaga/Swede | heavy | 85.62 lb | 38.92 kg | Ian Neale | UK | 2011 |
| Squash | heavy | 1486.6 lb | 560.8 kg | Joel Jarvisl | ON, CA | 2012 |
| Sugarbeet | heavy | 156 lb 10 oz | 71.05 kg | Piet de Goede | Netherlands | 2005 |
| Sunflower | tall | 26' 4" | 8.03 m | Hans-Peter Schiffer | Germany | 2009 |
| Sunflower | widest head | 32¼" | 82 cm | Emily Martin | CA | 1983 |
| Swiss Chard | heavy | 71 lb 12 oz | 32.55 kg | John Evans | AK, US | 1995 |
| Tomato | heavy | 7 lb 12 oz | 3.51 kg | Gordon Graham | OK, US | 1986 |
| Tomato | tall plant | 65' | 19.81 m | Nutriculture Limited | UK | 2000 |
| Turnip | heavy | 39 lb 3 oz | 17.78 kg | Scott Robb | AK, US | 2004 |
| Watermelon | heavy | 307.5 lb | 139.5 kg | Gabriele Bartoli | IT | 2012 |
| Zucchini (courgette) | heavy | 64 lb 8 oz | 29.26 kg | Bernard Lavery | UK | 1990 |
Rules
Rules provided by the EGVGA
(European Giant Vegetable Growers Association)
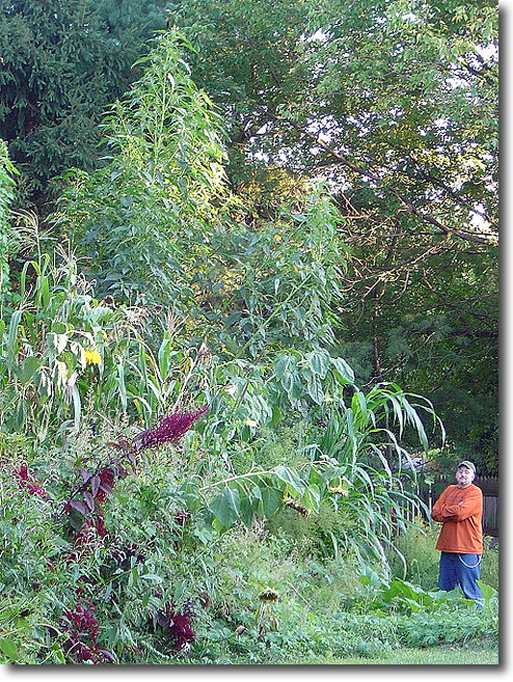
Amaranth
Amaranth (Amaranthus) is part of the herb family. Some species are raised as gluten free pseudograin while other species are used as vegetables in some countries. The past few years amaranth has become more popular in giant vegetable growing circles.
Amaranth is measured from the bottom of the stem to the top of the flower (or stem if it has not flowered) in a straight line.
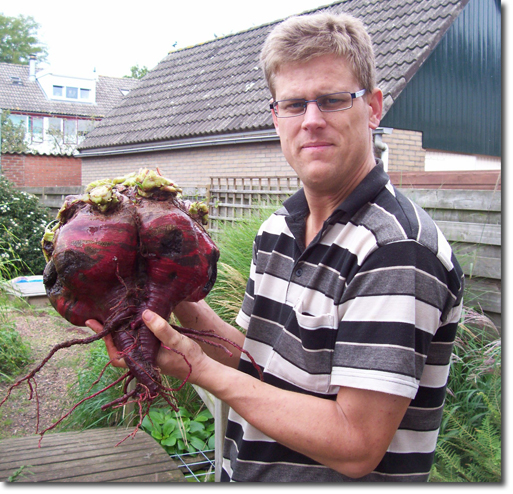
Beet (heavy)
Beetroot is a very difficult class as there are several types of beets and grey areas in between. Generally we speak of table beets, fodder beets and sugar beets. Table beets can be of pretty much any colour from white to dark purple and even yellow. For competition purposes beetroots are limited to beta vulgaris rubra, the typical dark red, round table type. One of the grey area beetroots is the beta vulgaris vulgaris "Mammoth" which is both fit for human consumption but also as fodder. We have chosen to make a special category for these, but they will not be recognized for any records in the beetroot class.
Beetroots should be clean (hose them down with luke warm water) and free of deep splits, holes and rotten spots. All of the roots should be left on, but the leaves should be cut off as close to the shoulder of the beetroot as possible.
"Mammoth" beetroots can sometimes be hollow. Other than that, they follow regular beetroot rules.
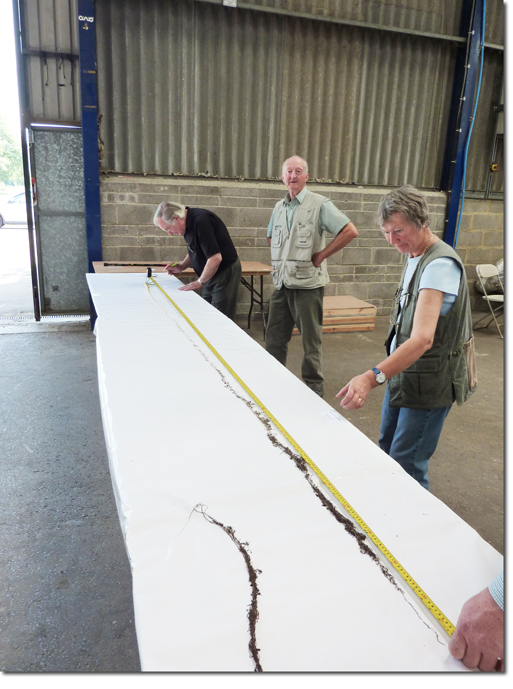
Beet (long)
Long beetroots can be of any colour, but generally they are quite dark red. They are typically grown in long tubes with special very fine soil. The length of the beetroot is more dependent on the technique than on the type, though obviously some types are preferable to others.
Long beetroots are measured from the shoulder of the beetroot to the tip of the root and in a straight line.
The length of the foliage left on is not important. It is not measured. The beetroot root must be in one piece and attached to the beet itself. No backing paper or cloth is to be used.
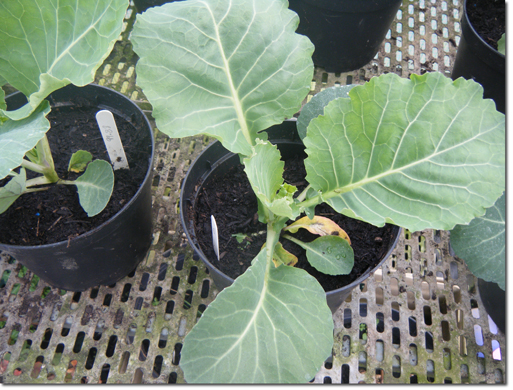
Cabbage
Cabbage belongs to the Brassica oleracea species and for competition purposes the green variety of the Linne cultivar is used. Although red cabbages are denser and therefore weigh more per cubic inch, they are generally smaller. In the past crosses have been made between green and red cabbages with success. Cabbage does especially well in Cornwall, parts of Wales and Alaska. It is one of the few giant vegetables of which the entire plant, except for the roots are weighed.
Although some shows allow leaves that have broken off during transport to be included in the final weight, the international rules state that all leaves need to be attached to the cabbage stalk. The cabbage must be in sound condition and the stalk must be trimmed to within 5 cm (2 in) of the first bottom leaf.
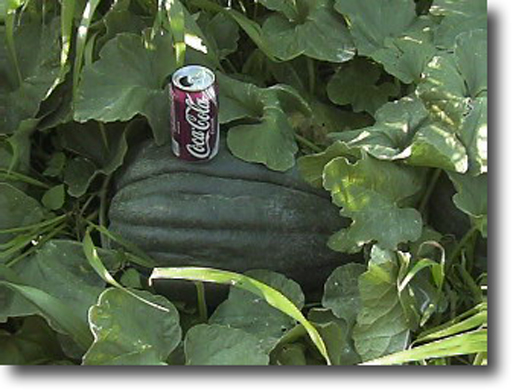
Cantaloupe
Cantaloupe (cucumis melo) is also known as muskmelon and rockmelon and may contain netting or not. The flesh must be orange. Other types of melons are shown in some countries in the sweet melon class. Cantaloupes are either round or somewhat elongated.
Melons must be clean and free of deep splits, holes and rotten spots. 2.5 cm (1 inch) of stem is allowed.
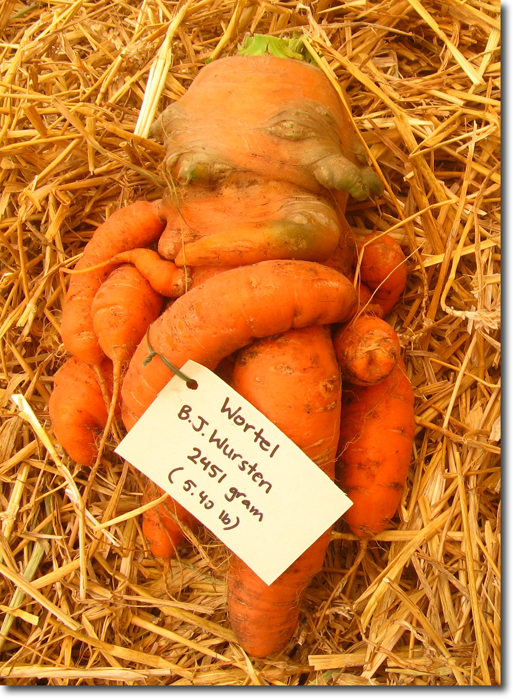
Carrot (heavy)
The carrot (Daucus carote) is a root vegetable which can be a various number of colours including orange, yellow, white, red and purple, the last one being the original colour. Orange carrots were bred in The Netherlands in the 17th century and are now known as Western carrots, the type used in both the heavy and long classes. For heavy classes Flakkee (a region in the Dutch province of Zeeland) types are often used. These are so-called winter carrots with broad shoulders.
Carrots must be clean and sound, with no signs of rotting. The entire root must be kept on, but the leaves should be trimmed off as close to the shoulders as possible. For show purposes only orange carrots are allowed.
Carrots may have multiple forks, as long as they are all attached to the same set of leaves. Mutilating the main root will cause the carrot to grow more forks, generally thought to increase the final weight. Orange carrots tend to grow bigger than other coloured carrots due to selective breeding.
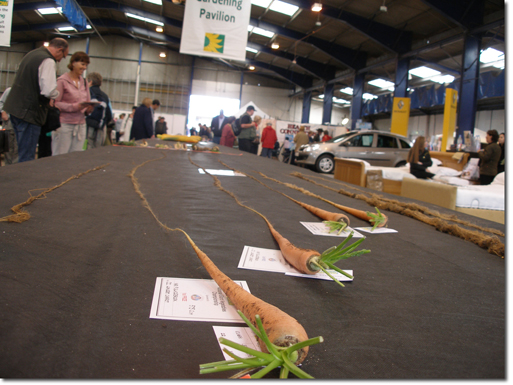
Carrot (long)
Just like growing long beetroots, the technique of growing carrots in long tubes with very fine soil and proper watering is the key to success. Many growers use "St. Valery" carrot seeds to produce long carrots. Store bought seeds of this type should be as good as those from winning specimens.
Long carrots are measured from their shoulders to the tip of the root and in a straight line. Foliage can be left on as it is not included in the final length. The carrot must be in one piece and no backing paper or cloth is to be used.
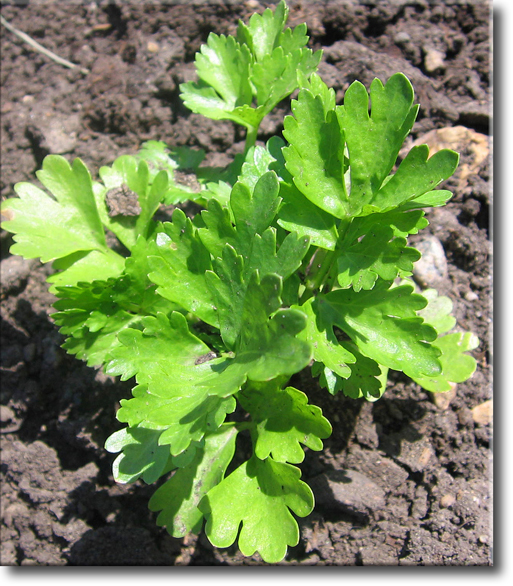
Celery
Celery belongs to the very small family of Apium graveolens. It is a distant relative of parsley and cow parsnip and has many uses. The stalks are eaten as vegetables but the toproots can also be eaten. The seeds (actually very small flowers) are used as spices but also in perfumes. Celery stalks are the only food in the world known to have a negative calorie count. It costs more energy to chew on the stalks than the amount of energy in the stalk itself. Celery can cause severe allergic reactions in some people when eaten. When handling celery it is best to wear long sleeves and gloves as celery in combination with UV light causes phytophotodermatitis, commonly known as celery burn.
Celery is weighed without the roots. It must be sound, dry and cleaned of any foreign matter. It should not have run to flower above the main stems.
Celery produces a huge network of roots. To harvest celery, use a sharp knife to cut off the roots at an angle of 45° just under the base of the stems instead of trying to dig up the entire plant.
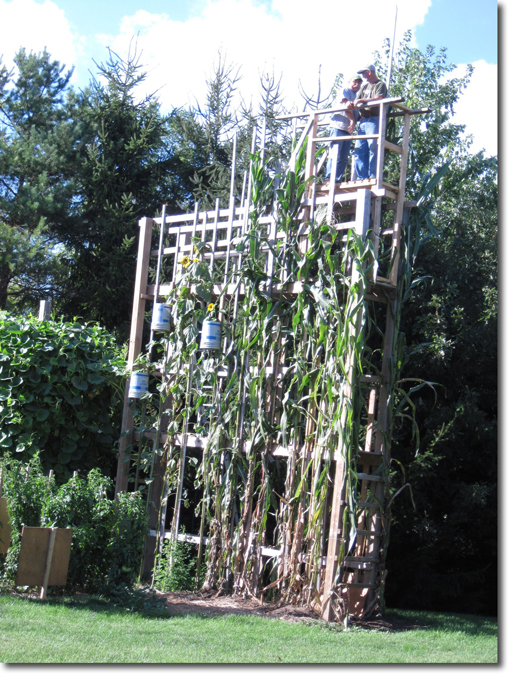
Corn
Zea mays is the Latin name for corn which is also known as maize in some countries. Although corn cobs are used as a vegetable, the plant itself is not a vegetable but has several other uses including feed for cattle. For competition purposes the height of the corn stalk is important, though some shows also measure the length of corn cobs. The type of corn used for competition is generally not a type fit for human consumption. The tallest types of corn come from South America and in particular Mexico, Colombia and Ecuador. Almost none of these types are available from commercial seed companies. Most of the seeds used originate from governmental seed banks.
The corn stalk is measured from the bottom of the stalk to the top of the tassle. The stalk will usually be a few centimetres in the ground. The roots of the corn stalk should be either cut off at the bottom of the stalk or cleaned to reveal where the bottom of the stalk begins. If a stalk has not tassled, the measurement goes to the top of the stalk. Leaves are never included in the measurement. All measurements must be taken in a straight line. Normally a mark is made on the ground at the bottom of the stalk and the top of the tassle. The stalk is taken away and the distance is measured.
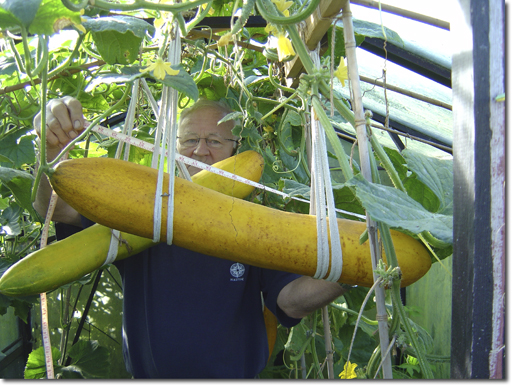
Cucumber (heavy)
The heavy and long cucumber classes are exclusively for cucumis sativus species. There are 20 members in the cucumis genus, which are divided into cucumbers, melons and gherkins. For competition purposes the cucumber must be 100% green or yellowish, brown if ripe.
Heavy cucumbers must be clean, sound, free of deep splits, holes and rotten spots when weighed. A maximum of 2.5 cm (1") of stem is allowed.
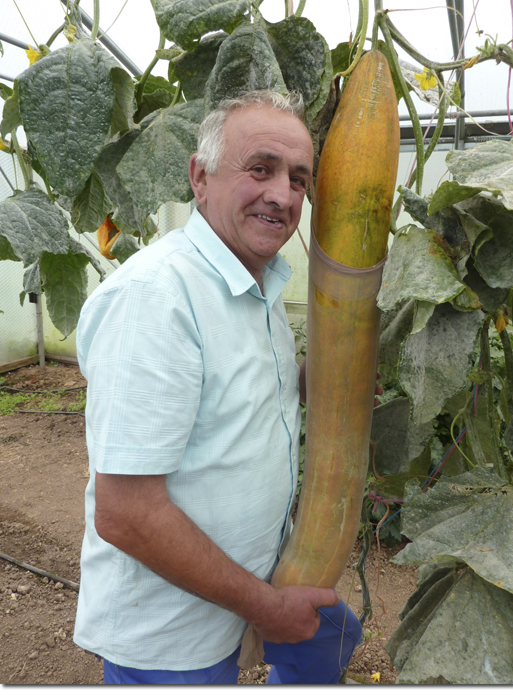
Cucumber (long)
Long cucumbers must belong to the cucumis sativa species for competition purposes. Like heavy cucumbers they must be 100% green or yellowish, brown if ripe.
Long cucumbers are usually laid down on paper on a table. A mark is made at the tip of the cucumber and where the stem meets the cucumber. The cucumber is taken away and the distance is measured. No part of the stem is included in the measurement and the measurement must be taken in a straight line, regardless of any curves in the cucumber. The cucumber must be sound, clean, without any deep splits, holes or rotten spots.
All other members of the cucumis genus are excluded from competition including the Yard Long Cucumber which is a melon of the cucumis melo family. Also any crosses between cucumbers and any other member of the cucumis family are not permitted.
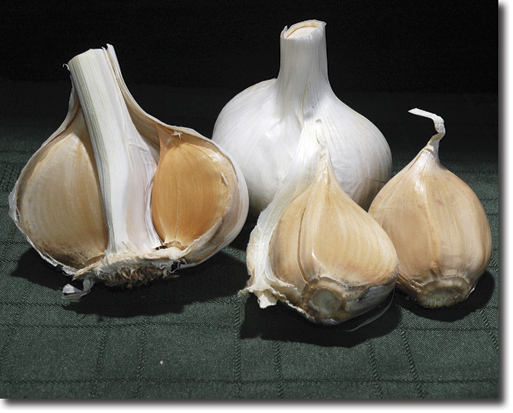
Garlic
Giant garlics, also known as elephant garlic, are not garlics, though they look like them, grow like them, and even taste somewhat like them. In reality, they are a genus of the leek family. For competition purposes they are put in the garlic class and not in the leek class where they would certainly be no competition.
Allium sativum, or true garlic, belongs to the onion family of Alliaceae. Although it is possible to propagate them from seed, almost always cloves are planted which produce more cloves. Elephant garlic is a member of the Allium ampeloprasum genus.
Garlic must be clean and in sound condition. The stem must be cut off as close to the cloves as possible. The roots should also be cut off, just under the basal plate.
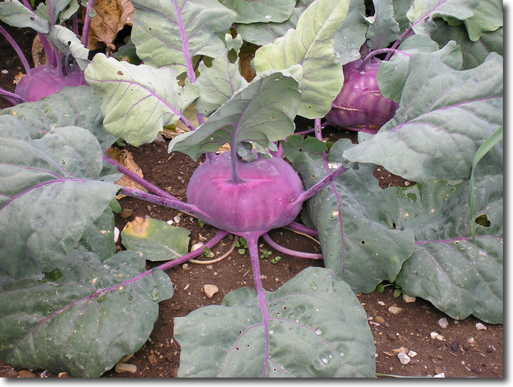
Kohlrabi
The name kohlrabi is confusing because in some languages the name is almost the same as turnip, for example in Dutch where the one is koolrabi and the other koolraap. They can also look quite similar which is how the kohlrabi got its name because in German kohl means cabbage and rabi is Swiss German for turnip. The difference is that koolrabi have multiple lateral stems, meaning stems come out of all parts of the cabbage. Turnips have one stem coming out of the top of the cabbage. While the outside can be white, green or purple, the inside flesh is whitish/pale yellow. The type used for competition is a Swiss Giant cultivar named Superschmelz.
Kohlrabi rules are the same as swedes and turnips. The leaves should be cut off as near to the shoulders as possible (though some shows strangely allow a few leaves at the top). The roots may be kept on but the entire cabbage must be clean and sound.
The Superschmelz cultivar has a tendancy under certain unknown conditions to produce multiple cabbages (known as pups) on one plant.

Leek
Leek belongs to the Allium family, which is the same family as onions and garlic. There are basically two types of leeks, the long blanche variety and the short pot variety. For competition purposes the pot variety will become much heavier, though shorter. While better strains are produced from seed this takes several years and it is best to grow with bulbs, pips or grass taken from a known heavy leek (they are a clone of the mother plant, but grown under better conditions can be heavier). These also allow an earlier start to be made in the season as they ideally require a 10 month growing period.
Leeks are weighed with the washed roots on. The entire plant must be clean, dry and free of foreign matter. It must also be in sound condition.
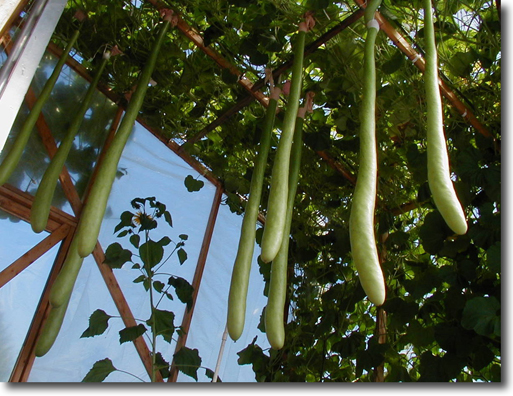
Long Gourd
Long gourds are a member of the Cucurbitaceae family and belong to the Lagenaria species. Most members of the gourd family, also known as Calabash, originated in Africa. The long gourd grown for competition seems to have its origins in Italy and parts of former Yugoslavia. Dried properly, many gourd types can last indefinitely. The long gourd is acutally a long dipper gourd (of which there are many types) without the bottle typical to many gourds, at the bottom. In some countries they are eaten as vegetables, but gourds have many other purposes, from musical instruments to spoons to pots and art forms.
Long gourds are measured in a straight line from the shoulder to the tip, regardless of any curves in the fruit. Cracks are characteristic to long gourds and are acceptable. Otherwise the long gourd must be sound without rot.
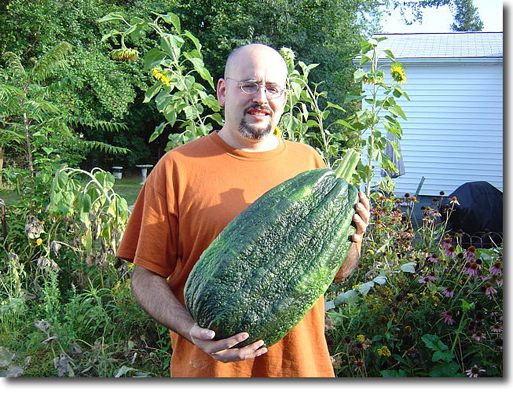
Marrow
Marrow is a confusing term because it refers to different things in different countries. For show purposes, it refers to a member of the cucurbita pepo family, otherwise known as summer squash. It is a direct relation to the zucchini and courgette. The main difference, apart from size, is that zucchini and courgette grow on bush type plants with the fruit growing on top of each while the marrow has vines like a pumpkin. That being said, the British also call zucchini and courgettes marrows once they reach a certain size. Marrows exist in several colours and combinations including white, green, yellow, orange to almost black. Some have stripes. For show purposes, only green and light yellow, almost white marrows are accepted. Light green stripes may occur on some green marrows.
Marrows must be sound with no cracks or holes into the cavity and no major rotten spots. The marrow must be washed clean. The entire stem and 1 inch (2.5 cm) of vine on either side is allowed. The colour must be green or light yellow. The green marrows might have light green stripes.
Marrows cross very easily with other members of the pepo family. Seeing as many marrows are still open pollinated, the strain has been quite contaminated. Because of this, many orange marrows have been shown. These are most likely crosses with field pumpkins. The EGVGA will not accept any dark yellow or orange marrows, or other colours not listed in the show rules.
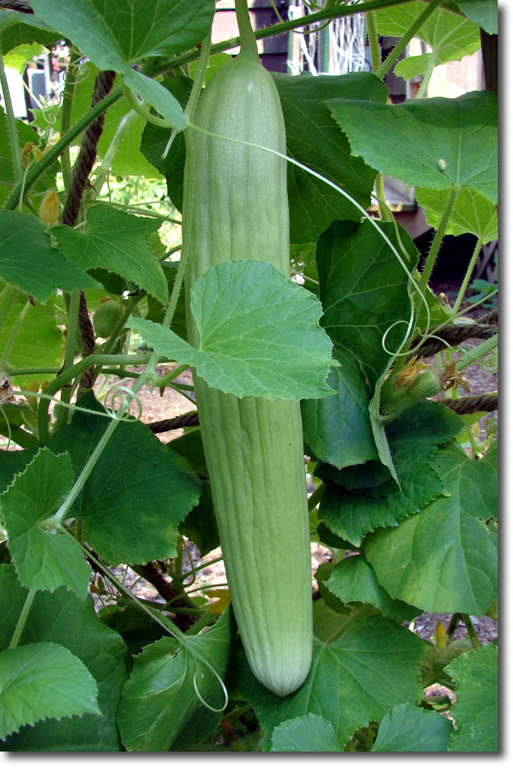
Melon (long)
There is no international long melon class. The EGVGA has created this non-competitive class for growers of Yard Long Cucumbers, which is the longest type of melon. With a bit of fantasy these melons look like oversize cucumbers, but they are no immediate relation as they belong to the cucumis melo species and not to cucumis sativus like all cucumbers do. Unfortunately some shows do recognize this melon as a cucumber.
Long melons must be sound and may have 1 inch (2.5 cm) of stem attached.
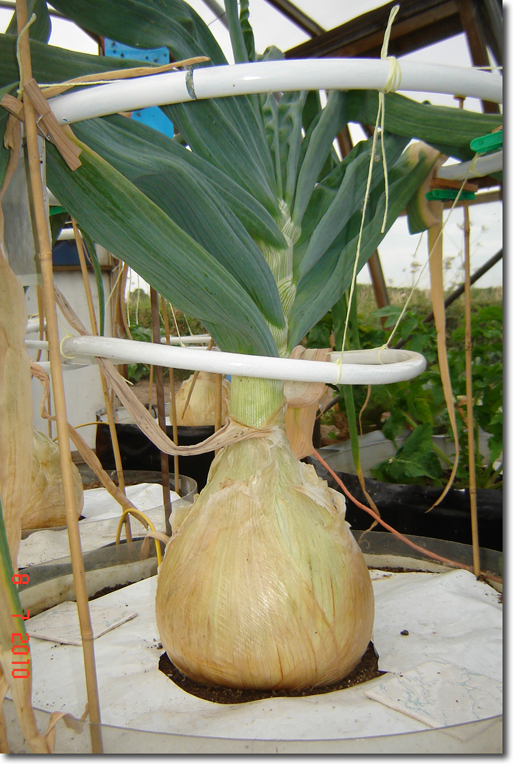
Onion
Onions, like garlic and leek, belong to the Allium family. Normal onions are very easy to grow, especially from pips (bulbs). But giant onions are very difficult and incredibly time consuming and expensive to grow. In Great Britain they are one of the most popular types of giant vegetable brought to shows. It is essential to get the right variety of seeds, which are usually only available from specialist growers. The seeds do not keep well, so new seeds need to be obtained at least every two years.
The foliage must be trimmed off at or below the first green leaf joint. The roots must also be removed. The onion must be clean, dry and sound with no rotten spots.
When removing the roots, the basal plate must not be damaged. If it is damaged, the onion cannot be replanted to produce seed. World record shows use a special tube collar (3 inch (7.5cm) dia x 5 inch (12.5cm) long placed over the neck to determine where it is cut off.
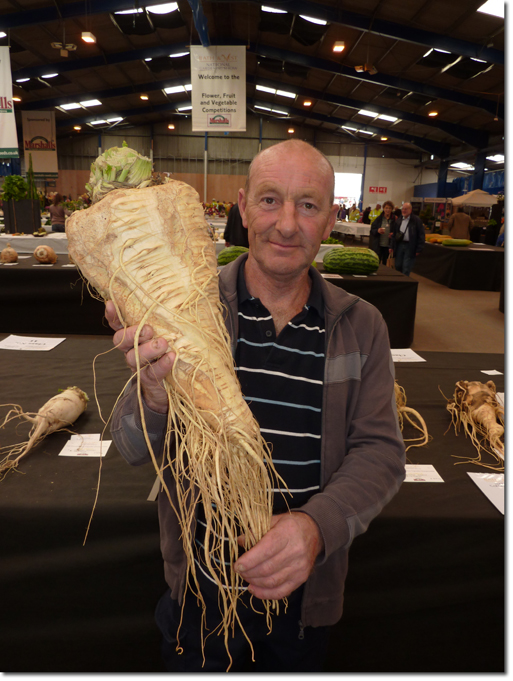
Parnsip (heavy)
Parsnips belong to the Pastinaca sativa species and are related to carrots, unlike cow parsnip which is related to celery. Seeds do not last long and it is best to use fresh seeds each year.
Parsnips must be clean, dry and sound with no rotten spots and the foliage trimmed off as close to the shoulders as possible. Any soft brown canker spots can be washed off first.
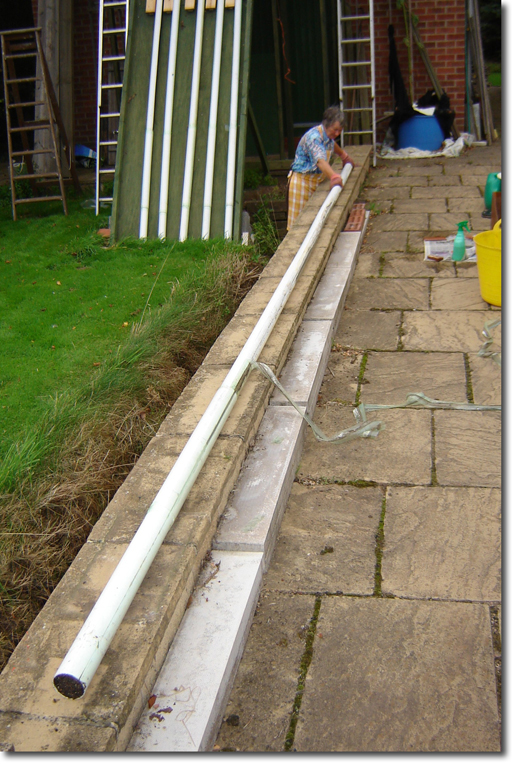
Parnsip (long)
Long parsnips are grown in tubes much the same as long beets and carrots. Although the length achieved has more to do with the technique than the variety, it is best to choose a long slender types.
Parsnips are measured from the shoulder to the tip of the root in a straight line. No backing paper or cloth is to be used. Foliage is not included in the measurement.
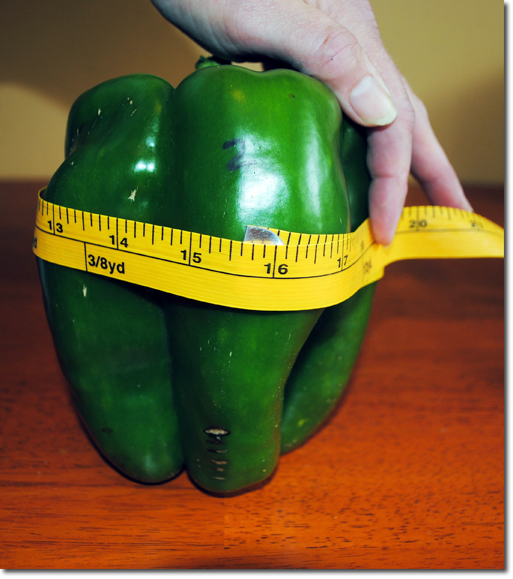
Pepper (heavy)
There is no international pepper class, but some shows do accept them. For competition purposes, peppers must be sweet bell peppers of the Capsicum annuum species. In large parts of Europe this type of pepper is known as paprika. Bell peppers lack capsaicin that causes a (strong) burning sensation when it comes into contact with mucous membranes. Sweet peppers are green when unripe. But they can be white, yellow, orange, red, purple and brown, depending on the cultivar.
The peppers must be sound and may contain only the stem that is attached to the plant. For competition purposes, peppers can be any of the above mentioned colours.
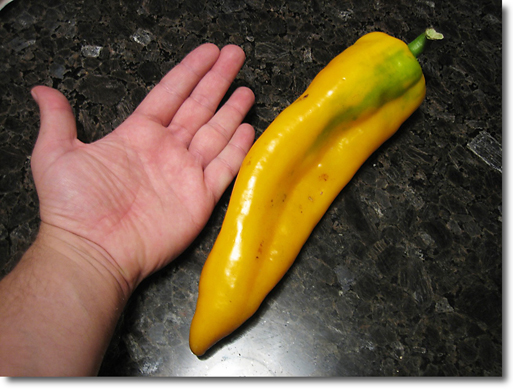
Pepper (long)
Long peppers are a Guinness World Record class, though there are few shows that actually accept them. There are many long cultivars which can be used, either sweet or hot (chili). Any colour is accepted as well. For the EGVGA it is a non-competitive class.
The pepper must be sound. The length is measured from the shoulder of the pepper to the tip in a straight line. The stem is not included.
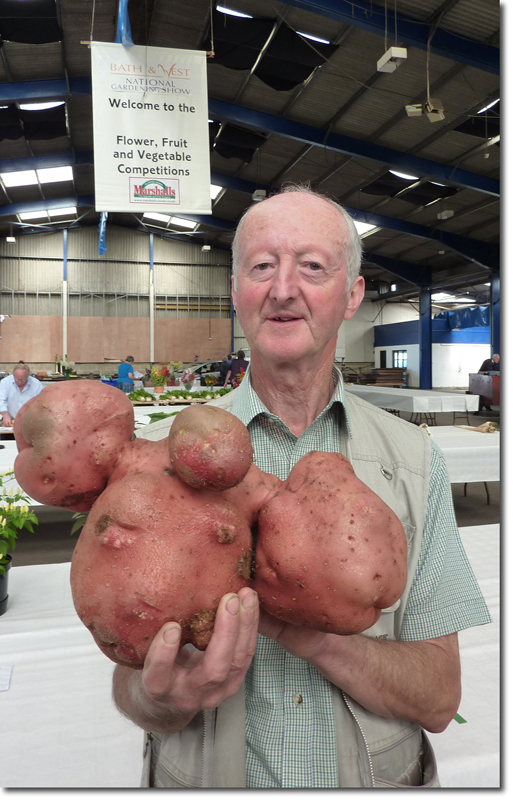
Potato
Potatoes belong to the enormous family of Solanum, which also contains tomatoes and eggplants. Most plants in this family are poisonous in some way. Potatoes belong to Solanum tuberosum, referring to the edible tubers. All potatoes are poisonous, but by peeling older potatoes and cooking them at high temperatures, the toxin is largely neutralized. Potatoes are the fourth most popular food on earth, following rice, wheat and maize. There are thousands of potato cultivars, each country having its own. Some cultivars are even restricted to certain provinces or even townships.
The potato must be clean, dry and sound with no rotten spots. Up to 1" (2.5cm) of stem can be included.
Regularly new world record claims are made for potatoes. These are almost always sweet potatoes, which are members of the Ipomoea batatas species, a totally different family which has nothing to do with potatoes.
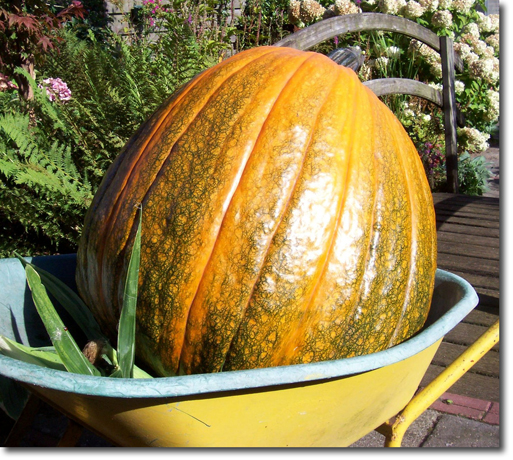
Pumpkin (field)
Field pumpkins belong to the cucurbita pepo species and have a hard stem. In actual fact they are true pumpkins unlike Atlantic Giants which belong to the squash family and have a soft stem.
The pumpkin must have no holes or splits into the cavity and no rotten of soft spots. The stem must be trimmed back to 1" (2.5 cm). The specimen must be free of dirt.
The most common types used for competition purposes are Phat Jacks and Howdens, though there are several other types that are grown.
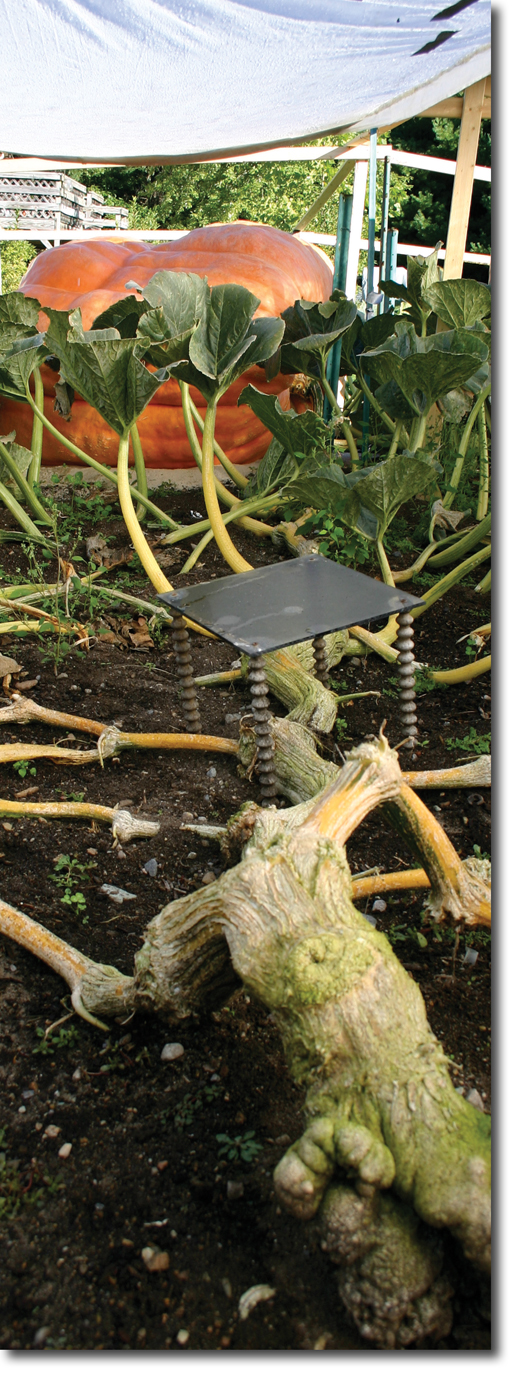
Pumpkin (giant)
The term pumpkin is quite misleading as the pumpkins grown for competition purposes are of the Cucurbita maxima species, which is one of the five members of the squash family, along with Hubbards, Pink Banana and Jarrahdale squash. Characteristic to the maxima species is the soft stem. Although in the past several types of "pumpkins" were grown for competition purposes, all serious growers now use generic Atlantic Giant seeds.
Pumpkins may have no cracks or splits into the cavity or (large) soft or rotten spots. The entire stem is allowed but the vine must be trimmed back to 1 inch (2.5 cm) on either side. Pumpkins can be any colour other than 100% grey, bluish or green.
Some shows have a prettiest pumpkin contest. Generally speaking the specimen should be over 500 lbs, be as orange as possible and have a symetrical, roundish shape.
Radish
Radishes (Raphanus sativa) belong to the Brassicaceae family. In general there are four types: summer, fall, winter and spring. For competition purposes winter varieties are used and in particular Daikon radishes. These are Asian radishes with long white roots. They come from Asia and are also known as Japanese radish, Chinese radish, Mooli or simply Daikon radish. The world's largest variety is a Japanese round type called Sakurajima daikon which easily grows to 6 kg in the right conditions, but can also grow to 30 kg if the proper care is taken and the proper soil is given.
The foliage must be trimmed off as close to the radish shoulders as possible. Roots are allowed. The radish must be clean, dry and sound with no rotten spots.
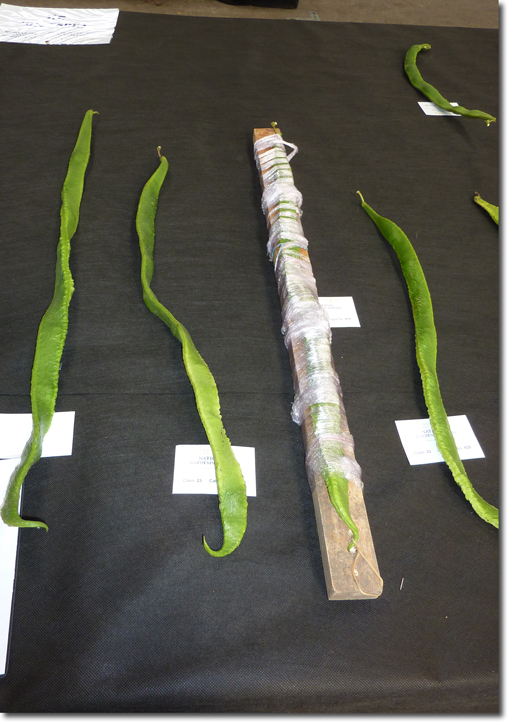
Runner Bean
Of the fifty members of the bean family only Phaseolus coccineus is allowed in the runner bean class. Native to Central America, they are also called scarlet runner beans because of the red flowers and multicoloured seeds. Unlike common beans, the cot leaves (cotyledons) stay in the ground during germination while with common beans these leaves are thrust out of the soil on (long) stems.
Runner beans are measured in a straight line from the shoulder to the tip, regardless of any curves. It is best to make a mark where the bean begins and ends and measure the distance in between. The bean must be sound and still green (not dried out).
The runner bean class excludes any other type of bean including French haricots but also asparagus beans, otherwise known as yard long beans, which in fact are members of a totally different genus and are not beans at all.
Rutabaga / Swede
Rutabagas and turnips have been confused at giant vegetable shows because of their similarities. Rutabaga is derived from the Swedish word meaning root bag. Because of the origin of the word, some countries choose to call the rutabaga a swede, or Swedish turnip and to make matters more confusing in parts of England and Canada it is simply called a turnip. The rutabaga is a member of the Brassica napobrassica species while turnips belong to the Brassica rapa species. The rutabaga is originally a cross between a cabbage and a turnip.
Rutabagas must be clean, dry and sound, without any rotten spots, deep splits or holes. The foliage must be trimmed off as close to the shoulders/neck of the rutabaga as possible. While some shows do not accept roots, international rules dictate that roots are allowed, just like a beetroot.
Sunflower (head)
Sunflowers are in no way a giant vegetable eventhough the seeds can be eaten. It is an annual flower plant. Each sunflower consists of about 1000-2000 flowers enclosed by an array of petals. Sunflowers originated in the Americas and only arrived in Europe in the 16th century. For competition purposes the sunflower is often shown at giant vegetable shows. There are two official classes, the largest sunflower head and the tallest sunflower plant.
Sunflower heads are the most controversial of all giant vegetable classes. There seems to be no international agreement on how to measure them. One option is to measure just the head, without any of the petals. But this can be done in a straight line across the bottom of the head, or in a rounded line over the top of the head. It is also possible to include petals, again across the bottom or over the top. The official Guinness way to measure is to place the sunflower head on a piece of paper or something similar, draw a mark at the tip of the petal sticking out the most and then draw a mark at the tip of the petal exactly 180 degrees on the other side of the head. Remove the head and measure the distance in a straight line. This is the petal to petal in a straight line method. This is the method accepted by the EGVGA. Local shows can choose any manner, but to make sure at international level that all measurements are done in the same way, the EGVGA has chosen to follow Guinness guidelines.
Sunflower (tall)
Sunflowers belong to the Helianthus annus genus and is an annual plant with a large head of flowers. Many fairs and shows have a tall sunflower class which measures the length of the stalk including the flower head. Sunflowers were introduced from Central America to Europe in the 16th century. In 1567 the world's tallest sunflower was grown in Padua, northern Italy. According to reports it measured 40 ft (12 m). The same lot of seeds produced several other plants, each of which were taller than the current modern world record of 8.03 m (26ft 4in). For years the world record had been held by a Dutch grower until 2009 when a German grower finally broke the record. Although sunflowers apparantly do well in cooler climates, they are real sun lovers and they need shelter from wind or in any case support.
Sunflowers are measured from the bottom of the stalk (without roots) to the top of the highest petal. Sunflowers are measured in a straight line, regardless of any curves in the stalk.
Tomato
Not only do potato and tomato rhyme in North American English, they also belong to the same family, along with aubergine (egg plant). Tomatoes belong to the Solanum lycopersicum species which also makes it a close relative to peppers. Through extensive cultivation, the tomato developed from a small green fruit found in the wild in South America to a much larger and diverse fruit grown throughout the world. The largest tomatoes in the world have been grown using a strain called Delicious although the Big Zac strain is more commonly used. First generation seeds seem to produce smaller fruits than later generation seeds which have been open pollinated, something which is seen in other sorts of giant vegetables as well.
Tomatoes must be clean, sound, free of splits, holes and rotten spots. The stem must be trimmed off within 1 inch (2.5cm) of the tomato.
Watermelon
Watermelons are a member of the cucurbitaceae family, but belong to the citrullus genus, unlike true melons which belong, together with cucumbers, to the cucumis genus. Because watermelon have their own class, it is not important that they are not actually melons but botanical berries (pepo). There are several types of watermelons in a limited variety of colours. For competition uses the Carolina Cross strain is used. Watermelons generally do well in warm climates but some strains have been successful in cooler climates.
Watermelons must be sound, without any cracks, splits or holes into the cavity or (major) rotten spots. The watermelon must be clean and have the stem removed within 1 inch (2.5 cm) of the fruit.
The Right Varieties
by Christopher Dean

When choosing to grow giant vegetables, genetics play a huge factor. The genetic potential for certain vegetables will never allow for extraordinary size. For example, the Atlantic Giant variety of pumpkin will weigh from 500-1800 lb; however other pumpkin varieties will never reach more than 10 lb even under ideal growing conditions.
To simplify the process of seed selection, I have created a quick and easy reference chart below which outlines the best varieties based on weight, height, and general size. This list includes most garden variety vegetable giants, along with some other favorites such as sunflowers and watermelons.
Finding giant vegetable seeds can be a difficult task. Some of the more popular giants, such as pumpkins and watermelons, have readily available seeds from multiple sources. However, good luck finding giant kohlrabi or giant carrot seeds. I have setup a website www.MonsterVegetables.com which offers most every giant seed variety available, along with a good deal of specialty growing equipment for growing, moving, and harvesting giants.
Weight
| Description | World Record | Giant Seed Variety Common Names |
| Artichoke | None Established | Emerald |
| Aubergine/Eggplant | Parks Whopper Eggplant Hybrid | |
| Beets | 51 lb 10 oz | Mammoth Long Red Mangles, Lutz |
| Broccoli | 35 lb | Romanesco, Packman Hybrid |
| Brussels Sprout | 18 lb 3 oz | Bedford Fillbasket |
| Cabbage | 138.25 lb | Imperial Long, Northern Giant |
| Cabbage (Red) | 45.25 lb | Giant Red Cabbage |
| Cantaloupes | 64 lb 13 oz | NC Giant Cantaloupe |
| Carrots (wgt) | 18 lb 13 oz | Healthmaster, S. American Flakee |
| Carrots (lgth) | 19' 2" | |
| Cauliflower | 54 lb 3 oz | Autumn Giant, Giant Of Naples |
| Celery | 74.8 lb | Giant Pascal |
| Corn | 31' | |
| Cucumbers (wgt) | 27.3 lb | Mammoth Zeppelin |
| Cucumbers (lgth) | 48.3" | |
| Garlic | 2 lb 10 oz | Kettle River Giant, Russian Giant |
| Kale | 105.9 lb | Giant 157 |
| Kohlrabi | 96 lb 15 oz | Gigante Kohlrabi |
| Leek | 19.3 lb | Giant Musselburgh |
| Marrows | 206.5 lb | Giant Marrow |
| Onion | 18 lb 6 oz | Kelsae Sweet, Ailsa Craig Exhibition |
| Parsnips | 17.3 lb | Harris Model, All American, Gladiator |
| Pepper | 1 lb 3.2 oz | Super Heavyweight, Chinese Giant |
| Potatoes | 10.95 lb | Kennebec |
| Pumpkin | 2624.6 lb | Atlantic Giant, Dill's Atlantic Giant |
| Radishes | 68 lb 9 oz | Sakurajima Mammoth, White Mammoth |
| Rhubarb | 5 lb 14 oz | Giant Rhubarb |
| Rutabaga/Swede | 85.62 lb | Giant Swede, Laurentian |
| Squash | 1486 lb | Show King |
| Tomato | 7 lb 12 oz | Big Zac, Delicious, Beefsteak |
| Turnip | 39 lb 3 oz | Golden Ball |
| Watermelon | 307.5 lb | Carolina Cross 183 |
| Zucchini | 64 lb 8 oz |
Height
| Description | World Record | Giant Seed Variety Common Names |
| Bean | 46' 3" | Broad Windsor, Asparagus (Long) |
| Brussel Sprouts | 9' 3" | Green Globe |
| Celery | 9' | Tall Utah |
| Corn | 31' | Jala Maize, Skyscraper |
| Okra | None Established | Giant Okra, West African Okra |
| Parsley | 5' 12" | Italian Parsley, Gigante Italian Parsley |
| Pepper Plant | None Established | Hot Tepin |
| Sunflowers | 26' 4" | Grey Stripe Giant, Craven, Cirrito |
| Tomato Plant | 65' | Cherry Tomato |
| Zucchini (lgth) | 7' 10" |
General Size
| Description | World Record Size | Giant Seed Variety Common Names |
| Carrot (Length) | 19' 2" | Scarlet Imperial Long |
| Chard | 71.75 lb | Fordhook Giant |
| Gourd (Length) | 137.75' | Giant Long Gourd, Collins Long Gourd |
| Lettuce (head) | Giant Caesar | |
| Pepper (Length) | NuMex Big Jim, Giant Aconcagua | |
| Spinach | Giant 157 |
If you can share your comments with me, that would be great. Send me corrections, where you find them, comments, suggestions etc.
This book will be a work in progress, so I would like it to be accurate as well as helpful to growers.
Send your comments to: annedawn@aol.com
If you have a better image, better advice, or a video that you feel is
- Better than what we have already
- Describes a technique mentioned in the book
- Adds more interest to the subject
- Shows an actual record, or
- Adds a video!!!
Please upload it here where you can also add a caption (who, what where, when):
http://www.giantpumpkin.com/giant_vegetable_form.php